Your mouse starts double-clicking, scrolling erratically, or stops responding mid-task. Before you toss it in the trash, the fix might be a simple cleaning or part swap inside the casing. Learning how to open a computer mouse properly is the first step to diagnosing and repairing common issues like sticky buttons, jumpy scrolling, or sensor problems. Most mice from brands like Logitech, Razer, HP, Dell, and Microsoft follow similar disassembly principles, so the skills transfer across models.
This guide walks you through universal steps to safely open any computer mouse, avoid cracking the plastic, and prepare for repairs. You’ll learn how to find hidden screws, release snap-fit casings, and identify what to look for once you’re inside. Whether you’re working on a budget office mouse or a high-end gaming peripheral, these techniques will save you money and reduce electronic waste.
Identify Your Mouse Type Before Opening
Before you grab a screwdriver, figure out what kind of mouse you have. The design directly affects how you approach disassembly.
Wired vs Wireless Mouse Designs
Wired mice typically have simpler builds with accessible screws on the bottom. Wireless models often hide fasteners under rubber feet or battery covers. Always check for a removable battery compartment first and open it before prying the shell. Some wireless mice use adhesives or plastic clips instead of screws.
Gaming vs Standard Mouse Construction
Gaming mice often include extra weights, RGB lighting, and complex multi-piece shells. These require more precision during opening. Standard office mice tend to use basic two-screw or simple snap-together enclosures that come apart quickly once fasteners are removed.
Ergonomic and Vertical Mouse Variations
Ergonomic models with curved or asymmetrical casings rely heavily on plastic clips along the seam. Opening these requires careful prying around the entire perimeter. Don’t force one side. Work slowly and evenly to avoid snapping the plastic.
Locate Every Hidden Screw on the Mouse
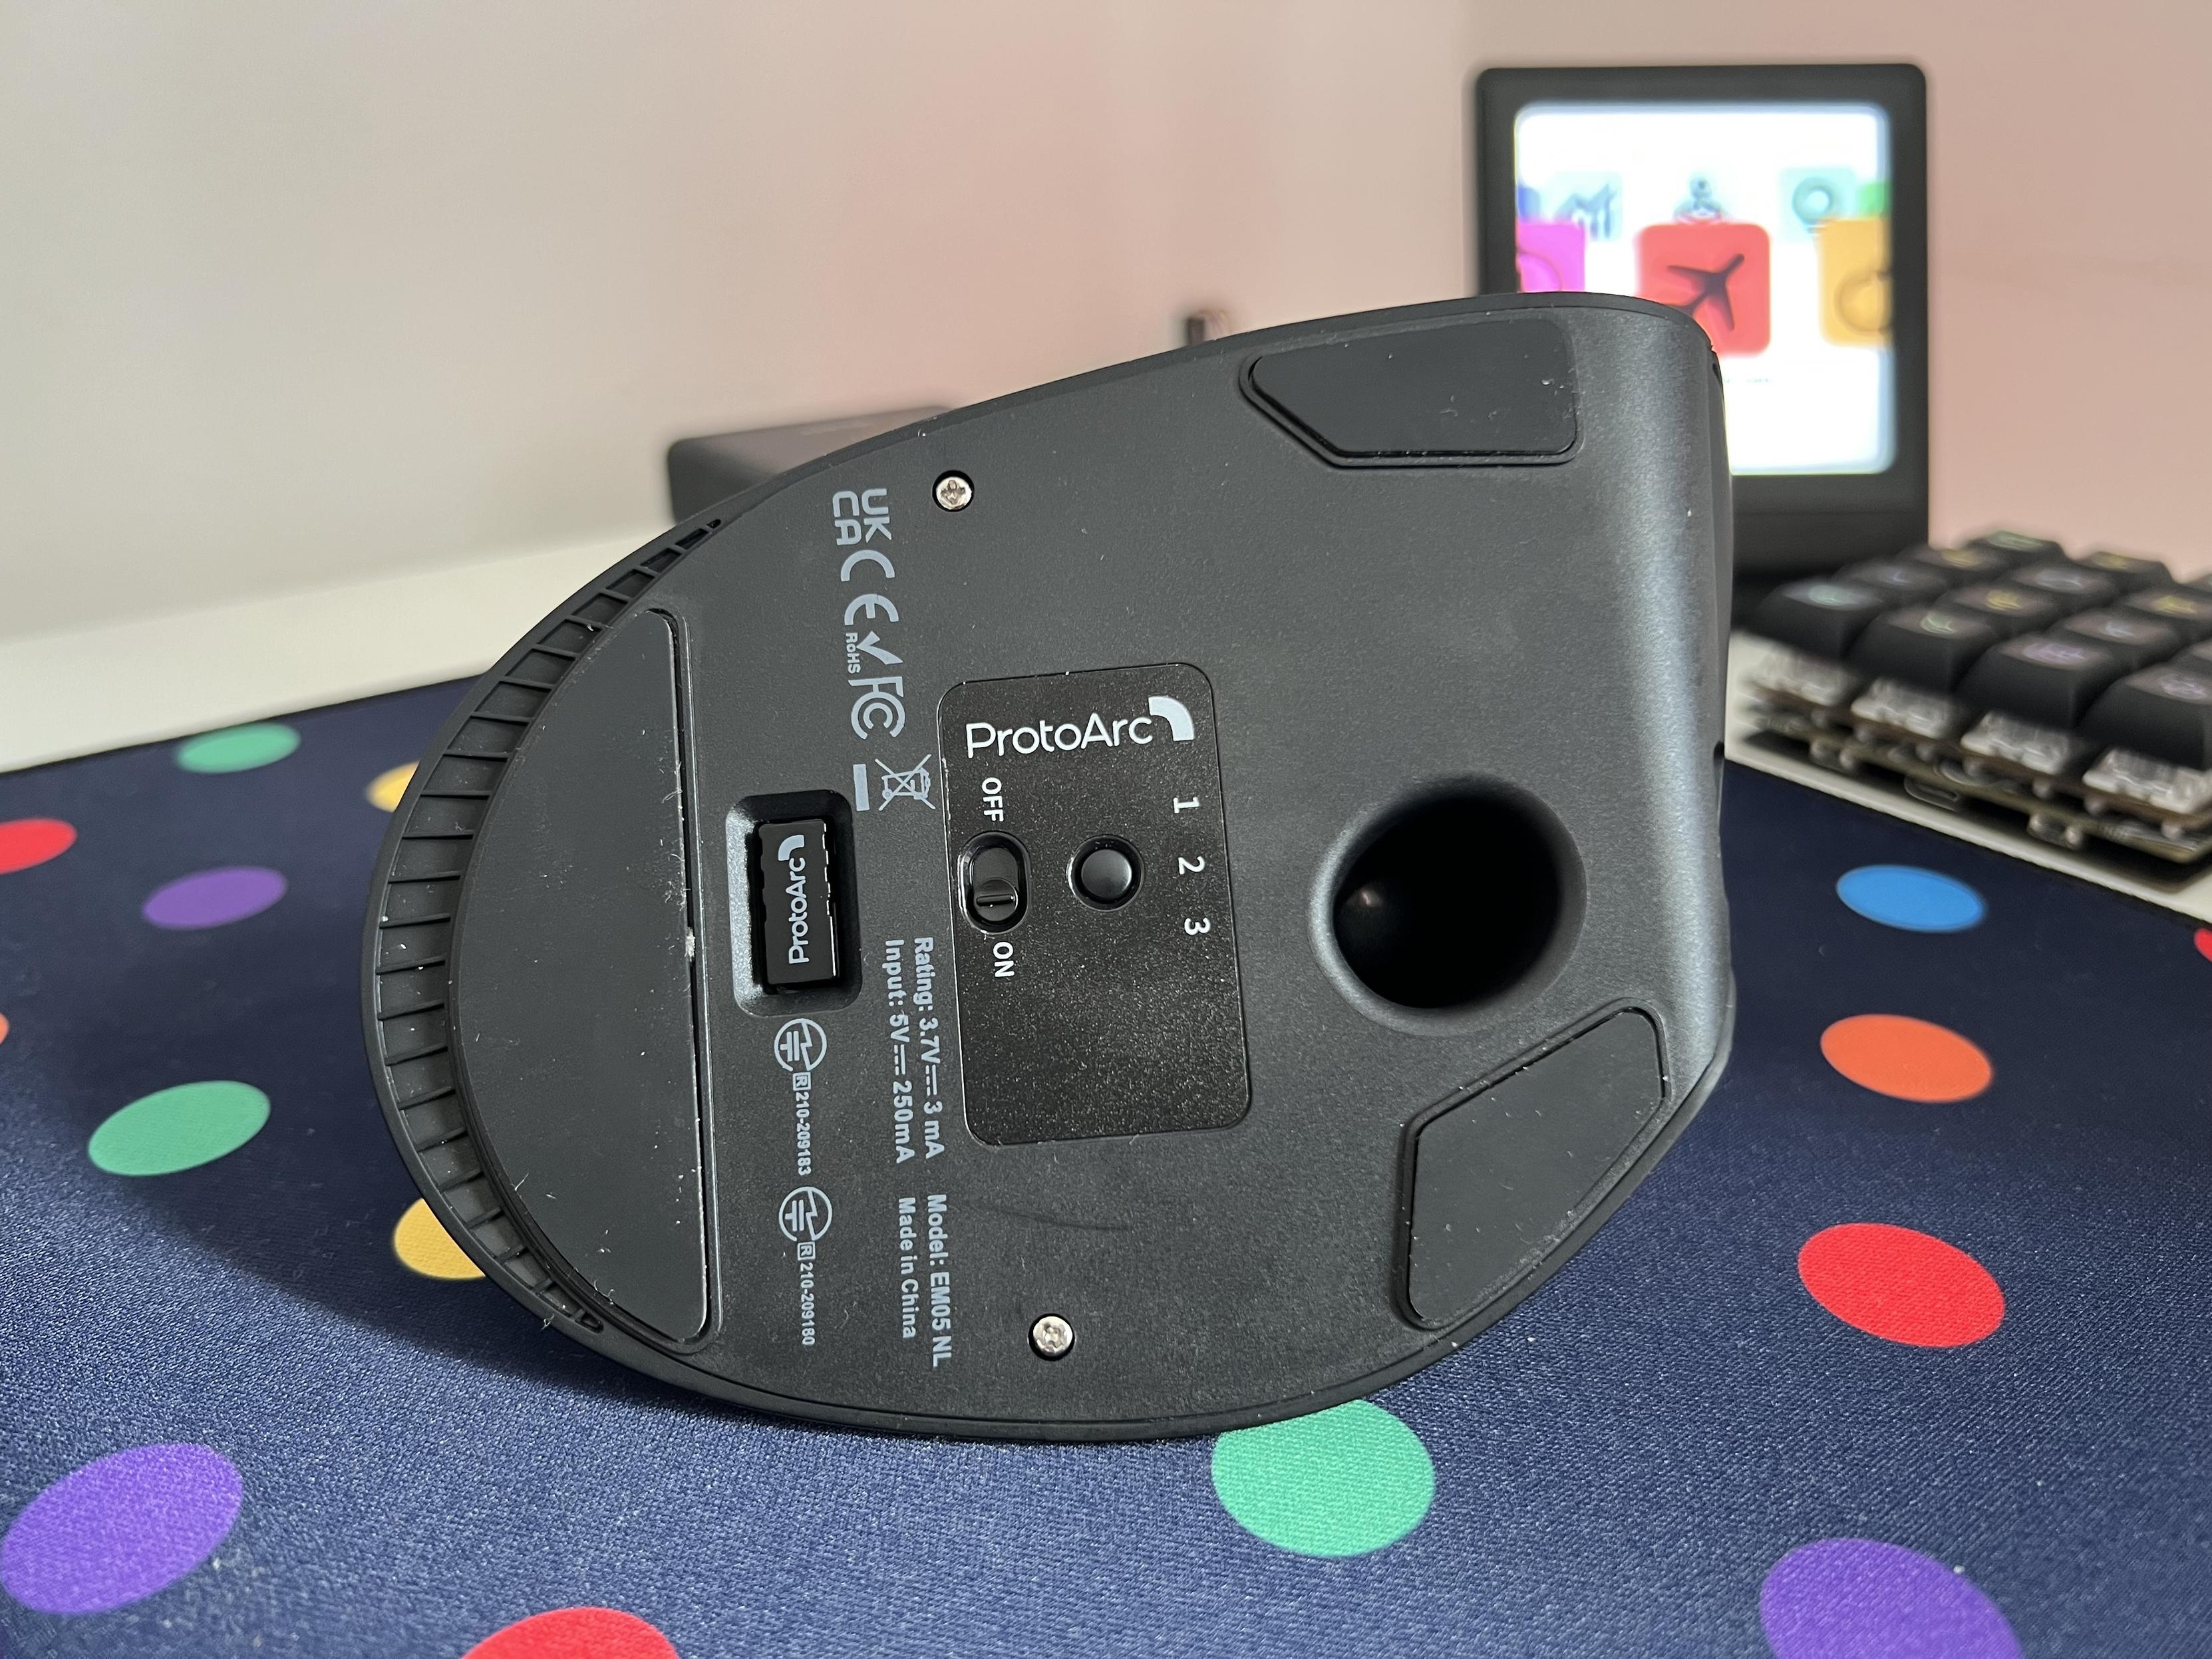
Most mice hide screws under labels, rubber feet, or small plugs. Missing a hidden fastener is the most common reason people crack a casing.
Check Under Rubber Feet and Pads
Flip the mouse over and look for small circular rubber pads, especially near the front or rear edges. Use a spudger or tweezers to gently peel them off. Many brands conceal Phillips screws underneath. Place the removed feet on a clean surface so you can reattach them later.
Remove the Battery Cover and Plate
For wireless mice, always remove the batteries and the cover first. Some models have a metal or plastic screw plate hidden under the battery tray. Unscrew this plate before attempting to separate the shell.
Inspect for Sticker-Covered Screws
Some manufacturers hide screws under warranty labels or branding stickers. Carefully lift a corner with a precision knife. If the sticker tears, keep the pieces so you can place them back during reassembly.
Gather the Right Tools for Mouse Disassembly
Using the wrong tools risks scratching the case or breaking internal clips. A small investment in proper tools makes the job much easier.
Essential Screwdrivers for Mouse Repair
Use a Phillips #0 or #00 screwdriver for most mouse screws. Smaller devices may need a Phillips #000 driver. A TR10 Torx security screwdriver is required for some business and high-end models that use star-shaped screws with a center pin. Never use a standard household screwdriver, as it will strip tiny fasteners.
Plastic Opening Tools for Snap Cases
Many mice use plastic clips instead of screws. Use an iFixit Opening Pick, a plastic spudger, or a plastic card to separate the halves. Metal tools can crack the plastic shell or damage sensitive internal components.
Tweezers and Magnification Aids
Keep tweezers handy for retrieving tiny screws from tight spaces. A magnifying glass or phone camera zoom helps spot hidden clips and damaged connectors inside the casing.
Separate the Mouse Shells Without Damage
Once all screws are out, the next step is carefully prying the top shell from the bottom.
Start Prying at the Front Edge
Begin near the mouse nose where the sensor is located. This area usually has fewer clips and more flex in the plastic. Slide a plastic pick in slowly and feel for resistance before moving along the seam.
Work Around the Sides Carefully
Continue inserting picks every inch along the outer edge. Rotate the mouse as you work. Apply steady, even pressure rather than prying one spot hard. If one side won’t budge, return to it after loosening the surrounding areas.
Watch for Ribbon Cables Inside
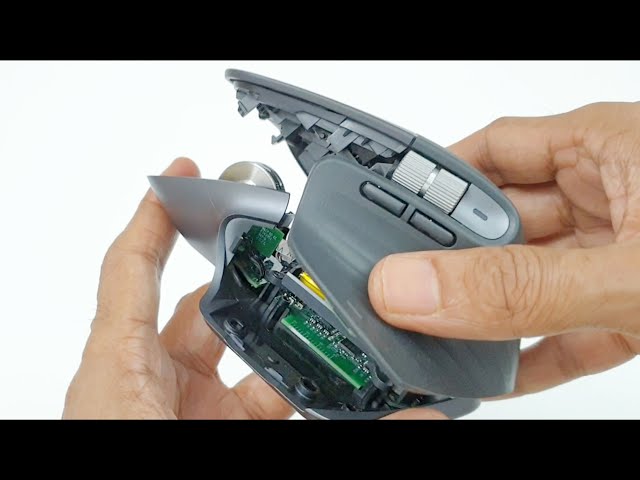
Some slim mice have ribbon cables connecting the top shell to the circuit board. After separating the case slightly, peek inside before pulling it fully apart. Disconnect any ribbon cables gently with a spudger to avoid tearing them.
Navigate Common Mouse Design Traps
Manufacturers use several tricks that can catch beginners off guard. Knowing these in advance prevents costly mistakes.
Hidden Clips Around the Scroll Wheel
On many mice, the scroll wheel hides a central clip inside the casing. Forcing the shell apart can break this clip. Gently press inward on the wheel while separating the case to release the tension.
Adhesive Pads Under Components
Some lightweight mice use adhesive instead of screws to hold the battery or PCB in place. Use a hairdryer on low heat for a few seconds to soften the adhesive before lifting components.
Security Torx Screws
High-end or business mice sometimes use TR10 Torx security screws. These star-shaped fasteners have a center pin that prevents standard drivers from fitting. Confirm your screw type before applying force.
Inspect Internal Mouse Components
With the mouse open, you can finally see what’s going on inside. This is where most repairs begin.
Common Problems to Look For
- Dust buildup under buttons or around the scroll wheel
- Corrosion on battery contacts in wireless models
- Loose wires or disconnected internal cables
- Worn microswitches, a common cause of double-clicking
- Dirty optical sensor lens, which causes cursor shaking
Look closely at the circuit board for any visible solder cracks or burn marks.
Clean Contacts Before Replacing Parts
Use 90% or higher isopropyl alcohol and a cotton swab to clean contact points and switch housings. Let everything dry completely before powering on. A quick clean often fixes sticky scrolling or unresponsive clicks without needing new parts.
Test the Mouse Before Full Reassembly
Place the shells loosely together and plug in the cable or insert batteries. Test movement, clicks, and scroll function before snapping everything shut. This saves time if something still isn’t working properly.
Reassemble Your Mouse Correctly
Putting the mouse back together is just as important as taking it apart. Rushed reassembly leads to cracked clips and loose shells.
Align the Shells Before Snapping
Make sure the top and bottom halves sit perfectly flush before pressing them together. Misalignment prevents clips from engaging and leaves gaps in the casing.
Press Along the Entire Edge
Start at the front and press down firmly along the seam. You should hear soft clicks as clips re-engage. Work your way around the entire perimeter rather than pressing one spot hard.
Replace All Screws and Rubber Feet
Reinstall every screw you removed, then press the rubber feet back into place. If the adhesive on the feet no longer sticks, use a tiny drop of rubber cement to secure them. Avoid super glue, which can melt the rubber.
Brand-Specific Mouse Disassembly Tips
While most mice follow the same principles, some brands have quirks worth knowing.
Logitech Mouse Quirks
Many Logitech models use three to four hidden screws under rubber feet and the battery cover. The scroll wheel mechanism on premium models has delicate gears, so avoid forcing it during disassembly. Popular repair topics include the Logitech MX Master and Logitech G502 Hero.
Razer and Gaming Mouse Tips
Razer mice often feature RGB lighting and magnetic side panels. Some open from the bottom rather than the top. Always power off and disconnect the mouse before opening to prevent short circuits during the repair.
HP and Dell Office Mouse Notes
Office mice from HP and Dell typically use two visible or semi-hidden screws. The plastic casing is thin, so use plastic tools only. Common models like the HP X3000 and Dell MS116 snap apart easily once the screws are removed.
Microsoft Sculpt and Ergonomic Models
The Microsoft Sculpt Comfort Mouse uses a three-part disassembly. Remove the battery cover, then a central screw, then gently pry the left side first. The tilt wheel mechanism is fragile, so handle it with extra care.
Know When to Replace Instead of Repair
Not every mouse is worth opening. Some problems signal the end of the device’s life.
Signs the Mouse Is Beyond Repair
- Cracked or burned circuit board
- Severe water damage with widespread corrosion
- Missing or broken internal clips that can’t be replaced
- Outdated wireless protocol that no longer pairs with your computer
If repair costs exceed $10 to $15 in parts and time, replacement is often the smarter choice for budget models.
Sustainable Disposal and Recycling Options
If your mouse isn’t fixable, recycle it responsibly. Circuit boards, batteries, and metals inside mice are all recyclable. For your next mouse, consider a repairable design that makes future fixes easier.
Frequently Asked Questions About Opening a Computer Mouse
What tools do I need to open a computer mouse?
You need a Phillips #0 or #00 screwdriver, a plastic spudger or iFixit opening pick, tweezers, and cotton swabs with isopropyl alcohol. Some models also require a TR10 Torx security screwdriver. A precision knife helps lift stickers, and a magnifying glass helps spot tiny components.
Where are the screws hidden on most computer mice?
Screws are commonly hidden under rubber feet on the bottom, beneath the battery cover on wireless models, and sometimes under branding stickers or warranty labels. Always inspect the entire underside before prying the case apart.
How do I open a mouse without visible screws?
Mice without visible screws use plastic snap-fit clips. Insert a plastic opening pick into the seam near the front and slide it along the edge to release the clips. Work slowly and evenly around the perimeter to avoid cracking the shell.
Can I open a wireless mouse the same way as a wired one?
The process is nearly identical, but you must remove the batteries first. Wireless mice often have an extra screw hidden under the battery tray. Also check for adhesive holding the battery compartment in place before prying.
Is it safe to open a gaming mouse with RGB lighting?
Yes, but always power off and unplug the mouse before opening. Avoid touching the LED components directly with metal tools. Static electricity can damage lighting circuits, so ground yourself before handling internal parts.
When should I replace my mouse instead of opening it?
Replace your mouse if the circuit board is cracked, if water damage has caused widespread corrosion, or if the wireless receiver no longer pairs. If repair parts and labor exceed $15, buying a new mouse is usually more cost-effective.
Final Thoughts on How to Open a Computer Mouse
Opening a computer mouse doesn’t require advanced technical skills. It only takes patience, the right tools, and a methodical approach. By identifying your mouse type, locating hidden screws, and using plastic tools to separate snap-fit shells, you can safely access the internal components without damage. Once inside, cleaning dust, replacing worn switches, or fixing a jumpy scroll wheel becomes a straightforward task.
The biggest takeaway is to work slowly and document every step. Take photos as you disassemble, keep screws organized, and never force plastic casings apart. With these habits, you’ll be able to repair mice across brands like Logitech, Razer, HP, Dell, and Microsoft with confidence. Your next step is to gather your tools, identify your mouse model, and start with a simple cleaning before attempting any part replacements.