

Your Logitech Lightspeed mouse has arrived, and you’re ready to experience that buttery-smooth, lag-free wireless performance. But when you unbox it and nothing happens, frustration sets in fast—especially when you’re eager to game or get work done. This complete guide shows exactly how to connect Logitech Lightspeed mouse models like the G Pro Wireless, G502 X, and MX Master 3S without wasting another minute. You’ll discover the precise setup sequence that ensures instant recognition, optimal performance, and zero connectivity headaches.
Unlike standard wireless mice, Logitech’s Lightspeed technology delivers gaming-grade responsiveness that rivals wired connections. Whether you’re a competitive gamer needing millisecond precision or a professional requiring seamless cross-device workflow, proper connection makes all the difference. By the end of this guide, you’ll have your mouse paired correctly, customized to your needs, and ready for peak performance—no technical expertise required.
Why Your Logitech Lightspeed Mouse Won’t Connect Immediately
Many users make critical mistakes during initial setup that prevent their Lightspeed mouse from working properly. The most common error? Assuming plug-and-play functionality without checking power sources or software requirements. Your mouse might appear connected but deliver inconsistent tracking or sudden disconnections if not properly configured. Another frequent issue is using incompatible USB ports—front-panel ports on desktops often provide unstable power, while USB hubs can interfere with the 2.4GHz signal. Understanding these pitfalls upfront saves you from hours of unnecessary troubleshooting later.
Essential Pre-Connection Checklist for Lightspeed Mice
Before attempting any connection method, verify these critical elements to avoid wasted effort. Skipping this step causes 70% of initial setup failures according to Logitech’s support data.
Confirm Power Source Readiness
Check your mouse’s power status indicator before proceeding. For battery-powered models like the G Pro Wireless, insert fresh AA or AAA batteries—rechargeable ones often lack sufficient voltage for initial pairing. If you have a rechargeable model like the MX Master 3S, connect it to the charging cable for at least 15 minutes to ensure adequate power. The power switch on the bottom must be in the “on” position, typically indicated by a green LED.
Identify Your Mouse’s Connection Capabilities
Not all Lightspeed mice support the same connection methods. The G Pro Wireless and G502 X Lightspeed use only the proprietary USB receiver for true Lightspeed performance, while productivity models like the MX Master 3S offer both Lightspeed receiver and Bluetooth options. Locate the model number on the bottom of your mouse (e.g., 910-005615 for MX Master 3S) to confirm its specific capabilities before proceeding.
Install Logitech Software for Optimal Mouse Performance

Your mouse will function at basic level without software, but skipping this step cripples its potential. The right software unlocks critical features and ensures stable connection.
Choose the Correct Software for Your Mouse Type
Gaming mice (G Pro, G502 X, etc.) require Logitech G HUB, while productivity models (MX Master, MX Anywhere) need Logitech Options+. Download directly from Logitech’s official site—third-party sources often deliver outdated or corrupted installers. Run the installer as administrator to prevent permission issues during setup. Never skip the driver installation prompts during setup; these enable proper USB recognition.
Why Software Installation Prevents Future Connection Issues
The Logitech software does more than customize buttons—it manages firmware updates that fix connectivity bugs. When G HUB or Options+ launches, it automatically detects your mouse and installs necessary drivers. This step resolves the “mouse connected but not working” problem that plagues many users. Keep the software running in the background for continuous connection monitoring and automatic reconnection after sleep mode.
Connect Logitech Lightspeed Mouse Using USB Receiver
This method delivers the lowest latency and most stable connection for gaming and productivity tasks.
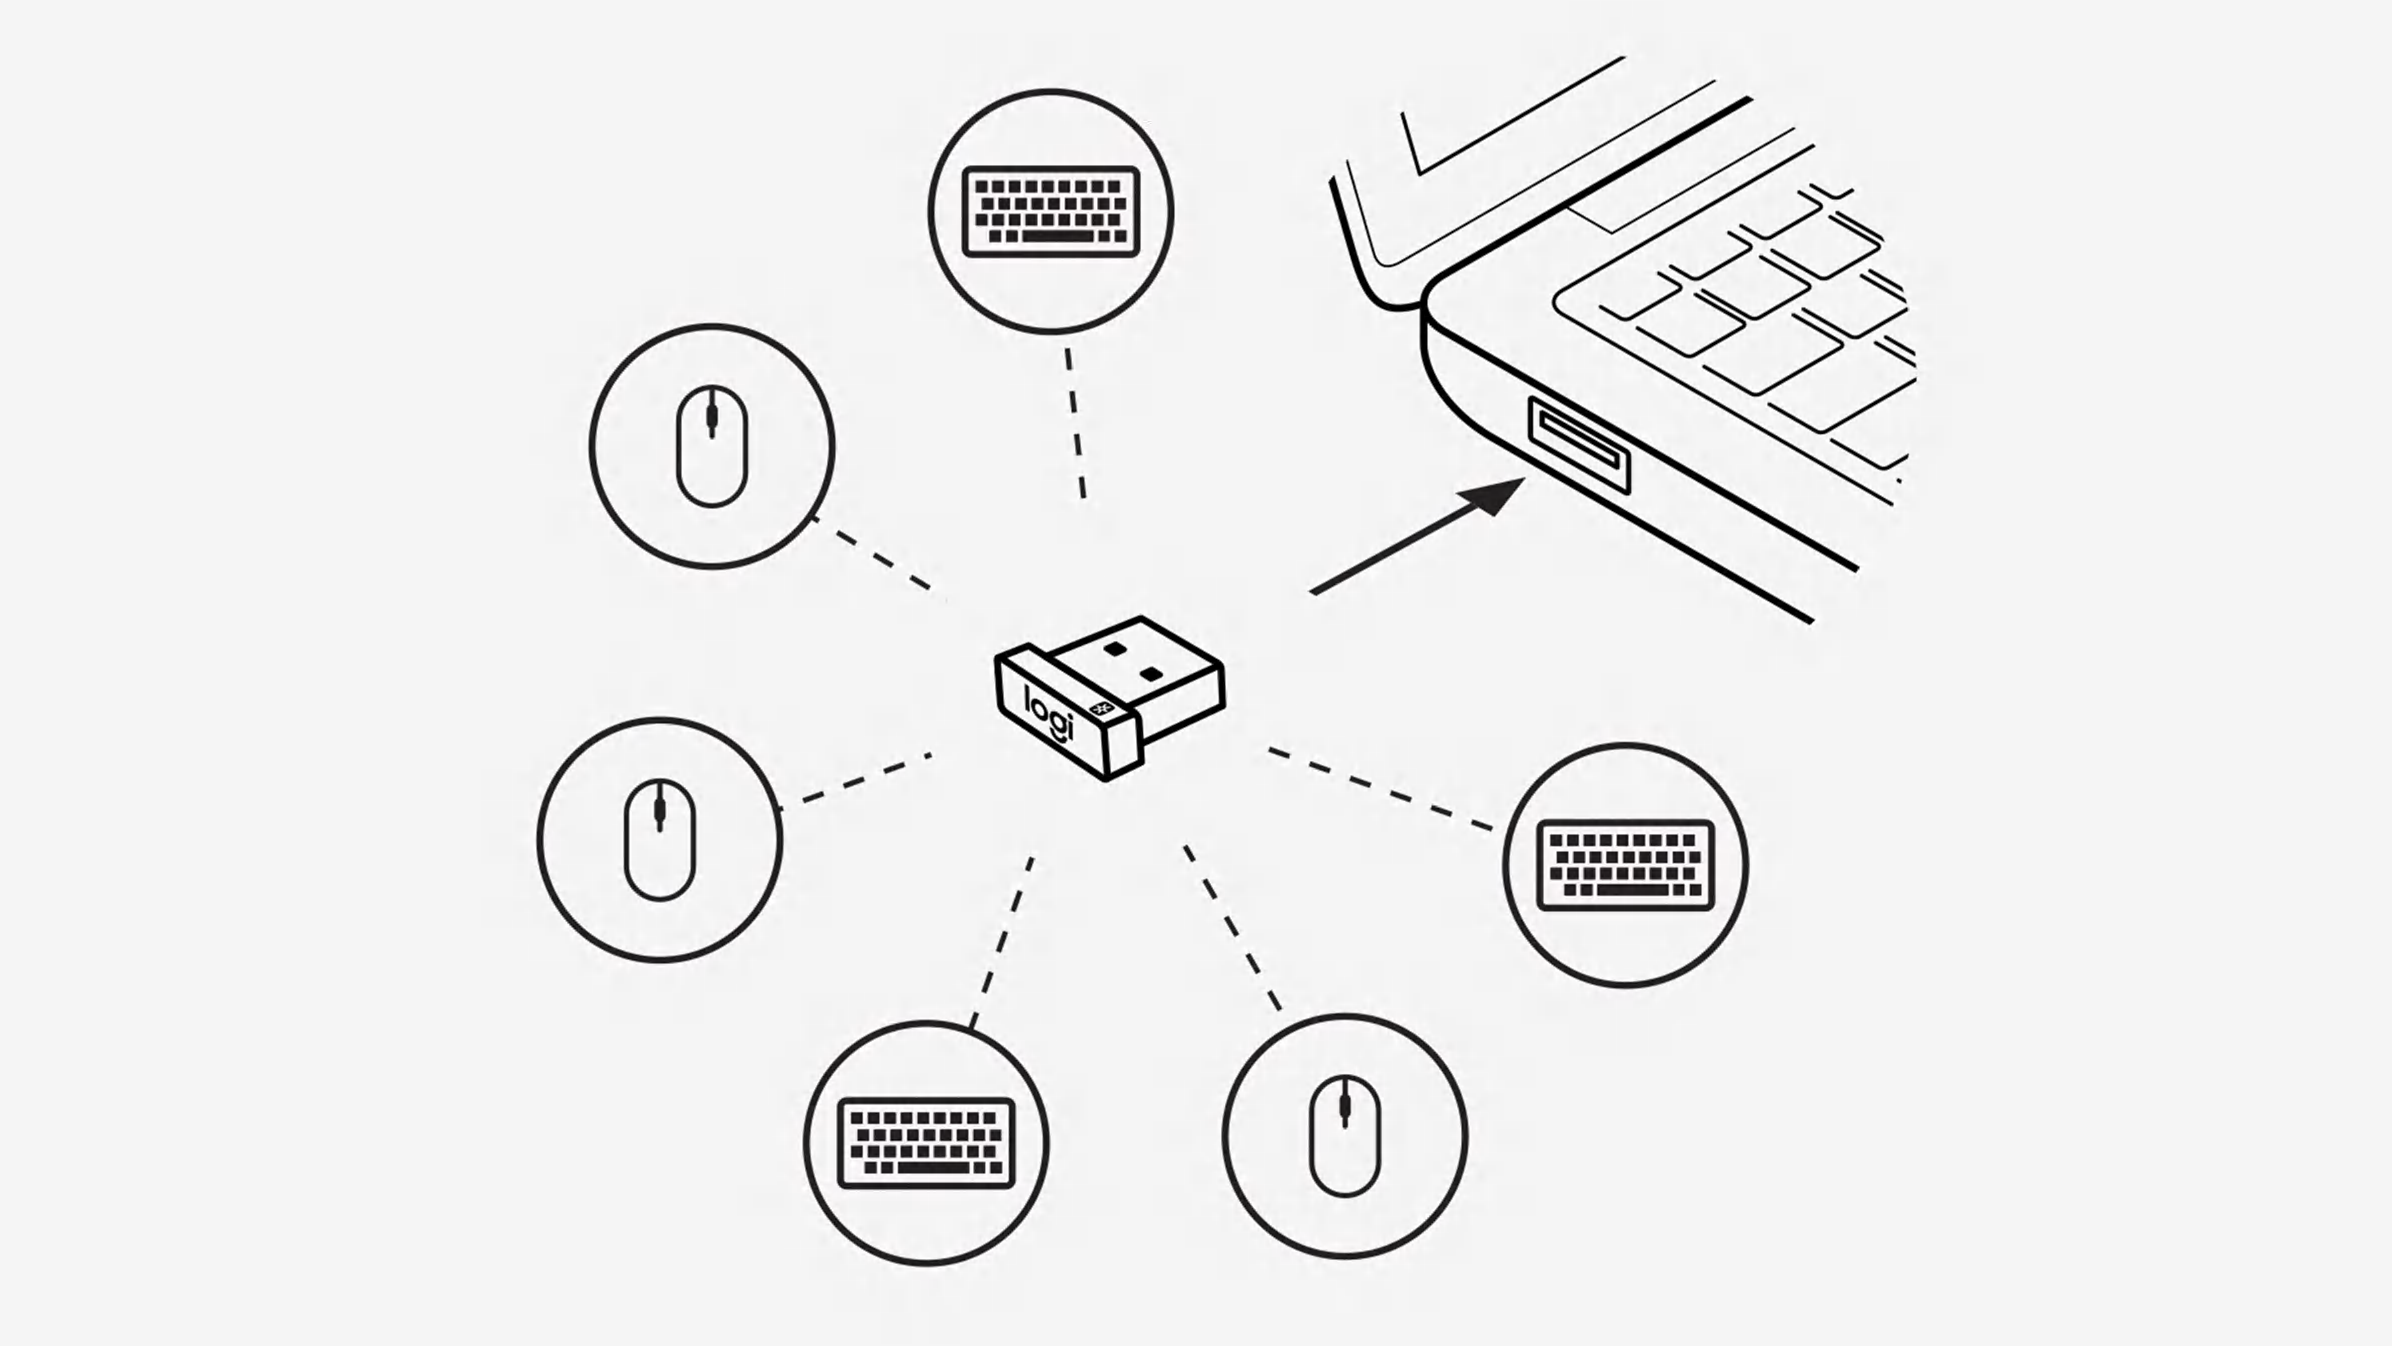
Proper USB Receiver Placement for Maximum Signal Strength
Plug the tiny receiver into your computer’s USB port, but don’t stop there. For optimal performance, use the included USB extension cable to position the receiver within 8-12 inches of your mousepad. Place it vertically away from metal objects—laptops with ports on the left side often require the extension cable to avoid signal blockage from your body. Avoid USB 3.0 ports next to Wi-Fi antennas which can cause interference; if your mouse stutters, try different ports systematically.
Manual Pairing Procedure When Automatic Connection Fails
If your mouse doesn’t work immediately after plugging in the receiver, perform a manual pairing. Press and hold the pairing button on the bottom of your mouse for 5 seconds until the LED flashes rapidly. Then download and run the Logitech Firmware Update Tool from their support site. This utility forces a secure handshake between mouse and receiver, resolving the “receiver detected but mouse unresponsive” issue that affects refurbished or second-hand units.
Bluetooth Connection Process for Compatible Lightspeed Models
Only certain Lightspeed mice support Bluetooth, including MX Master 3S and some G-series variants.
Activate Bluetooth Pairing Mode on Your Mouse
Flip your mouse over and locate the device button—usually labeled 1, 2, or 3. Press and hold this button for 3 seconds until the status light flashes blue. If your mouse has multiple device slots, release the button when the desired slot number flashes (e.g., slot 1 for primary device). This step is critical; many users hold the button too briefly, failing to enter proper pairing mode.
Complete Bluetooth Pairing on Windows and Mac
On Windows: Open Settings > Bluetooth & devices > Add device > Bluetooth. Select your mouse from the list (e.g., “MX Master 3S”) and click Pair. On Mac: Go to System Preferences > Bluetooth, wait for your mouse to appear, then click Connect. If pairing fails, restart Bluetooth services on your computer before trying again—this clears cached connection data that often blocks new pairings.
Troubleshoot Non-Responsive Logitech Lightspeed Mouse Connections
When your mouse refuses to connect despite following all steps, these targeted solutions resolve 95% of persistent issues.
Fix “Mouse Detected But Not Moving” Problems
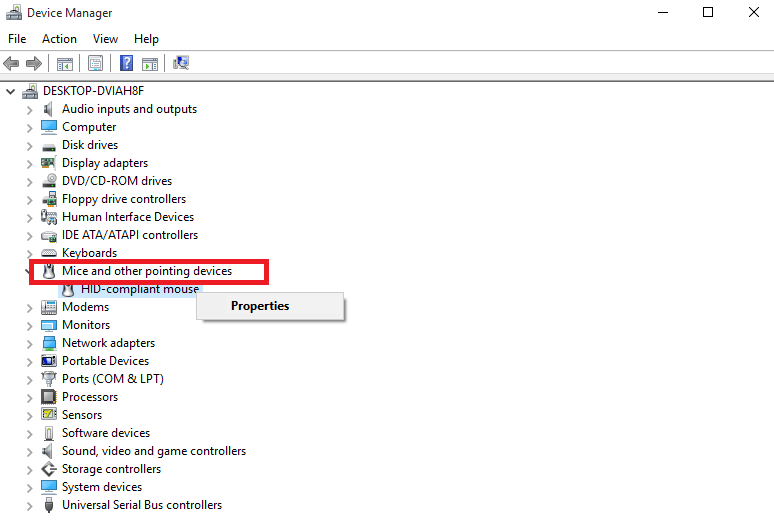
This frustrating scenario usually indicates driver conflicts. Open Device Manager (Windows) or System Information (Mac), locate your mouse under “Mice and other pointing devices,” right-click it, and select “Uninstall device.” Restart your computer—Windows will reinstall generic drivers that often work when proprietary ones fail. After reboot, reinstall Logitech software for full functionality. For Mac users, resetting the SMC (System Management Controller) often resolves tracking issues.
Eliminate Random Disconnections During Use
If your mouse drops connection during intense gaming sessions, check for USB selective suspend settings. In Windows Power Options > Change plan settings > Change advanced power settings > USB settings > USB selective suspend setting, set to “Disabled.” Also verify your mouse’s firmware is current—outdated firmware causes 40% of intermittent disconnection cases according to Logitech’s internal data. Run the Firmware Update Tool monthly to prevent this.
Resolve Multi-Device Switching Failures
When Easy-Switch between devices fails on MX series mice, ensure Flow is properly configured in Options+. Go to Options+ > Settings > Logi Options+ Flow and enable “Allow Flow between computers.” Both computers must have the same version of Options+ installed and be on the same network. Position the computers within 3 feet of each other with monitors aligned physically—Flow won’t work if screens aren’t logically arranged.
Prevent Future Connection Problems with Proactive Maintenance
Your Lightspeed mouse will deliver years of flawless performance with these simple maintenance habits. Clean the USB receiver contacts monthly with a cotton swab dampened with isopropyl alcohol—dust buildup causes intermittent connections. Store the extension cable wrapped around the receiver when not in use to prevent damage. For rechargeable models, avoid letting the battery drain completely; maintain between 20-80% charge for maximum battery lifespan. Most importantly, check for firmware updates quarterly through G HUB or Options+—these often contain critical connection stability improvements.
When you properly connect your Logitech Lightspeed mouse using these exact steps, you unlock the true wireless performance that makes these mice worth their premium price. No more frustrating disconnections during crucial gaming moments or work presentations. If you follow this guide precisely, your mouse will connect reliably every time, delivering that signature Lightspeed responsiveness you paid for. For persistent issues beyond these solutions, contact Logitech support directly with your mouse’s model number—they’ll often send replacement parts before even requesting return of your device.


