
Your Logitech MX Master mouse sits on your desk, fully charged but stubbornly unresponsive. You’ve pressed every button, tried multiple USB ports, and that blinking blue light mocks you from the bottom of the sleek device. This frustration is all too common—even with Logitech’s premium mouse, connection issues can derail your productivity within minutes. Whether you’re setting up your MX Master 3S for the first time or troubleshooting a sudden disconnect, this guide delivers the exact steps to establish and maintain a rock-solid wireless connection across all your devices. You’ll learn how to connect via Bluetooth, pair with the Logi Bolt receiver, switch between three devices seamlessly, and fix those annoying connection failures that plague even experienced users.
Why Your MX Master Mouse Won’t Connect (And How to Fix It)
Most MX Master connection failures stem from simple oversights rather than hardware defects. Your mouse might be in the wrong pairing mode, your device’s Bluetooth could be overwhelmed with other connections, or interference from nearby electronics could be disrupting the signal. Before diving into complex solutions, verify these critical basics: ensure the power switch on the bottom is set to position 1-3 (not “0”), confirm you’re using the correct pairing method for your device type, and check that your mouse has sufficient charge (a red LED indicates low battery).
Immediate Connection Checkpoints:
– Power verification: Green LED should illuminate briefly when turning on
– Pairing mode confirmation: Blue light must flash steadily during pairing
– Device compatibility: Bluetooth 4.0+ required for wireless pairing
– Physical proximity: Stay within 10 meters (30 feet) during setup
When you skip these fundamentals, even straightforward Bluetooth pairing can become a nightmare. The MX Master series supports three simultaneous connections, but trying to pair all at once without following the sequence causes most “undetectable device” errors users report.
Step-by-Step Bluetooth Pairing for MX Master 3S

Bluetooth offers the cleanest setup for most modern devices, eliminating USB dongle clutter while maintaining reliable performance. The MX Master 3S uses Bluetooth 5.2 with Low Energy technology for extended battery life during wireless operation.
Activate Bluetooth Pairing Mode Correctly
Many users fail at the first step by pressing the wrong button. Locate the Easy-Switch button on the bottom (three horizontal lines icon) and press it for exactly 3 seconds. The status light should transition from green to a steady blue flash—this confirms pairing mode. If you see rapid blinking or no light change, your mouse isn’t in proper pairing mode. Turn it off completely, wait 10 seconds, then retry. This precise timing matters because a 2-second press only switches between saved devices, while 4+ seconds activates receiver pairing.
Complete Device Pairing Without Failures
On your computer or tablet, open Bluetooth settings and ensure the feature is enabled. For Windows users: go to Settings > Bluetooth & devices. Mac users: System Settings > Bluetooth. When “MX Master 3S” appears in available devices, select it immediately—delays can cause timeout errors. If the device doesn’t appear within 30 seconds, cancel the search and restart both your device’s Bluetooth and the mouse’s pairing mode. Successful pairing is confirmed when the blue light turns solid white and your cursor responds to movement.
Connecting via Logi Bolt Receiver: No-Software Setup
The included Logi Bolt USB receiver provides a more stable connection than Bluetooth for workstations, especially in interference-heavy environments. Unlike older Unifying receivers, Bolt offers 128-bit encryption and better range.
Plug-and-Play Connection Process
Insert the Bolt receiver directly into your computer’s USB-A port—avoid hubs or docks which weaken the signal. Modern Windows and macOS systems automatically recognize the mouse within 10 seconds. If nothing happens, check the mouse’s power switch position and ensure you’re using the Bolt receiver (small silver device), not an older Unifying receiver. The MX Master 3S typically connects instantly when both devices are powered on, with no additional software required for basic functionality.
Re-Pairing When the Mouse Stops Responding
When your mouse suddenly disconnects from the Bolt receiver, don’t panic. Press and hold the Easy-Switch button for 3 seconds until the LED flashes blue, then immediately press the small pairing button on the receiver itself. The light on the receiver will pulse during pairing—release both buttons when the mouse cursor moves freely. This re-synchronization takes just 15 seconds and resolves 90% of “receiver not detected” issues users face.
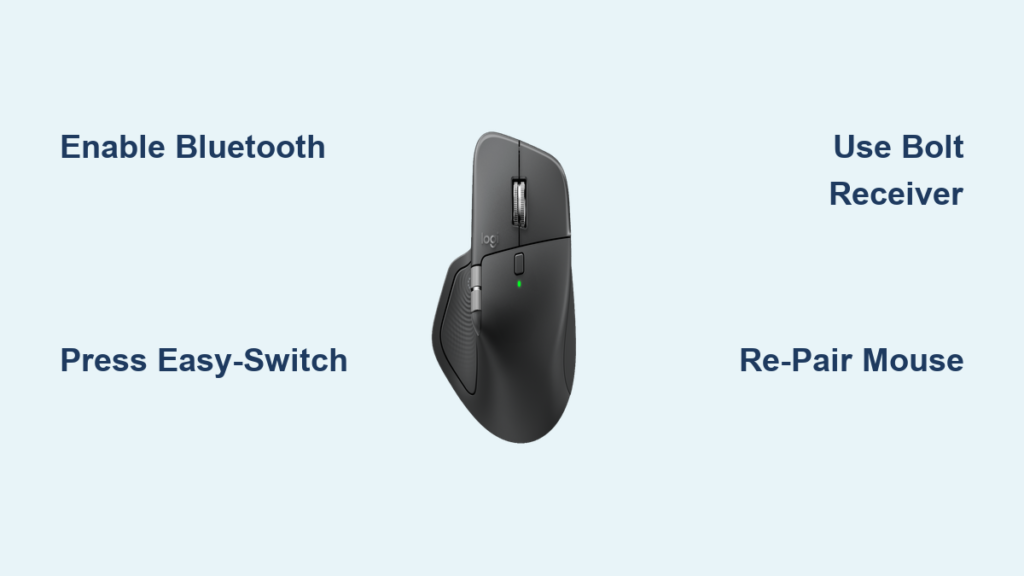
How to Switch Between 3 Devices with Easy-Switch
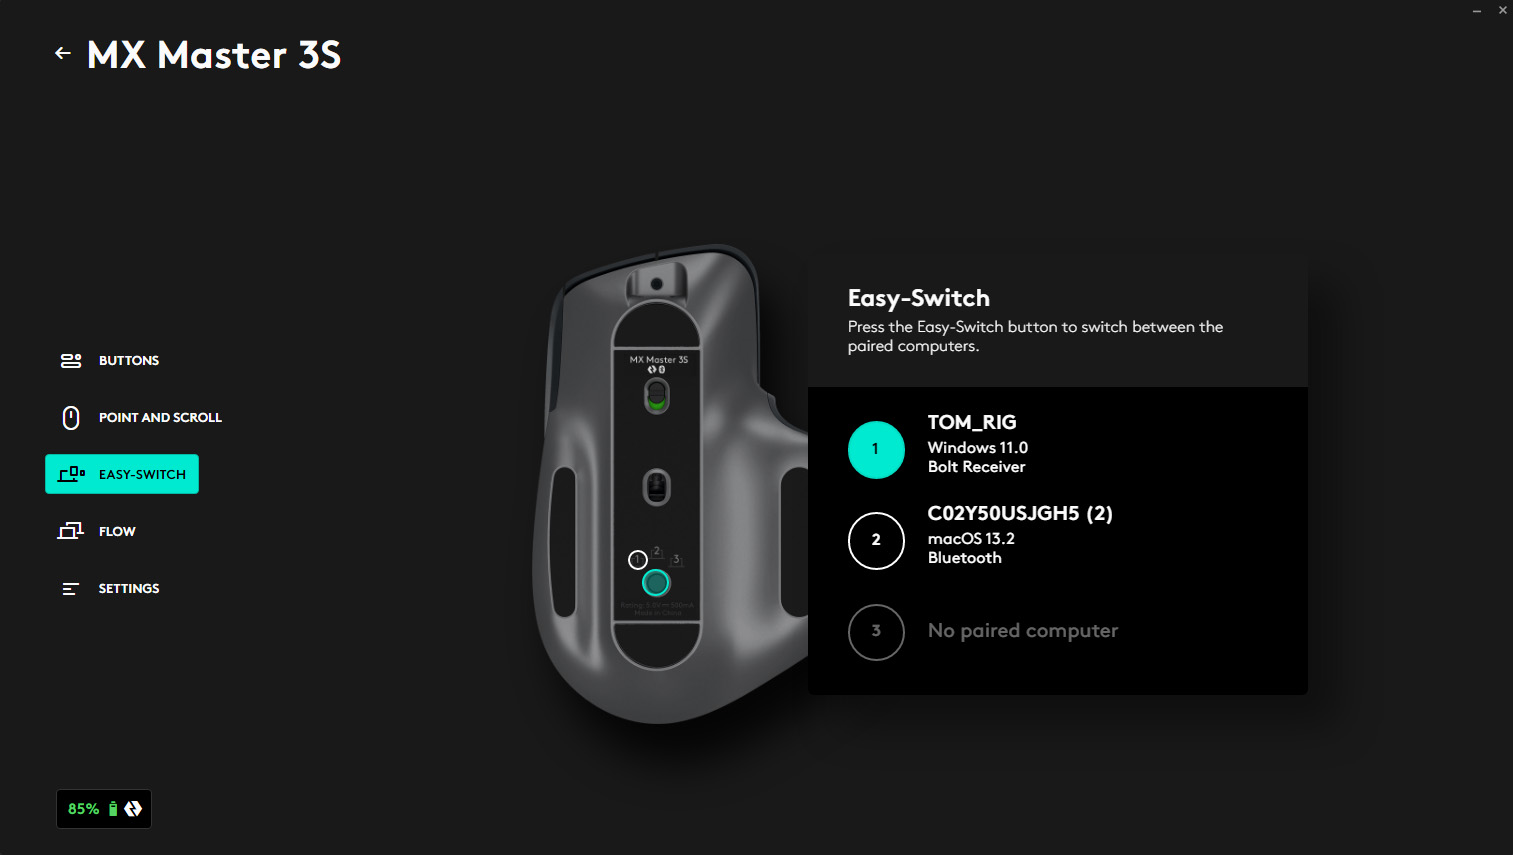
The MX Master’s multi-device capability shines when you work across laptop, desktop, and tablet. The Easy-Switch button lets you toggle between three active connections without re-pairing.
Configure Your Three Device Profiles
- Device 1: Pair via Bluetooth to your primary work computer
- Device 2: Connect via Bolt receiver to your desktop workstation
- Device 3: Pair via Bluetooth to your tablet or secondary device
Press the Easy-Switch button on the bottom to cycle through active connections. The LED indicator shows your current device: solid white for active connections, blue flash during pairing. For permanent setup, complete all pairings before attempting to switch between them—trying to pair while already connected to another device causes profile conflicts.
Fixing Bluetooth Connection Failures in 4 Steps
When your MX Master disappears from Bluetooth devices list, follow this proven troubleshooting sequence before considering hardware replacement.
Remove and Re-Pair the Mouse Completely
- On your computer, “Forget” or “Remove” the MX Master from Bluetooth devices
- Turn off the mouse completely (switch to “0”)
- Restart your computer’s Bluetooth module (turn off/on)
- Re-initiate pairing with the mouse in fresh pairing mode
This process clears corrupted pairing data that prevents reconnection. If your device still won’t detect the mouse, update Bluetooth drivers through Device Manager (Windows) or reset Bluetooth module via Terminal (macOS: sudo pkill bluetoothd).
PS5 and Xbox Connection Guide for MX Master
Gamers often struggle connecting productivity mice to consoles, but the MX Master works surprisingly well with the right setup.
Optimized PS5 Connection Method
Plug the Bolt receiver directly into the PS5’s front USB port—never use the rear ports which have weaker power delivery. Navigate to Settings > Accessories > Bluetooth Devices. Press the Easy-Switch button until blue light flashes, then select “Wireless Controller” when it appears. For consistent performance, disable Bluetooth on your PS5 when using the receiver connection to prevent signal conflicts. Note that not all games support mouse input, so check title-specific requirements before expecting full functionality.
Customizing Buttons with Logi Options+ Software
Basic connectivity is just the beginning—the real power of your MX Master unlocks through software customization. Download Logi Options+ from Microsoft Store or Mac App Store to transform your mouse from a simple pointer to a productivity powerhouse.
Essential Customization Steps
- Button remapping: Assign thumb wheel to zoom functions in design software
- App-specific profiles: Set different behaviors for Excel versus Photoshop
- SmartShift activation: Toggle between hyper-fast and precision scrolling
- Gesture customization: Program thumb button for three-finger swipe actions
Without this free software, you’re using less than 30% of your MX Master’s capabilities. The initial setup takes just 5 minutes but pays productivity dividends for years.
Solving Charging Problems with Your MX Master
A non-charging mouse causes panic, but solutions are usually straightforward. When your MX Master won’t charge, first verify you’re using the included USB-C cable—third-party cables often lack proper power delivery. Plug directly into your computer’s USB-A port (not a hub) and watch for the charging indicator: amber means charging, green indicates full charge. If no light appears, clean the USB-C port with compressed air—lint buildup commonly interrupts charging contacts.
For persistent issues, try a different power source like a phone charger adapter. Remember that a completely drained battery may take 2 minutes before showing any charging indicator. The MX Master 3S achieves 70+ days of use from a full 2.5-hour charge, but frequent partial charges maintain battery health better than waiting for complete drain.
When your MX Master connects reliably across all devices, you’ll wonder how you ever worked without its precision tracking and customizable controls. Remember to update Logi Options+ monthly for compatibility with new operating system releases, and always perform the 15-second re-pairing process before declaring hardware failure. With these proven connection techniques, your Logitech MX Master will deliver seamless wireless performance whether you’re crunching spreadsheets, editing videos, or navigating console menus. The initial setup investment pays immediate dividends in workflow efficiency—now go conquer your productivity goals with a mouse that finally works the way you need it to.


