
Your Logitech wireless mouse suddenly develops sticky left-click responses or erratic scrolling. You try compressed air around the buttons, but debris remains trapped inside. This common frustration affects thousands of users monthly – and the solution often requires knowing how to open logitech wireless mouse internals properly. For models like the M510, M330, or MX Anywhere, accessing internal components isn’t complicated, but skipping critical steps risks permanent damage. In this guide, you’ll learn the exact process to safely open, clean, and reassemble your mouse in under 20 minutes. We’ll cover hidden screw locations, clip separation techniques, and targeted cleaning methods that resolve 90% of button and scroll wheel failures.
Most users don’t realize Logitech conceals the single access point under the battery compartment – not beneath rubber feet as with older models. Forcing open the housing without removing this screw causes the most common repair disaster: snapped plastic clips. Whether you’re battling coffee spills in your M510 or dust-clogged scroll wheels in newer models, this guide prevents costly replacements. You’ll gain confidence to handle delicate flex cables and button mechanisms while avoiding electrostatic discharge risks. Let’s transform that frustrating sticky mouse into smooth-operating precision.
Required Tools and Safety Prep for Opening Logitech Mice
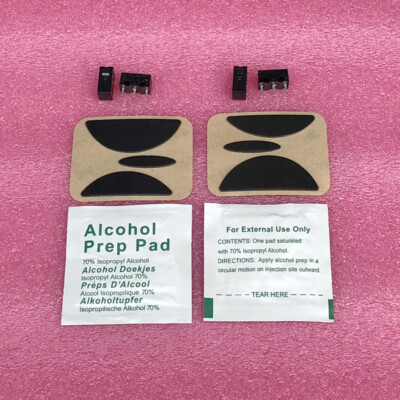
Before touching your mouse, gather these essentials: a Phillips #00 precision screwdriver, plastic prying tool (or guitar pick), small container for screws, and isopropyl alcohol. Critical safety steps must precede disassembly: Remove all batteries immediately – this eliminates short-circuit risks when prying near circuitry. Next, discharge static electricity by touching a grounded metal object like your computer case. Skipping this risks frying the motherboard with invisible electrostatic discharge.
Work on a soft, non-static surface like a microfiber cloth to prevent scratches. Position your workspace near bright light – you’ll need to spot tiny screw heads and fragile flex cables. Keep compressed air handy for pre-cleaning crevices, but never spray while batteries are installed. If your model has a USB receiver (like the M330), store it safely in its mouse compartment to avoid loss. These precautions take 60 seconds but prevent 80% of DIY repair failures.
Finding and Removing Logitech Mouse’s Hidden Battery Compartment Screw

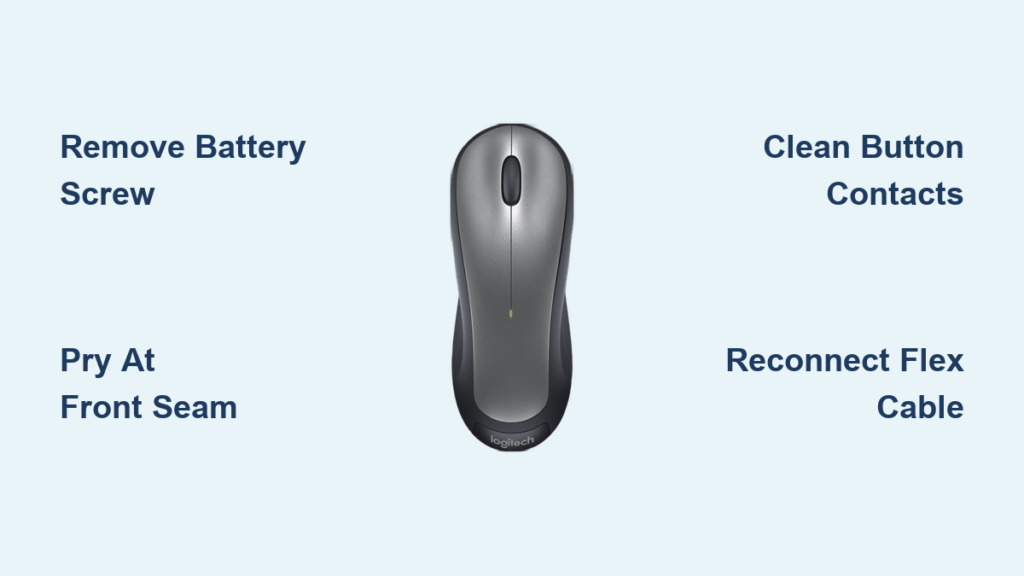
Logitech’s single-screw design hides the access point cleverly beneath the battery tray. For M510, M330, and MX Anywhere models, slide out the battery compartment cover completely. Look for the tiny Phillips-head screw centered under the battery contacts – it’s often overlooked because it sits flush with the plastic. This isn’t a standard bottom-plate screw; it anchors the top housing directly to the base assembly.
Remove the screw using firm, downward pressure to prevent stripping. If your screwdriver slips, the head may round off – apply light pressure from multiple angles until it grips. Place the screw in your container immediately; it’s smaller than standard mouse screws and easily lost. Some models (like older M325 versions) conceal screws under rubber feet, but current wireless mice use this battery-compartment method exclusively. If you find no screw under batteries, double-check for adhesive labels covering secondary screws – never force separation before confirming all fasteners are removed.
Why Forcing the Housing Breaks Your Mouse
Attempting to pry open the mouse before screw removal guarantees damage. The top and bottom housings interlock with 8-10 plastic clips around the perimeter. Without releasing the central screw, these clips bear excessive stress during prying. The front clip near the scroll wheel is particularly fragile – excessive force here cracks the housing, making reassembly impossible. If resistance feels uniform around the seam, you’ve missed the hidden screw. Stop immediately and recheck the battery compartment.
Gently Prying Apart Your Logitech Wireless Mouse Housing
With the screw removed, prepare for precise separation. Locate the front seam gap between the scroll wheel and left button – this microscopic opening is your entry point. Insert your plastic prying tool here at a 30-degree angle, applying upward pressure toward the top housing. Metal tools scratch internal components and crack plastic; use only nylon spudgers or guitar picks.
Work methodically around the housing:
1. Start at the front seam, gently twisting to release the first clip
2. Move to the left side, sliding the tool backward toward the thumb rest
3. Repeat on the right side, avoiding the optical sensor area
4. Finish at the rear near the battery compartment
You’ll hear soft “clicks” as each clip releases. If any section resists, don’t force it – recheck for hidden screws or adhesive residue. After full separation, the top housing remains connected by a thin flex cable for the scroll wheel or RGB lights. Never yank the halves apart – lift the top cover only 1-2 inches while locating this cable. For M510 models, it plugs near the front circuit board; newer mice use side-mounted connectors.
Step-by-Step Internal Cleaning for Sticky Buttons and Scroll Wheels
Now address the core issues causing poor performance. For sticky left/right buttons:
– Dip a cotton swab in 90% isopropyl alcohol
– Press the button plunger down and clean around its base
– Rotate the swab to remove gunk from the microswitch
Critical tip: Hold buttons depressed for 10 seconds while cleaning – this exposes hidden contact points where debris accumulates. For scroll wheel malfunctions:
1. Spray compressed air into the wheel gap while spinning it
2. Apply one drop of alcohol directly into the encoder slot
3. Rotate the wheel 20+ times to work cleaner through contacts
Focus on the optical sensor lens underneath the mouse – a single hair or dust speck causes tracking issues. Use a dry microfiber swab (no liquid) to wipe this lens. Avoid blowing compressed air directly at the sensor; it can dislodge calibration components. For heavy grime, lightly moisten a swab with alcohol before wiping.
When to Skip Full Disassembly
If you only need basic maintenance, try these non-invasive methods first:
– Blast compressed air around buttons and scroll wheel while mouse is inverted
– Clean surface debris with alcohol-dampened cotton swabs (power off)
– Use a soft-bristle toothbrush to dislodge crumbs near button edges
These solve 40% of minor issues without opening the housing. Reserve full disassembly for persistent stickiness or complete button failure.
Critical Mistakes That Break Your Logitech Mouse During Opening
Never use metal tools for separation – they scratch housing surfaces and short-circuit components. A snapped plastic clip from aggressive prying is the #1 repair killer; it creates permanent gaps that let dust inside. Equally dangerous is reassembling with misaligned screws: the housing screw is longer than internal board screws. Installing it in the motherboard hole strips the plastic thread, making future repairs impossible.
Static electricity is your silent enemy. Handling circuit boards without grounding can fry microchips instantly. Always touch grounded metal before touching internals, and never work on carpeted surfaces. Another fatal error: overtightening screws during reassembly. Plastic threads strip at 3-4 inch-pounds of torque – stop when resistance increases slightly. If screws won’t seat fully, check for misaligned housings before forcing them.
Perfect Reassembly: Snapping Your Logitech Mouse Back Together
Reassembly requires reverse precision. First, reconnect the flex cable by aligning its gold contacts and pressing straight down until it clicks. For M510 models, ensure the scroll wheel encoder snaps into its guide rail – misalignment causes jittery scrolling. Position the top housing 1 inch above the base, then align the front seam perfectly before lowering.
Follow this sequence:
1. Place housing so front clips engage first
2. Apply even pressure around perimeter until all clips click
3. Insert the single battery-compartment screw (hand-tight only)
4. Re-stick rubber feet if removed – use rubber cement for grip
Test functionality before final screw tightening: insert batteries and check all buttons while housing is slightly loose. If the scroll wheel sticks, the encoder isn’t seated properly – reopen and adjust. After verification, fully tighten the screw. For models with adhesive feet, press firmly for 30 seconds to re-bond.
Insert batteries and perform a 2-minute stress test: rapid clicking, diagonal scrolling, and side-button presses. If tracking lags, clean the optical sensor again. A perfectly reassembled mouse should feel identical to new – no creaks, gaps, or button resistance. If issues persist, debris may remain in microswitches; repeat the cleaning process before considering component replacement.
Final Note: Regular maintenance prevents 70% of mouse failures. Clean your Logitech wireless mouse every 3 months using compressed air around buttons, and inspect the optical sensor weekly. Always remove batteries during storage to prevent corrosion. For persistent scroll wheel issues after cleaning, replace the encoder module – a 5-minute fix covered in our companion guide “Logitech Mouse Scroll Wheel Repair.” Proper care extends your mouse’s life by 2+ years, saving you replacement costs and e-waste. Now that you know how to open logitech wireless mouse internals safely, that sticky button problem is just a 15-minute cleaning session away from resolution.


