

That frustrating moment when your crosshair won’t keep up with your flicks—could your Logitech mouse’s polling rate be the hidden culprit? For competitive gamers and precision-focused professionals, understanding how to change polling rate on Logitech mouse models can transform your experience from laggy to lightning-fast. This critical setting determines how frequently your mouse communicates with your PC, directly affecting responsiveness in everything from first-person shooters to detailed graphic design work. Whether you’re using a G502 LIGHTSPEED, G Pro Wireless, or another compatible model, this guide delivers every verified method to adjust your polling rate, including when software fails and you need advanced solutions.
Unlike DPI—which controls cursor speed—polling rate manages how often your mouse reports its position to your computer. A 1000Hz rate means your mouse updates its position every millisecond, while 125Hz updates only every 8 milliseconds. This difference creates the “snappiness” you feel during fast movements. Most gamers benefit from 500Hz or 1000Hz settings, but wireless users might temporarily drop to lower rates when battery is low. You’ll discover exactly where to find these settings in your specific Logitech software and what to do when standard methods don’t work.
G HUB Method: Changing Report Rate on G502, G Pro, and LIGHTSPEED Models

Logitech G HUB serves as the primary control center for adjusting polling rate on compatible gaming mice like the G502, G Pro, G903, and LIGHTSPEED wireless models. The company labels this setting as “Report Rate” within the software interface, but it functions identically to what most users call polling rate.
Step-by-Step: Locating Report Rate in G HUB for G502 LIGHTSPEED
Open G HUB and select your connected mouse from the device list—this takes less than 10 seconds once the software loads. Don’t skip verifying that your mouse appears in the device list, as disconnected devices won’t show settings options.
Click the gear icon next to your mouse name to access advanced settings. For many users, this icon blends into the interface, so look carefully near the device name rather than in traditional menu locations.
Navigate to the Performance tab where you’ll find the Report Rate dropdown menu. If you’re using an older model, this might appear under “Pointer Settings” or “Sensor Configuration” instead.
Select your desired polling rate from the available options (typically 125Hz, 250Hz, 500Hz, or 1000Hz). The G502 LIGHTSPEED and G Pro Wireless both support 1000Hz, but some entry-level models may top out at 500Hz.
Pro Tip: Gamers competing in titles like Valorant or CS2 should use 1000Hz for maximum responsiveness, while general productivity users might prefer 500Hz to balance performance with system resource usage. Always save your profile after making changes to prevent settings from reverting.
Save Polling Rate to Mouse Memory: Use 1000Hz Without G HUB on Any PC

When you take your Logitech mouse to a friend’s house or a LAN event, you don’t want to rely on installing G HUB first. Saving your preferred polling rate to the mouse’s onboard memory ensures your 1000Hz setting works immediately on any computer.
How to Store Polling Rate in Onboard Memory
Create a dedicated profile in G HUB specifically for your preferred polling rate. Name it something like “1000Hz Tournament” so you can identify it instantly during competitions.
Adjust the Report Rate to your desired setting within this profile—most competitive gamers lock this at 1000Hz for consistent performance.
Access onboard memory settings by clicking the gear icon next to your mouse, then look for “On-Board Memory Mode” or “Save to Device.” This option sometimes hides under “Advanced Settings” depending on your G HUB version.
Assign your profile to a memory slot (usually labeled M1, M2, etc.) and confirm the save. Your mouse will now default to this polling rate even on systems without G HUB installed.
Warning: Not all Logitech mice support onboard memory storage—check your model specifications first. The G502 HERO and G Pro Wireless both support this feature, but basic office mice typically don’t.
Windows Mouse Settings Fix: When G HUB Won’t Change Your Polling Rate
If G HUB crashes or won’t recognize your mouse, Windows offers alternative paths to influence polling behavior—though these methods have limitations compared to dedicated software.
Bypassing G HUB With System-Level Adjustments
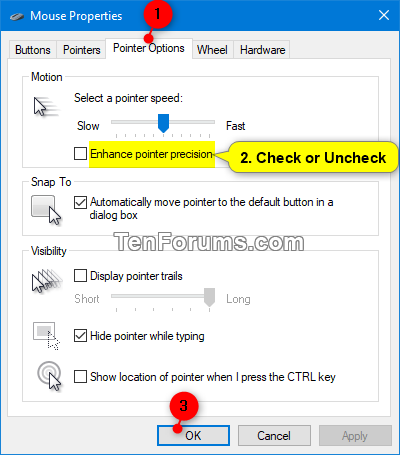
Access Windows mouse settings through Settings > Bluetooth & devices > Mouse > Additional mouse settings. This path changed in recent Windows versions, so don’t waste time looking in Control Panel first.
Navigate to Pointer Options in the Mouse Properties window and toggle “Enhance pointer precision” off for more consistent tracking. While this doesn’t directly change polling rate, it eliminates Windows’ acceleration that can mask polling issues.
Install HIDUSBF—a third-party utility that forces higher polling rates system-wide. This works when G HUB fails but requires administrative privileges and may conflict with other mouse software.
Expert Note: Windows defaults to 125Hz for most USB devices, so even if G HUB shows 1000Hz, system limitations might cap the actual rate. Test your effective polling rate using free tools like Mouse Rate Checker before assuming settings took effect.
Registry Hack: Force 1000Hz Polling Rate When Software Fails (Advanced)
This nuclear option should only be attempted when all other methods fail, as incorrect registry edits can destabilize your system. Back up your registry before proceeding—this takes just two clicks but could save hours of troubleshooting.
Safely Editing Polling Rate in Windows Registry
Open Registry Editor by typing “regedit” in the Windows search bar and running it as administrator. Disregard the security warning if you’ve created a backup first.
Navigate to HKEY_CURRENT_USER\Control Panel\Mouse—this path contains the critical polling parameters that Windows uses system-wide.
Modify MousePollingRate by double-clicking the DWORD value and entering your desired rate (1000 for 1000Hz). If this value doesn’t exist, right-click > New > DWORD Value and name it exactly “MousePollingRate”.
Reboot your system for changes to take effect. Test immediately with a polling rate checker tool since registry changes can sometimes conflict with USB controller limitations.
Critical Warning: Wireless mice like the G Pro Wireless may ignore registry changes during low-battery operation as they automatically reduce polling to conserve power. This method works best for wired connections.
Gaming vs Battery Life: When to Use 1000Hz vs 125Hz on Logitech Mice
Choosing the right polling rate involves balancing performance needs with practical constraints—especially for wireless models where battery life directly correlates with your selected rate.
Optimizing Polling Rate for Your Specific Use Case
Competitive gaming demands 1000Hz for the lowest possible input lag. In fast-paced shooters where milliseconds decide victories, this setting provides the most immediate cursor response. Test yourself: switch between 125Hz and 1000Hz during rapid flick shots—you’ll feel the difference instantly.
Productivity work benefits from 500Hz as the sweet spot between responsiveness and resource efficiency. Office tasks rarely need maximum polling rates, and this setting reduces CPU overhead without noticeable performance loss.
Wireless battery conservation requires 125Hz when unplugged for extended periods. On the G Pro Wireless, dropping from 1000Hz to 125Hz can extend battery life by up to 40%—a crucial consideration during long work sessions away from power sources.
Pro Tip: Create multiple G HUB profiles—one for gaming at 1000Hz and another for battery saving at 125Hz—and switch between them with a single button press on mice with profile toggle buttons.
Fix Stuttering Cursor: 4 Common Polling Rate Problems on Logitech Mice
Even after changing your polling rate, issues can persist due to misunderstandings about how these settings interact with your system. Here’s how to diagnose and fix the most frequent problems.
Why Your 1000Hz Setting Might Still Feel Laggy
System bottleneck causing stutter occurs when your PC can’t process high polling rates smoothly. If you experience stuttering at 1000Hz but smooth movement at 500Hz, your system likely lacks the processing headroom—try lowering the rate rather than assuming your mouse is faulty.
USB port interference frequently disrupts high polling rates. Plug your mouse directly into a rear motherboard USB port rather than a hub or front-panel port, which often share bandwidth with other devices.
Wireless signal degradation affects LIGHTSPEED models when the dongle sits behind metal objects. Reposition your USB receiver for clear line-of-sight to the mouse, especially when using 1000Hz which demands stronger signal integrity.
Driver conflicts can override G HUB settings. Completely uninstall third-party mouse utilities before troubleshooting polling rate issues—they often hijack USB communication at a lower level than G HUB can control.
Final Takeaway: Mastering how to change polling rate on Logitech mouse models puts you in control of one of gaming’s most impactful yet overlooked settings. For G502 and G Pro users, G HUB provides the simplest path to 1000Hz responsiveness, while onboard memory ensures your settings travel with you. When software fails, the registry method offers a last-resort solution—but always verify your effective polling rate with testing tools. Remember that wireless models like the G Pro Wireless automatically adjust polling based on battery level, so keep your mouse charged for consistent high-rate performance. Whether you’re chasing victory royales or perfecting pixel-perfect designs, the right polling rate configuration creates that essential connection between your hand and the screen.


