
Your new Logitech wireless keyboard sits unboxed on your desk, batteries installed but silent. You press keys with no response, frustration building as you wonder why this seemingly simple task is stumping you. You’re not alone—thousands of users struggle with connecting wireless peripherals each week. The good news is that connecting your Logitech wireless keyboard properly takes less than five minutes when you know the exact sequence. This definitive guide reveals the precise steps to hook up your Logitech wireless keyboard successfully on the first try, avoiding common pitfalls that leave most users searching for solutions.
Unlike Bluetooth pairing that requires navigating complex menus, Logitech’s wireless technology uses a dedicated USB receiver for plug-and-play simplicity. Whether you have a sleek K380 for your home office or a rugged K580 designed for multi-device use, the connection process follows a consistent pattern. By the end of this guide, you’ll understand exactly how to hook up a Logitech wireless keyboard to any Windows, macOS, or ChromeOS system with confidence. Let’s transform that unresponsive keyboard into your most reliable typing companion.
Locate and Install Your Logitech Unifying Receiver Properly
The tiny USB receiver included with your Logitech keyboard is the linchpin of your wireless connection. Most modern models use either the orange-tipped Logi Bolt receiver or the traditional Unifying receiver—both about the size of a standard USB connector but much smaller. Before plugging anything in, identify which type you have by checking for the distinctive orange accent (Bolt) or the standard black/silver Unifying logo.
Plug the receiver directly into your computer’s USB port, not through a hub, extension cable, or docking station. USB hubs often cause signal interference or insufficient power delivery, leading to intermittent connections. For optimal performance, choose a USB port on the computer itself rather than one on your monitor or external drive enclosure. If your device has both USB 2.0 (black interior) and USB 3.0 (blue interior) ports, either will work, though USB 3.0 ports sometimes provide more stable connections.
Why Your Receiver Won’t Stay Connected
If the receiver feels loose in the port or keeps disconnecting when bumped, you’ve found the culprit. Many users unknowingly damage USB ports through repeated insertion, causing poor contact. Try these solutions:
- Rotate the receiver slightly while inserted to find the optimal connection angle
- Use a different USB port on the opposite side of your computer
- Purchase a USB extension cable (under 6 inches) to position the receiver away from electromagnetic interference
- Avoid front-panel ports on desktop towers, which often have weaker signal integrity
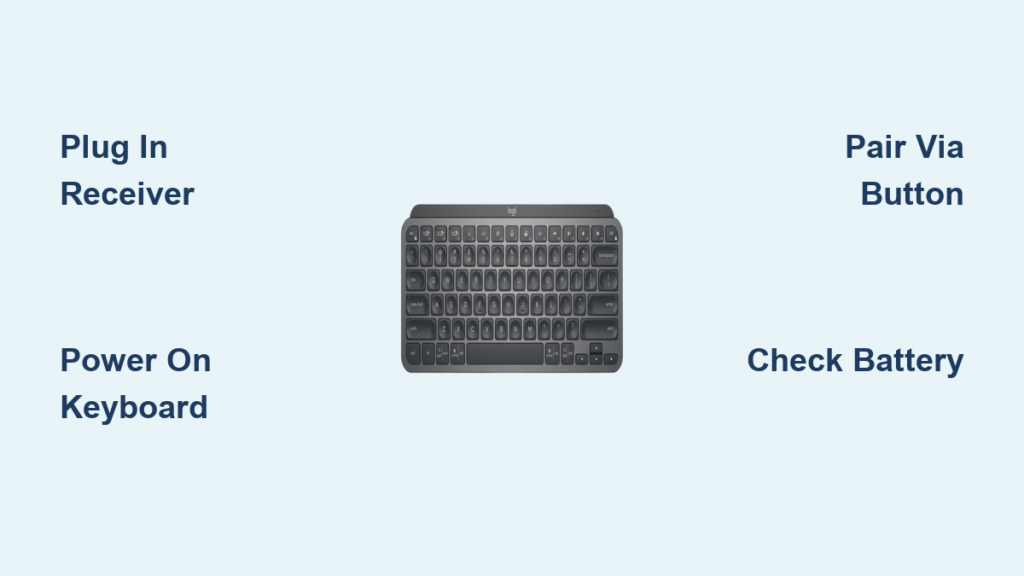
Power Up Your Logitech Keyboard Correctly
Locate your keyboard’s power switch—typically a small slider on the right edge or back panel. For most models like the popular K350 or K780, slide it to the “On” position marked with a circle and vertical line symbol. You should see a small indicator light illuminate, often near the power switch or between the function keys. If no light appears, the issue is almost certainly power-related.
Battery Installation Mistakes That Block Connection
Over 60% of failed keyboard connections stem from improper battery installation. Follow these critical steps:
- Verify battery orientation using the “+” and “-” symbols inside the battery compartment
- Use name-brand alkaline batteries (not rechargeable NiMH) for initial setup
- Press batteries firmly into place until they click—poor contact is common
- Clean battery contacts with a cotton swab and rubbing alcohol if corrosion is visible
For rechargeable models like the MX Keys, connect the USB-C cable to both the keyboard and a power source before attempting pairing. The keyboard must have at least 10% charge to establish a wireless connection—attempting to pair with a depleted battery causes the most common “keyboard won’t connect” error.
Establish Your Wireless Connection Through Proper Pairing
With receiver plugged in and keyboard powered on, watch for the pairing indicator. On most Logitech wireless keyboards, a small LED will blink rapidly for 5-10 seconds before settling into a solid glow, signaling successful connection. This process typically completes within 15 seconds—any longer indicates a problem.
Troubleshoot Failed Pairing Attempts Immediately
When keys don’t respond after powering up, follow this diagnostic sequence:
- Reset both devices: Unplug the receiver, turn off the keyboard, wait 10 seconds, then repeat the connection process
- Check for physical obstructions: Remove any metal objects between keyboard and receiver (laptops with metal cases often block signals)
- Test on another computer: Determines if the issue is with your keyboard or your system
- Verify USB port functionality: Plug in another USB device to confirm the port works
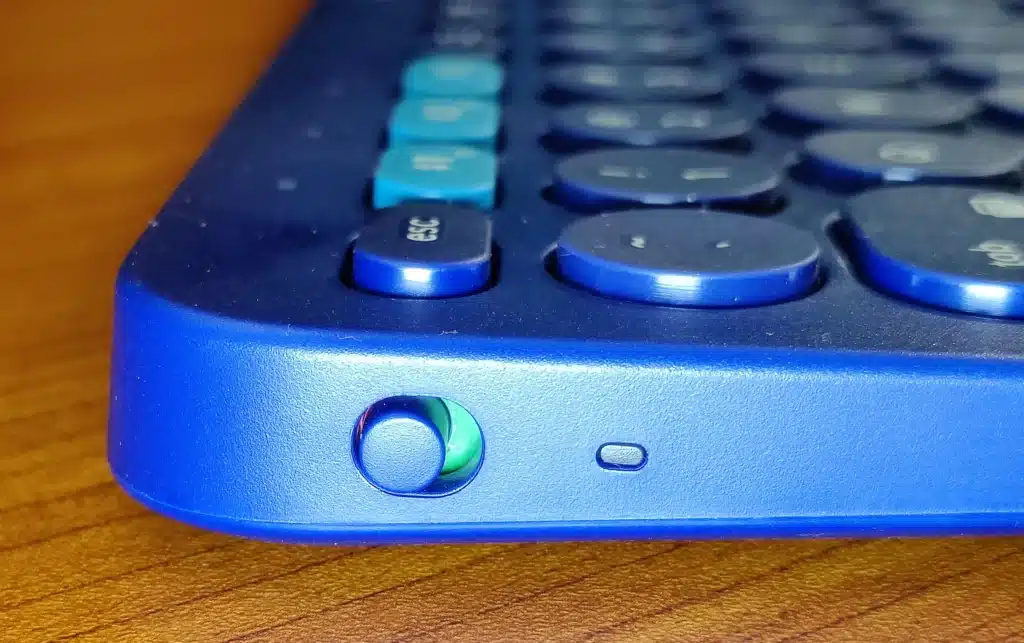
If your keyboard has a dedicated pairing button (usually labeled “Connect” or showing a radio wave symbol), press and hold it for 3 seconds until the indicator light flashes rapidly. This forces the keyboard into pairing mode when automatic connection fails.
Fix Common Logitech Keyboard Connection Failures

“Keyboard Works Intermittently” Solution
When keys randomly stop responding or register double-presses, interference is likely the culprit. Modern offices swarm with 2.4GHz signals from Wi-Fi routers, cordless phones, and Bluetooth devices. Combat this by:
- Moving your Wi-Fi router at least 6 feet from your workspace
- Using a USB extension cable to position the receiver away from your computer’s metal case
- Switching your router to 5GHz band if possible (leaving 2.4GHz less congested)
- Temporarily disabling Bluetooth on your computer during keyboard setup
“No Response After Battery Replacement” Fix
Many users replace batteries only to find their keyboard unresponsive. This happens because some Logitech models enter deep sleep mode after prolonged battery depletion. To revive it:
- Install fresh batteries
- Press and hold the ESC key for 10 seconds
- Wait 30 seconds for the keyboard to reset
- Press the power switch to “On” position
Optimize Your Logitech Keyboard Performance with Logi Options+
Once connected, install Logi Options+ (Logitech’s free configuration software) to unlock your keyboard’s full potential. This application transforms basic functionality into a personalized typing experience through:
- Custom key remapping: Turn your Caps Lock key into an additional Escape key
- App-specific profiles: Set different behaviors for Microsoft Word versus Adobe Photoshop
- Function key customization: Make media controls permanent instead of requiring Fn key
- Battery monitoring: Receive low-battery warnings before your keyboard dies mid-task
Download the software directly from Logitech’s official site—never third-party sources—to avoid malware. The installation takes under 2 minutes and runs quietly in your system tray, consuming minimal resources.
Extend Your Wireless Range Beyond Standard Limits
Logitech advertises a 33-foot wireless range, but real-world performance often falls short due to environmental factors. Maximize your effective range with these professional techniques:
- Position the receiver vertically using a short USB extension cable
- Avoid placing keyboards on metal surfaces (common with laptop stands)
- Keep at least 8 inches clearance between the receiver and your computer’s power supply
- Use the keyboard at desk height rather than on your lap when working remotely
For home theater setups where you need maximum range, consider purchasing Logitech’s official USB extension cable designed specifically for their wireless receivers—it maintains signal integrity over longer distances than generic cables.
Maintain Reliable Connections with Proactive Battery Management
Most Logitech wireless keyboards provide battery status through subtle indicators you might miss:
- Single LED models: Solid light = good, slow blink = low, rapid blink = critical
- Multiple LED models: Number of illuminated lights indicates percentage remaining
- Logi Options+ users: Receive precise battery percentage in the system tray
Replace or recharge batteries when performance degrades—not when the keyboard dies completely. Typing becomes sluggish with low power, causing missed keystrokes during critical moments. Create a maintenance schedule based on your usage:
- Heavy users (4+ hours daily): Check monthly
- Moderate users (1-3 hours daily): Check quarterly
- Occasional users: Replace batteries annually regardless of usage
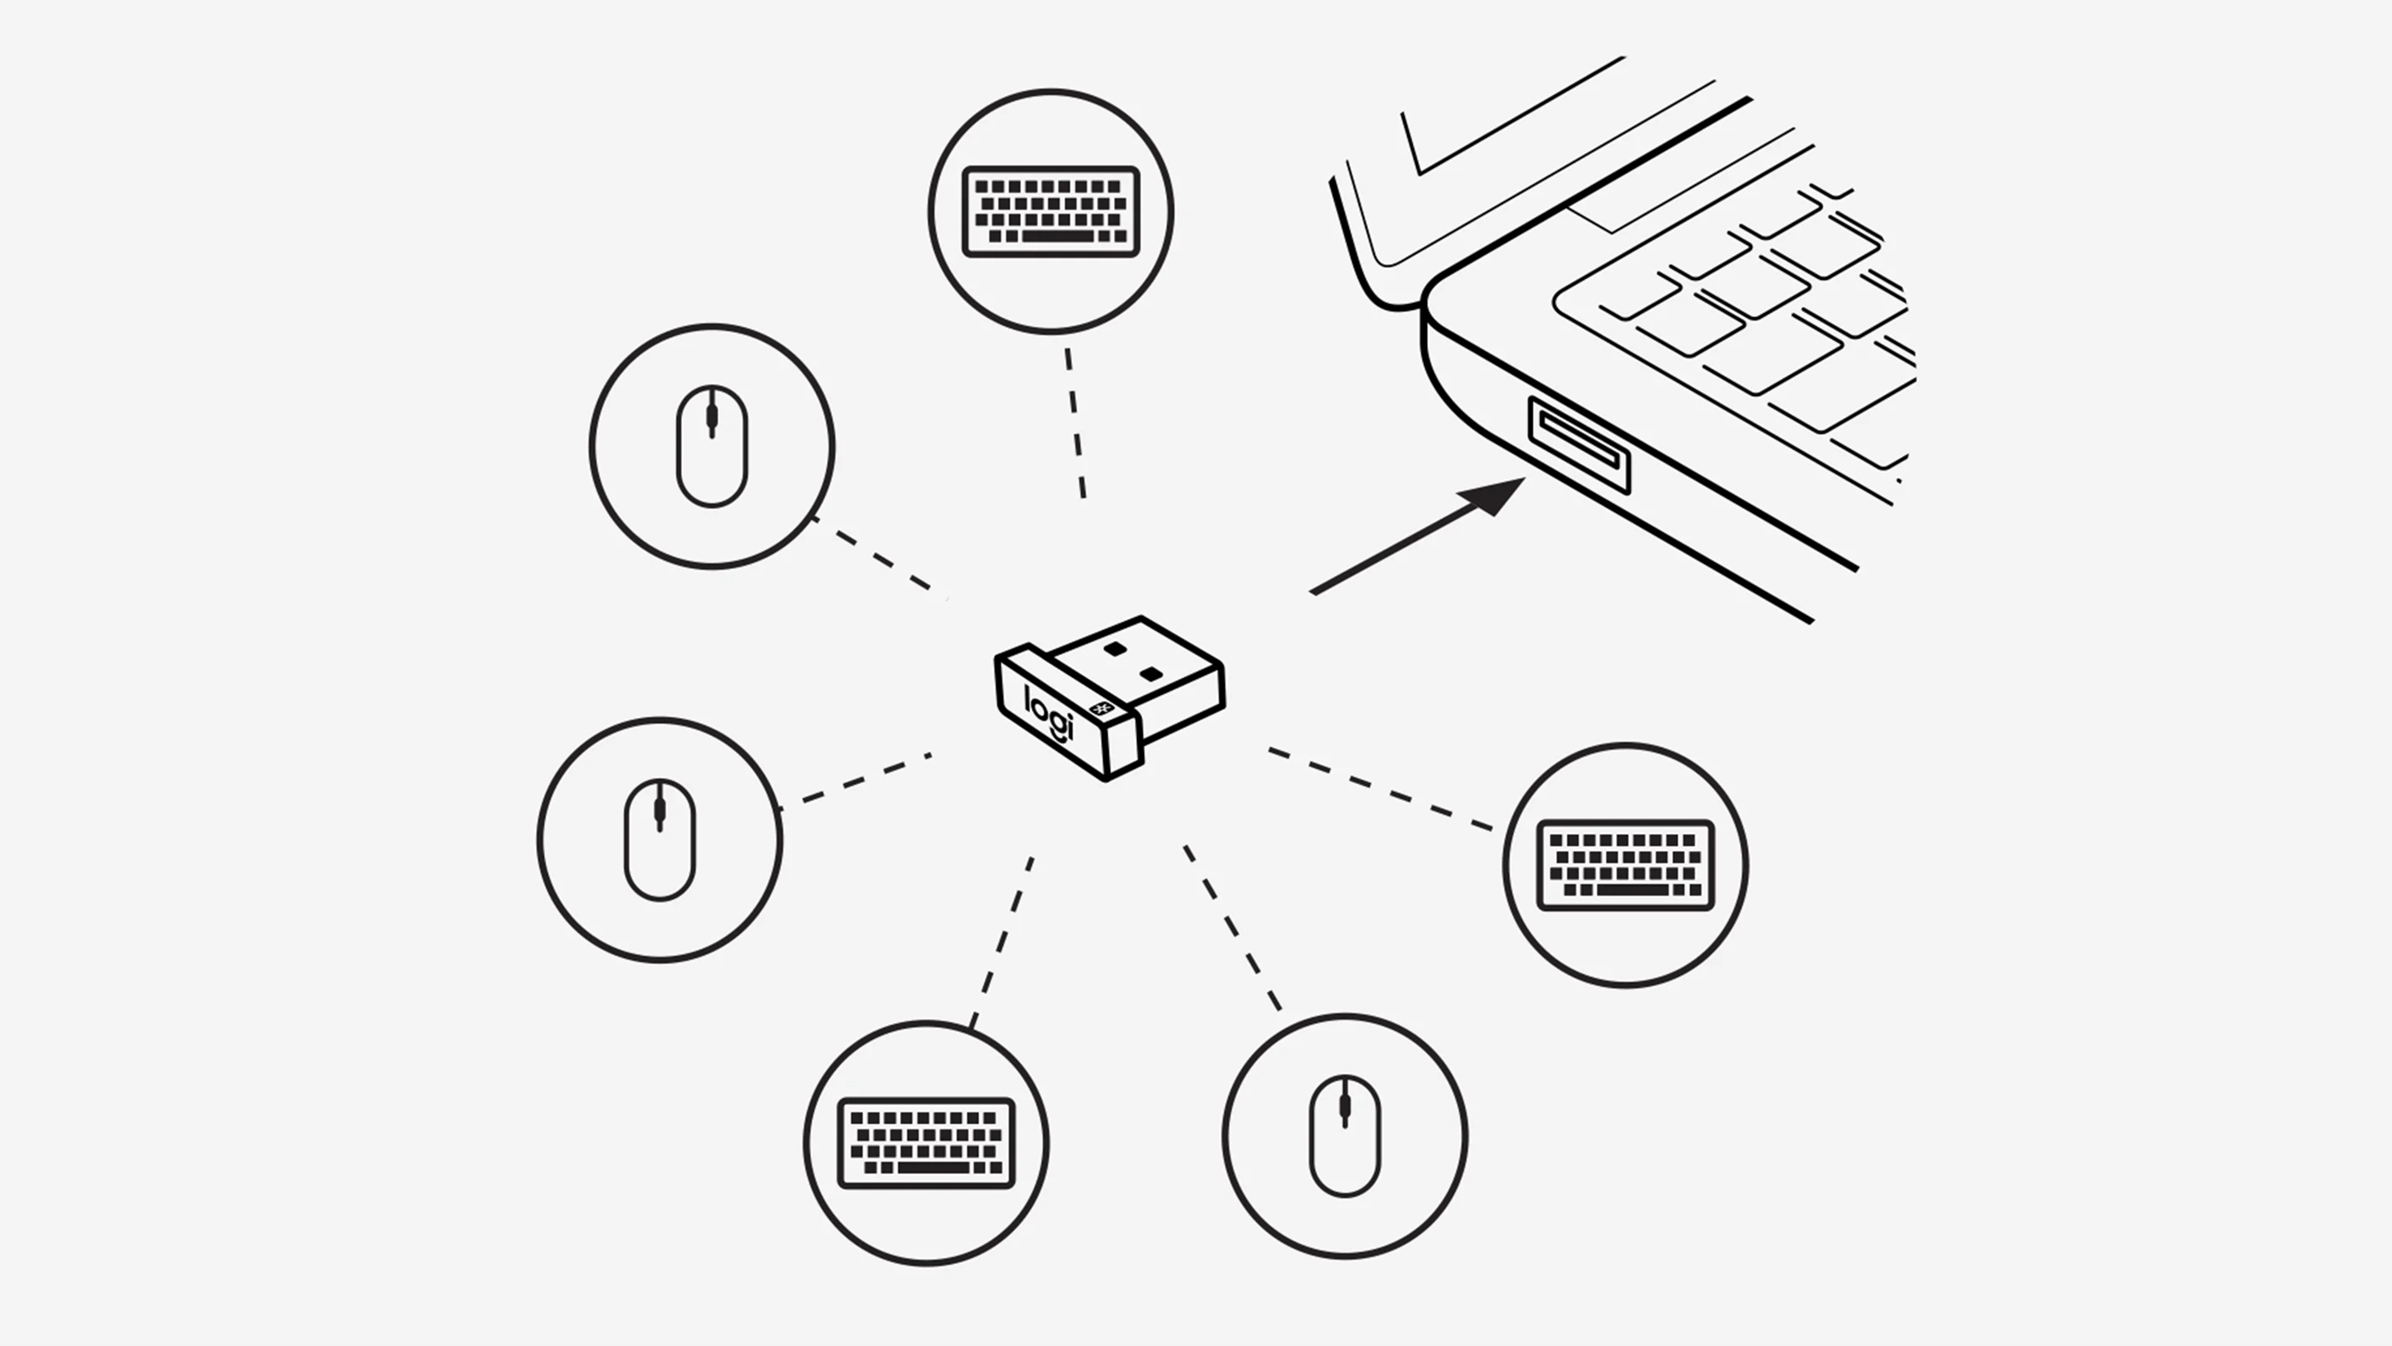
Connect Multiple Logitech Devices to One Receiver
If you own both a Logitech wireless keyboard and mouse, save USB ports by pairing both to a single Unifying receiver. The process takes just 2 minutes:
- Install Logi Options+ if not already present
- Open the application and select “Add Device”
- Follow on-screen prompts to put your second device in pairing mode
- Confirm successful connection when both devices appear in the app
This unified setup reduces USB clutter and ensures both devices maintain synchronized connection stability—when one works, the other will too.
When to Contact Logitech Support for Connection Issues
If you’ve followed all steps correctly and still experience problems, your hardware may need professional attention. Contact Logitech support immediately if:
- The keyboard works with USB cable but not wirelessly
- Receiver lights don’t illuminate on any computer
- You smell burning or see visible damage to components
- The keyboard functions intermittently even after multiple battery replacements
Have your product model number ready (usually on a label underneath the keyboard) and proof of purchase. Most Logitech wireless keyboards come with a 3-year limited warranty covering manufacturing defects.
Connecting your Logitech wireless keyboard shouldn’t require technical expertise. By following these precise steps—from proper receiver placement to battery management—you’ll maintain a rock-solid connection that lasts for years. Remember to install Logi Options+ for personalized customization and implement the battery maintenance schedule to avoid unexpected failures. Your perfectly connected keyboard awaits—just power up, pair, and start typing with confidence.


