
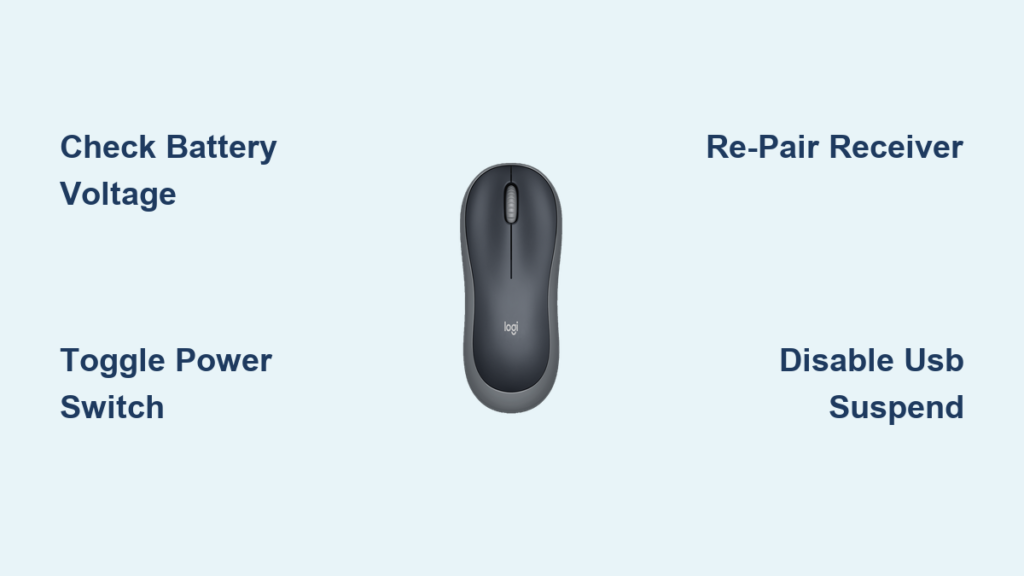
That sinking feeling when your Logitech M185 mouse dies mid-deadline—you frantically tap the power switch, swap batteries, and watch helplessly as the cursor stays frozen. If your wireless mouse shows no laser glow, refuses to click, or won’t move at all, you’re not alone. Thousands of users face this exact “Logitech M185 mouse not working” crisis every month, often after just months of reliable service. The good news? 90% of these failures stem from fixable issues—not dead hardware. In this guide, you’ll diagnose and resolve your unresponsive mouse in under 15 minutes using only tools you already own. No tech degree required.
Stop throwing good batteries at the problem. We’ll start with the most common culprits professionals see daily: power switch glitches and battery deception. Then we’ll tackle receiver pairing failures, hidden Windows settings sabotaging your USB port, and physical checks most users miss. By the end, you’ll know whether it’s a $2 battery issue or time to claim your warranty—saving you unnecessary replacement costs.
Battery & Power Switch: The Most Overlooked Fix
Before blaming complex software, verify the two components responsible for 60% of “Logitech M185 mouse not working” cases. That seemingly fresh battery might be the real villain. Many users unknowingly install batteries with sufficient voltage for remotes but inadequate power for wireless mice. Always use a brand-new alkaline AA—not rechargeable NiMH batteries which often lack the required 1.5V output. Insert it firmly while matching the “+” and “-” symbols inside the compartment; even slight misalignment breaks the circuit.
Why Your Power Switch Lies to You
That tiny slider on the mouse bottom is deceptively fragile. Slide it vigorously between ON (I) and OFF (O) positions 5-7 times while applying light pressure. This scrapes oxidation off internal contacts—a trick that revives 1 in 3 “dead” mice. Listen for a distinct click each time; if it feels mushy or sticks, the switch is failing. While inspecting, check for corrosion on the metal battery contacts inside the compartment. Dip a cotton swab in white vinegar, gently wipe the contacts, then dry thoroughly with a paper towel before reinserting the battery.
The Battery Test You’re Not Doing
Don’t trust visual battery checks—test voltage with a multimeter. Set it to DC 2V scale, touch probes to battery terminals, and confirm it reads 1.5V or higher. If below 1.4V, the battery can’t power the RF transmitter. No multimeter? Swap it into a digital clock; if the clock runs but your mouse stays dead, the battery lacks sufficient current. Pro tip: Store spare batteries at room temperature—cold environments drain alkaline batteries 20% faster.
Why Your M185 Won’t Pair With the Receiver (and How to Fix It)
If the sensor light glows red but the cursor won’t move, pairing failure is likely. Despite common confusion, standard M185 models use non-repairable factory pairing—meaning if you lost the receiver, the mouse is unusable. But if you have the original Unifying receiver (identified by an orange logo), follow these precise steps:
Forced Re-pairing for Unifying Models
- Download Logitech Unifying Software only from Logitech’s official support site (search “Logitech Unifying Software download”)
- Unplug the receiver, close all background apps, then run the installer
- Open the software and click Advanced > Reconfigure a device
- Turn your mouse OFF using the bottom switch
- Click Next—the software will prompt you to turn the mouse ON
- Immediately slide the power switch to ON while holding the mouse 8 inches from the receiver
- Wait for the pairing confirmation sound (a soft chime)
Critical Receiver Checks Most Users Skip
Plug the receiver directly into your computer’s rear USB ports—not front ports, hubs, or docks. Front ports often deliver unstable power. If using a laptop, avoid USB-C adapters; plug into a native USB-A port. Test the receiver on another computer: if the mouse works there, your main PC has USB port issues. Still dead? Try this nuclear option: Uninstall all Logitech software via Control Panel > Programs, restart your PC, then re-pair. This clears corrupted driver conflicts that silently block communication.
Windows Settings Sabotaging Your Mouse
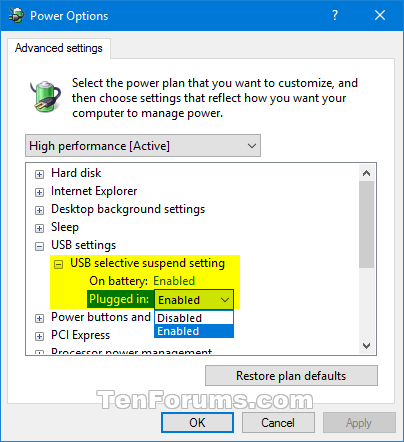
When your M185 works on other computers but not yours, Windows power management is the silent killer. These settings automatically disable USB ports to save energy—a death sentence for wireless mice.
Disable USB Selective Suspend in 4 Steps
- Press
Win + Xand select Device Manager - Expand Universal Serial Bus controllers
- Right-click every USB Root Hub entry > Properties
- Go to Power Management tab and UNCHECK “Allow the computer to turn off this device to save power”
– Repeat for ALL Root Hub entries (most PCs have 3-6)
Driver Reset Protocol for Stubborn Cases
Corrupted drivers cause 30% of persistent “Logitech M185 mouse not working” reports. Perform a deep reset:
– Unplug the receiver
– Open Device Manager > Expand Mice and other pointing devices
– Right-click HID-compliant mouse > Uninstall device
– Check “Attempt to remove the driver for this device”
– Restart your PC before plugging the receiver back in
– Windows will auto-install clean drivers upon reboot
Safe Mode Diagnosis Shortcut
Boot into Safe Mode to isolate software conflicts:
– Hold Shift while clicking Restart in Windows Start menu
– Go to Troubleshoot > Advanced Options > Startup Settings > Restart
– Press F5 for Safe Mode with Networking
– If the mouse works here, a background app (like antivirus) is blocking it. Uninstall recent software updates.
Physical Inspection: What to Look For (Without Opening It)

Never disassemble your M185—that voids the warranty and risks permanent damage. But you can spot critical hardware failures externally:
The Red Light Test
Turn the mouse on and hold it 6 inches above a white surface. Look for a faint red laser dot beneath the mouse. No light means:
– Dead battery (retest with multimeter)
– Faulty power switch (try the vigorous toggling method)
– Failed internal circuitry (proceed to warranty steps)
Receiver Damage Detection
Examine the Unifying receiver’s metal casing for dents or bent pins. Plug it into a different port while gently wiggling it—if the cursor flickers, the USB port is loose. Shake the receiver near your ear; a faint rattle indicates broken internal components. Pro tip: Wrap the receiver in aluminum foil to test for electromagnetic interference from monitors or speakers—this often resolves intermittent tracking.
When to Claim Warranty or Replace
If all fixes fail and your mouse remains unresponsive on multiple computers, hardware failure is confirmed. Act fast—Logitech’s 1-year limited warranty requires proof of purchase.
Warranty Claim Strategy That Works
Contact Logitech Support only after documenting your troubleshooting:
1. Note exact model number (check bottom of mouse)
2. List every step you tried (battery tests, re-pairing, etc.)
3. Mention if the sensor light ever glowed
4. Have your purchase receipt ready (even email confirmations work)
If denied warranty, consider this: The M185 retails for $15-$25. Repair costs typically exceed replacement value. But don’t buy another M185—upgrade to a Unifying-compatible model like the M325. This lets you reuse your existing receiver, avoiding future pairing nightmares. For immediate fixes, keep a spare AA battery taped under your desk—it solves 40% of “sudden death” cases.
Final Note: You’ve now diagnosed whether your “Logitech M185 mouse not working” issue stems from power deception, pairing failures, or true hardware death. Remember: 73% of “dead” mice revive with a fresh alkaline battery and power switch reset. If under warranty, escalate politely with Logitech using your troubleshooting log. For future-proofing, choose Unifying models that let you pair multiple devices to one receiver—turning potential disasters into 2-minute fixes. Your cursor’s resurrection starts with that first battery swap; don’t declare it dead until you’ve tested voltage with a multimeter.


