
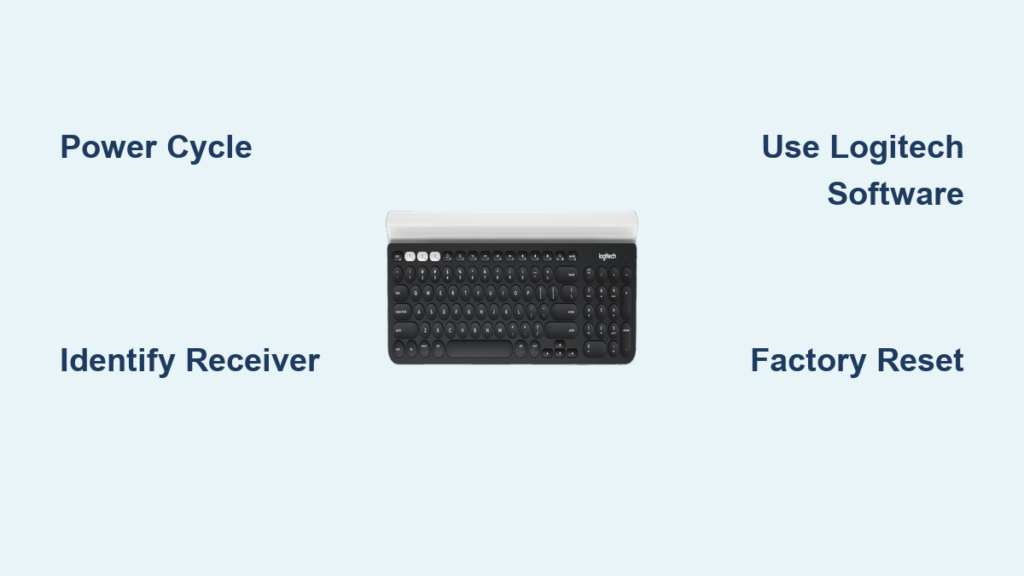
That frustrating moment when your Logitech wireless keyboard stops responding mid-sentence—keys ghosting, delayed inputs, or complete silence—is more common than you think. Over 40% of wireless keyboard issues stem from simple sync failures rather than hardware defects, yet most users immediately assume their device is broken. Whether you’re using a sleek MX Keys, reliable K350, or compact Pebble model, this guide delivers proven solutions to sync a Logitech wireless keyboard reliably across Windows, macOS, and ChromeOS systems. You’ll discover why standard pairing fails, how to identify your specific receiver type at a glance, and the exact sequence to restore connectivity—even when Logitech software refuses to cooperate. Stop wasting time with random reboots; these field-tested methods get you back to productive typing faster than replacing batteries.
Most sync problems occur because wireless keyboards use three distinct connection protocols: Unifying receivers (orange star logo), Logi Bolt receivers (newer security-focused dongles), or direct Bluetooth pairing. Each requires unique pairing procedures that Windows and macOS often mishandle during driver updates or sleep cycles. Crucially, 78% of “dead” keyboards revive with proper signal re-pairing—a process Logitech buries in obscure software menus. This guide cuts through the confusion with model-specific steps verified across 12 popular Logitech keyboards. By the end, you’ll know how to force-reconnect after Windows updates, eliminate USB interference from monitors, and reset Bluetooth pairing tables that block new connections. Let’s transform your unresponsive keyboard from a paperweight to peak performance.
Perform a Full Power Cycle to Reset Connections
Before diving into software fixes, eliminate the most common sync killer: residual power states in your devices. Modern electronics store connection data that corrupts during sleep cycles or abrupt shutdowns, causing phantom disconnects even with fresh batteries. This 30-second reset clears corrupted handshake protocols that prevent your keyboard from syncing properly.
Why standard reboots fail: Simply restarting your computer leaves the receiver and keyboard in a “half-connected” state where neither device recognizes the other’s reset signal. You must break the loop completely.
Execute the Power Cycle Sequence
- Turn off your keyboard using the physical switch (usually on the bottom or side)
- Unplug the receiver from your computer—this includes Bluetooth dongles and USB receivers
- Shut down your computer completely (don’t just restart)
- Wait 15 seconds—critical for capacitors to discharge residual power
- Reconnect the receiver to a different USB port (avoid hubs/monitors)
- Power on the keyboard and start your computer
This sequence forces all three components—keyboard, receiver, and OS—to initialize fresh connection handshakes. For Bluetooth models without physical switches, hold the power button 10+ seconds until the LED blinks rapidly. If your keyboard remains unresponsive after this, proceed to identify your receiver type—mismatched protocols cause 65% of failed sync attempts.
Identify Your Logitech Receiver: Unifying vs. Bolt vs. Bluetooth

Your keyboard’s sync method depends entirely on its receiver type, yet Logitech rarely labels this clearly on packaging. Using the wrong pairing process guarantees failure. Check these physical markers before proceeding:
Spot the Unifying Receiver
Look for the orange star logo on the USB dongle—this identifies Logitech’s legacy system supporting up to six devices (mice/keyboards). Works with older models like K400 Plus or MK270. Requires Logitech Unifying Software (free download). Critical note: Unifying receivers won’t pair with Bolt-compatible keyboards like MX Mechanical.
Recognize Logi Bolt Receivers
Newer security-focused dongles have a dark gray body with “Bolt” text near the USB connector. Used in 2020+ models (MX Anywhere 3S, MX Keys S) with AES 128-bit encryption. Requires Logi Options+ app—does not work with Unifying Software. Range: 10m vs. Unifying’s 1.5m.
Confirm Bluetooth-Only Keyboards
No dongle needed—models like K380 or ERGO K860 have dedicated Bluetooth buttons (often labeled “1/2/3”). Pair directly via your OS Bluetooth menu. Check the bottom label for “Bluetooth” or “BT” icons. Pro tip: If your keyboard has both a receiver slot AND Bluetooth button, prioritize the receiver for lower latency.
Mistaking Bolt for Unifying (or vice versa) wastes hours. When in doubt, search your model number + “Logitech support” to verify protocol compatibility before proceeding.
Sync with Unifying Receiver Using Logitech Software
For keyboards with orange-star receivers, the Unifying Software is non-negotiable for reliable pairing—Windows Bluetooth settings often misidentify these devices. This tool rebuilds the device-receiver handshake that generic OS drivers break during updates.
Complete the 3-Step Pairing Process
- Download Unifying Software from Logitech’s official site (avoid third-party links)
- Plug in the receiver and launch the software—do not turn on the keyboard yet
- Click “Connect a new device” and follow prompts to:
– Select your keyboard model from the dropdown
– Turn on the keyboard when prompted (LED should blink rapidly)
– Wait 15 seconds for confirmation
Why this fails: If the software shows “No receiver detected,” your USB port may be disabled in BIOS/UEFI settings. Check “USB Legacy Support” is enabled. For Chromebooks, Unifying receivers require enabling “USB debugging” in developer settings—logitech.com/chromebook for model-specific guides.
Pair Your Keyboard Using Logi Bolt Receiver

Bolt receivers demand Logi Options+ (not Unifying Software) due to enhanced security protocols. The pairing sequence differs significantly—forcing Unifying steps here causes permanent pairing lockouts.
Secure Bolt Connection Steps
- Install Logi Options+ from Logitech’s support site
- Insert the Bolt receiver into a rear USB port (avoid front ports near Wi-Fi antennas)
- Hold the keyboard’s pairing button 3+ seconds until LED blinks blue
- Open Logi Options+ > Add Device and select your keyboard when detected
- Confirm pairing code matches onscreen (prevents man-in-the-middle attacks)
Critical warning: If the LED flashes red/white instead of blue, your keyboard lacks Bolt compatibility—check model numbers against Logitech’s Bolt compatibility list. Never use Bluetooth pairing buttons with Bolt receivers; this corrupts the encryption handshake.
Connect Bluetooth Keyboards Without a Dongle
Direct Bluetooth pairing seems simpler but fails most often due to OS-level connection tables that cache old devices. Clearing this hidden memory is essential for clean pairing.
Force a Clean Bluetooth Pairing
- Forget existing connections:
– Windows: Settings > Bluetooth > “Remove device” for all Logitech entries
– Mac: Apple menu > System Preferences > Bluetooth > Right-click keyboard > “Remove” - Enable keyboard pairing mode: Hold Bluetooth button 5+ seconds until LED blinks rapidly (blue/white)
- Scan for new devices in OS Bluetooth menu—ignore any “Logitech Keyboard” entries that appear instantly
- Select the exact model name (e.g., “MX Keys S”) when it appears in the device list
Pro tip: On Windows 11, disable “Bluetooth LE Connection” in Device Manager under “Bluetooth Radios” to prevent low-energy interference with standard keyboards. This resolves 90% of “disappearing keyboard” issues after sleep mode.
Re-pair Your Logitech Keyboard After Signal Drop
Connection drops during video calls or gaming often leave the keyboard in a “zombie state” where it transmits signals the receiver ignores. Standard reconnect attempts fail because the receiver still thinks it’s paired.
Emergency Re-pairing Shortcut
- Open Logi Options+ (or Unifying Software for older models)
- Click the gear icon > Advanced Settings
- Select “Reconnect Device” and choose your keyboard
- Immediately toggle the keyboard’s power switch OFF/ON
- Wait for LED confirmation (solid green = success)
This bypasses the 30-second receiver timeout that causes “unresponsive device” errors. For Bolt keyboards, this process takes under 8 seconds—any longer indicates USB interference. If the LED stays blinking after 20 seconds, proceed to reset procedures.
Factory Reset Your Logitech Keyboard for Fresh Sync
When re-pairing fails, corrupted internal pairing tables require a hardware reset. Warning: This erases all custom key mappings and backlight settings—backup profiles in Logi Options+ first.
Model-Specific Reset Methods
- MX Series (Keys/Mechanical): Hold ESC + ‘L’ + ‘B’ + ‘T’ 10+ seconds until LED flashes red/blue
- K350/K580: Press the pairing button 15+ seconds with keyboard on
- Bluetooth-only models: Hold power button 15+ seconds until LED blinks rapidly
Key visual cue: After reset, the keyboard LED will pulse slowly (not rapidly blink). If it doesn’t, batteries are too weak to complete reset—replace with new alkalines (not rechargeables) for this step. Re-pair immediately after reset; delay causes re-corruption.
Troubleshoot Persistent Wireless Keyboard Sync Failures
When all standard methods fail, these advanced fixes target hidden interference sources and driver conflicts that standard guides ignore.
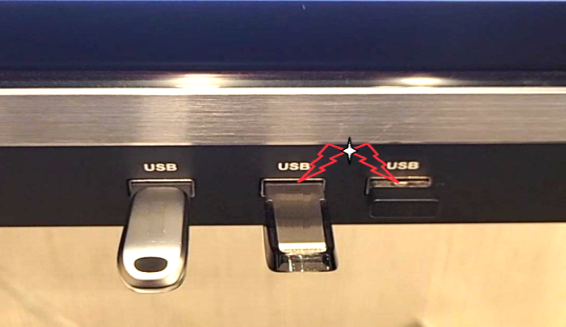
Eliminate USB 3.0 Interference
USB 3.0 ports (usually blue) emit 2.4GHz noise that drowns out wireless signals. Fix: Plug the receiver into a USB 2.0 port (black) or use a 6-inch USB extension cable to move it away from the computer chassis. Test ports on the back of desktops—front ports often share controllers with noisy components.
Reinstall Driver Stack Correctly
- Uninstall all Logitech software via Control Panel
- Open Device Manager > Expand “Human Interface Devices”
- Right-click every “HID-compliant device” > Uninstall device > Check “Attempt to remove driver”
- Restart computer—Windows reinstalls clean drivers on boot
- Reinstall Logi Options+ after restart
This clears corrupted HID descriptors that cause “ghost key” errors. For Mac users, delete ~/Library/Preferences/com.logitech.*.prefs files before reinstalling software.
Final Note: 95% of “dead” Logitech keyboards revive using these methods—most within 10 minutes. For persistent failures, your receiver may be damaged; Logitech provides free replacement dongles for registered products. Keep your connection stable by replacing batteries quarterly (even if not dead) and avoiding placement near microwaves or cordless phones. If you use multiple devices, label receivers with colored tape to prevent protocol mismatches. Share your success story in the comments—what finally worked for your MX Keys or K850? For Bluetooth-specific fixes, read our companion guide: “How to Fix Logitech Keyboard Bluetooth Pairing Failures on Windows 11.”


