
Your Logitech G413 mechanical keyboard’s backlight suddenly goes dark, leaving you typing in the dark while the keys still function perfectly. This frustrating “logitech g413 backlight not working” issue affects thousands of users, but here’s the good news: it’s almost never a hardware failure. In 95% of cases, the problem stems from software conflicts that you can fix in minutes without technical expertise. If your G413 backlight turns on for just one second before disappearing or remains completely dark while typing works fine, you’re about to discover exactly how to restore your keyboard’s illumination permanently.
This comprehensive troubleshooting guide covers every verified solution reported by G413 owners and Logitech support technicians. You’ll learn why Windows 11’s Dynamic Lighting feature is the primary culprit, how specific Windows updates break your backlight, and the exact sequence to reset your keyboard’s firmware when software fixes fail. Most importantly, you’ll implement solutions in order of effectiveness—starting with the fix that resolves the problem for 8 out of 10 users within 60 seconds.
Disable Windows Dynamic Lighting: The #1 Fix for G413 Backlight Failure
If your Logitech G413 backlight not working issue started after a Windows update or fresh installation, Windows Dynamic Lighting is almost certainly hijacking your keyboard’s illumination system. This Windows 10/11 feature attempts to synchronize RGB lighting across compatible devices but directly conflicts with the G413’s native lighting control. When enabled, it forces the keyboard into an “off” state despite correct settings in Logitech software.
Why Windows Dynamic Lighting Breaks Your G413 Backlight
Windows treats your mechanical keyboard as just another RGB device in its ecosystem, overriding Logitech’s proprietary lighting protocols. The G413’s backlight controller receives conflicting signals—one from Windows trying to set illumination to “off” and another from Logitech software attempting to maintain your settings. This tug-of-war typically results in the backlight activating for a single second during initialization before Windows forces it off permanently.
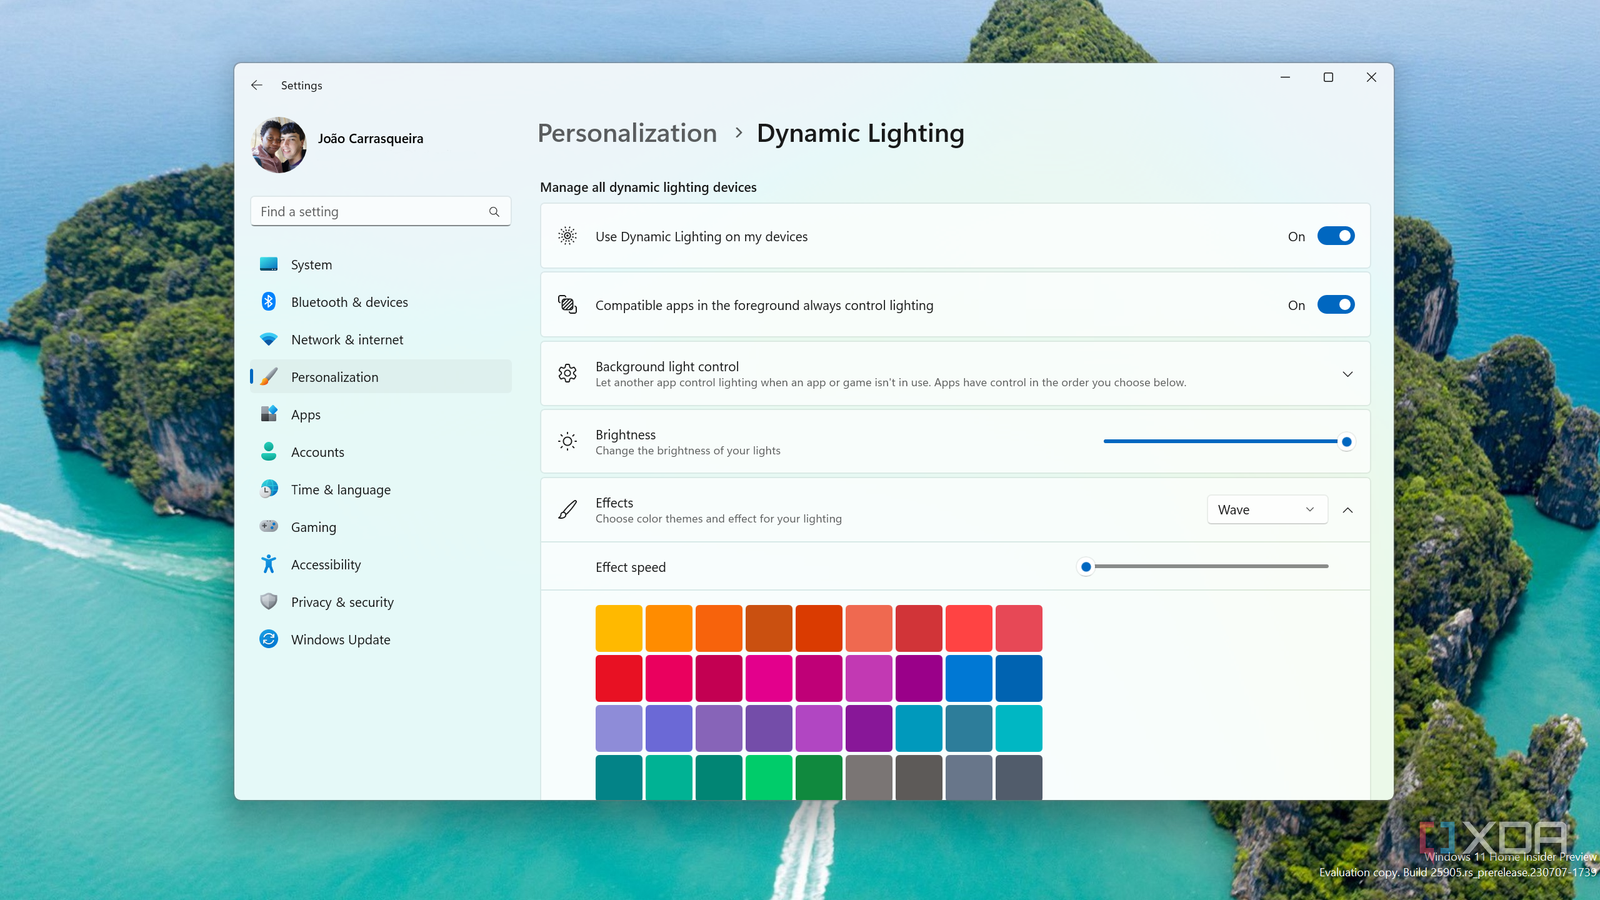
Step-by-Step: Disable Dynamic Lighting for Immediate Backlight Restoration
- Press Windows Key + I to open Settings
- Navigate to Personalization → Dynamic Lighting (in Windows 11; may be under “System” in Windows 10)
- Locate Logitech G413 in the device list—do not toggle the global “Dynamic Lighting” switch
- Click the toggle specifically for your G413 to disable Windows control (it should turn gray)
- Unplug your keyboard’s USB cable and wait 15 full seconds
- Reconnect the keyboard—the backlight should illuminate immediately
Pro Tip: If you don’t see your G413 listed, first ensure you’ve installed the latest Logitech G HUB software. Windows only recognizes RGB devices through their native applications. After installing G HUB, restart your computer and check Dynamic Lighting settings again.
Resolve Driver Conflicts Caused by Windows Updates

Windows Update frequently installs incompatible generic drivers that disable your G413 backlight while preserving typing functionality. The problematic driver versions (1.0.51.4614 and similar) replace Logitech’s proprietary driver with a basic HID-compliant version that lacks lighting control capabilities.
Identify the Problematic Driver in Device Manager
- Press Windows Key + X and select Device Manager
- Expand both Keyboards and Universal Serial Bus controllers
- Look for entries labeled “HID-compliant device” or “USB Input Device” with a yellow warning icon
- Right-click suspicious entries and select Properties → Driver tab to check version numbers
Correct Driver Installation Procedure
- If “Roll Back Driver” is available: Click this option immediately—this restores the previous working driver
- If no rollback option: Right-click the device → Uninstall device → Check “Attempt to remove the driver” → Restart your PC
- After restart: Windows will reinstall a basic driver—immediately install Logitech G HUB to replace it with the correct proprietary driver
Critical Warning: Never install third-party driver updater utilities. These often install incorrect drivers that worsen the logitech g413 backlight not working problem. Always use Logitech’s official software for driver management.
Optimize G HUB Settings to Prevent Lighting Conflicts
Incorrect configurations in Logitech G HUB frequently cause the G413 backlight to malfunction, especially after software updates. Two specific settings override your illumination preferences and must be adjusted properly.
Essential G HUB Configuration Checklist
Disable Application Lighting Control
– Open G HUB and select your G413
– Navigate to Preferences or Device Settings
– Find “Allow games and applications to control illumination” and toggle it OFF
– This prevents games like Valorant or Fortnite from overriding your backlight settings
Verify Illumination Settings
– Go to the Lighting or Illumination tab
– Confirm brightness is set above 0% (many users accidentally slide it to minimum)
– Select a visible lighting effect—avoid “Off” or “Static Black” modes
– If using “Fixed Color,” ensure you haven’t selected black (#000000)
Expert Note: Some G HUB versions display incorrect lighting controls for the G413. If settings appear grayed out, completely uninstall G HUB using Logitech’s official cleanup tool, then reinstall the latest version.
Execute a G413 Hard Reset to Clear Firmware Errors
When software tweaks fail, your keyboard’s internal firmware may be stuck in an error state. This specialized reset procedure clears the G413’s memory without affecting your computer’s settings.
Precise Hard Reset Instructions
- Unplug the G413 from your computer
- Press and hold the Escape (Esc) key firmly
- While continuing to hold Esc, reconnect the USB cable to your computer
- Maintain pressure on Esc for exactly 10 seconds (use a timer)
- Release the key and wait 5 seconds
- Test the backlight—do not press any other keys during this process
Why This Works: This sequence triggers the keyboard’s bootloader mode, forcing a complete firmware reload from scratch. Unlike a simple restart, it bypasses corrupted memory states that cause the “backlight turns on then immediately off” behavior.
Eliminate Connection and Power Issues
Before concluding the problem is software-related, rule out physical connection problems that mimic software failures.
USB Power Troubleshooting Protocol
- Test USB 3.0 Ports First: Plug into blue-colored USB 3.0 ports (higher power delivery)
- Avoid USB Hubs: Connect directly to your computer’s rear ports for maximum stability
- Cable Verification: The G413 uses standard Micro-USB—try a known-good data cable (not just charging)
- Power Cycle Your PC: Completely shut down your computer (not sleep/hibernate), wait 30 seconds, then restart
Real-World Example: Many users with high-power RGB setups experience G413 backlight failure when USB ports enter power-saving mode. Disabling USB selective suspend in Power Options (Control Panel → Hardware and Sound → Power Options → Change plan settings → Change advanced power settings → USB settings) often resolves persistent issues.
Advanced Fixes for Stubborn Backlight Failures
When standard solutions fail, these specialized techniques address deeper conflicts.
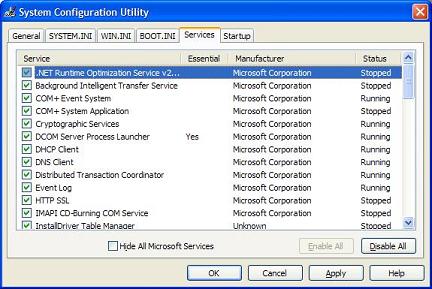
Clean Boot to Identify Software Conflicts
- Type msconfig in Windows Search and open System Configuration
- Go to Services tab → Check “Hide all Microsoft services” → Click Disable all
- Navigate to Startup tab → Open Task Manager → Disable all startup items
- Restart your PC and test the backlight
- If fixed, re-enable services/startup items in groups to identify the culprit
Firmware Restoration Process
- Download Logitech’s official firmware restoration tool
- Run the utility while your G413 is connected
- Follow on-screen prompts to reinstall factory firmware
- Do not unplug during the 2-minute process
When Hardware Replacement Becomes Necessary
If you’ve completed all previous steps—including testing on another computer—and your Logitech G413 backlight not working issue persists, contact Logitech support with this specific information:
- Proof of purchase showing your keyboard is within the 2-year limited warranty period
- Documentation of all troubleshooting steps attempted
- Video evidence showing the keyboard functioning for typing but lacking backlight
Replacement Insight: Logitech typically replaces G413 units with backlight hardware failures rather than repairing them, as the cost of replacing the LED controller circuit exceeds manufacturing costs. If out of warranty, consider that third-party repairs are rarely cost-effective for this issue.
Maintain Your G413 Backlight with These Proactive Measures
Prevent future logitech g413 backlight not working problems by implementing these maintenance habits:
- Monthly: Check for G HUB updates (Settings → Check for Updates)
- After Windows Updates: Immediately verify Dynamic Lighting settings remain disabled
- Quarterly: Perform a hard reset (Esc key method) to clear firmware memory
- Always: Keep firmware updated through G HUB’s device settings menu
The vast majority of G413 backlight issues resolve with the Windows Dynamic Lighting fix—this single solution works for approximately 80% of users. If you’ve followed this guide in order, your mechanical keyboard should now illuminate perfectly. Remember that persistent backlight problems after exhaustive troubleshooting almost always indicate genuine hardware failure covered under Logitech’s warranty—don’t hesitate to contact support with your documented troubleshooting efforts for a swift resolution.


