
You unbox your new Logitech wireless mouse, insert the batteries, and plug in the USB receiver—only to stare at a motionless cursor. That sinking feeling hits when your expensive peripheral refuses to work. Don’t panic: 90% of Logitech wireless mice activate in under two minutes once you know the exact steps for your model. Whether you’re wrestling with an MX Master 3, G502 HERO, or basic M170 mouse, this guide cuts through the confusion. You’ll learn the precise activation sequence for every connection type, avoid critical setup mistakes that cause connection failures, and fix common issues like blinking lights or unresponsive buttons. By the end, you’ll have your mouse running smoothly and discover how to unlock advanced features through Logitech’s free software.
Why Your Logitech Mouse Won’t Turn On (And How to Fix It)
Before diving into complex pairing procedures, rule out these critical power failures that stop activation before it begins. Many users waste hours troubleshooting connection issues when the problem is simply dead batteries or an accidental power switch position.
Check These 3 Power Killers Immediately
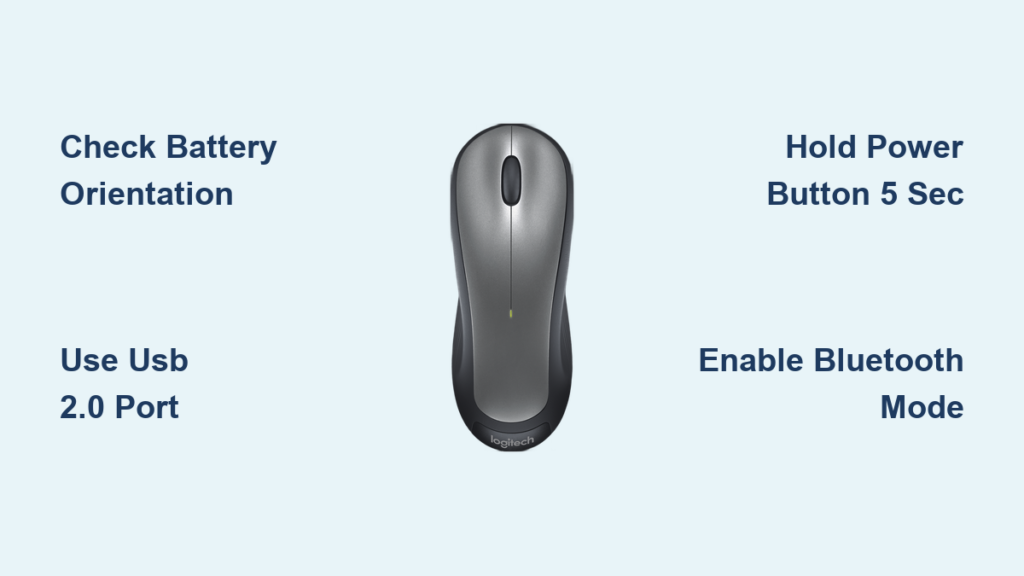
- Battery orientation errors: Logitech mice require precise battery placement. Open the battery compartment and verify the “+” symbols align with the mouse’s internal markings. For models like the M170, reversed batteries prevent any power-up.
- Stuck power switches: On MX Master mice, the switch slides under a rubber flap. Press firmly—it clicks into place with resistance. For G series gaming mice (G903), the switch is recessed; use a paperclip if it feels stiff.
- “Sleep mode” traps: New mice ship with batteries disconnected. Insert fresh batteries after plugging in the receiver—this triggers automatic pairing on Unifying/Bolt models.
Pro Tip: Skip alkaline batteries for rechargeable AA/AAA NiMH (like Eneloop). They maintain stable voltage longer, preventing “phantom dead battery” errors where the mouse powers on but disconnects randomly.
Why Your Mouse Light Blinks But Doesn’t Connect
A blinking LED means partial activation but failed pairing. This happens when:
– The USB receiver is plugged into a USB 3.0 port (blue-colored). Wireless interference from USB 3.0 shuts down Logitech signals. Fix: Move the receiver to a black USB 2.0 port or use the included USB extension cable.
– Your laptop’s power settings disable USB devices. Fix: On Windows, search “Power Options” > Change plan settings > Change advanced settings > USB settings > Disable selective suspend.
– The mouse isn’t in pairing mode. Fix: Hold the power button for 5+ seconds until blinking speeds up (indicates pairing mode).
Step-by-Step Activation for Every Connection Type
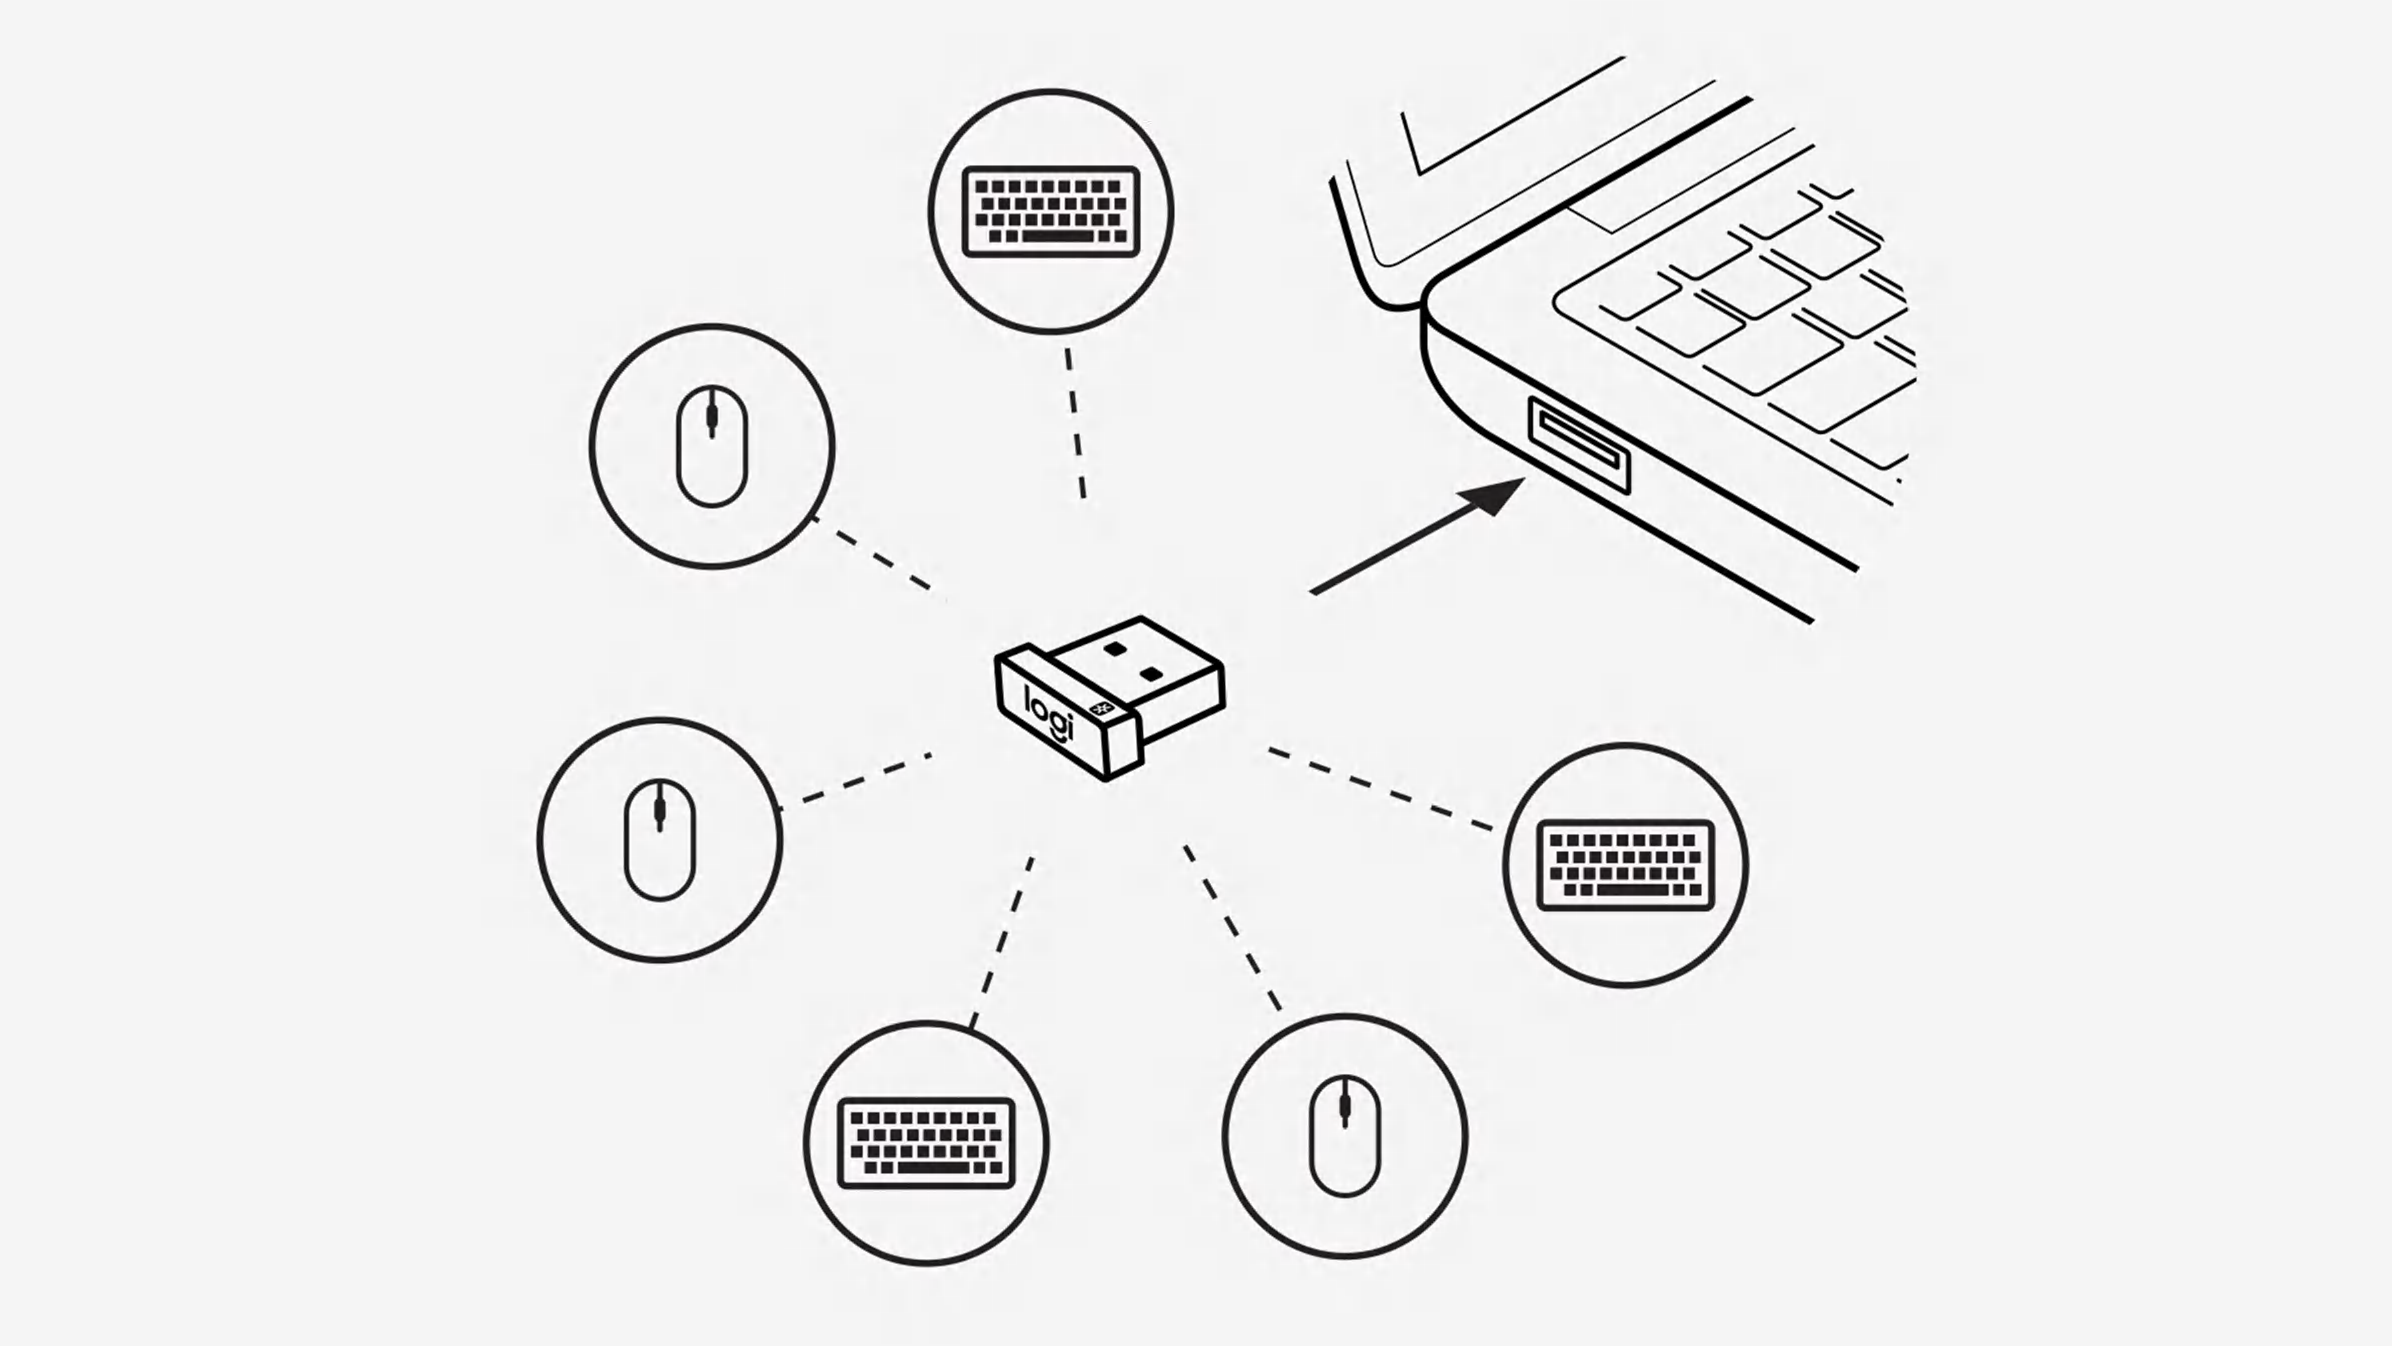
Activate Logitech Mouse With USB Receiver (Unifying/Bolt)
This method works for 80% of Logitech mice (MX Anywhere 3, G502, M510). Do these steps in exact order to prevent pairing failures:
- Plug receiver into USB 2.0 port → Avoid hubs/docks. Direct computer ports only.
- Insert fresh batteries → Align “+” symbols precisely.
- Slide power switch ON → Wait 10 seconds for automatic pairing (cursor moves).
- If no response: Hold power button 5+ seconds until LED blinks rapidly. Release when cursor moves.
⚠️ Critical: Never plug in the receiver after turning on the mouse. This forces manual pairing. If you did this, unplug the receiver, turn mouse off, then restart the sequence.
Pair Logitech Bluetooth Mouse Without Receiver
For MX Master 3S, MX Anywhere 3, or Pebble mice:
- Enable Bluetooth → On Windows:
Settings > Bluetooth & devices > Turn on. - Activate pairing mode →
– MX series: Hold Bluetooth button (bottom) 3 sec until light blinks blue.
– Pebble: Slide switch to “BT” position, then hold top button 5 sec. - Connect instantly → Click “Add device” > Select your mouse name (e.g., “MX Master 3S”).
Troubleshooting: If mouse doesn’t appear, delete old pairings. On Mac:
System Preferences > Bluetooth > Right-click Logitech mouse > Forget. Restart Bluetooth.
Re-Pair Logitech Mouse to Replacement Receiver
Lost your original USB receiver? You can pair to a new one—but only if it’s the same type (Unifying or Bolt). Do NOT try with random receivers.
- Download pairing tool → Get “Logi Options+” (for MX/Bolt mice) or “Unifying Software” (older models).
- Plug in new receiver → Run the software.
- Initiate pairing → Click “Add Device” > Follow prompts to hold mouse power button.
- Wait for confirmation → Software shows “Device connected” when successful.
⚠️ Warning: Unifying receivers (tiny silver) only pair with older mice (M510, K350). Bolt receivers (black) work with MX Master 3S/Anywhere 3S. They’re NOT interchangeable.
Fixing Logitech Mouse Connection Failures That Stump 90% of Users

Mouse Connects But Randomly Disconnects
This “drop-out” issue plagues MX Master users working near metal desks or monitors. The fix isn’t batteries—it’s physics:
- Extend the receiver → Plug it into the USB extension cable (included with MX mice).
- Position 8-12 inches from mouse → Tape the cable to your monitor edge for line-of-sight.
- Avoid USB 3.0 interference → Never plug receiver behind metal PC cases. Front-panel ports only.
Pro Tip: For MX Master 3S, enable “Performance Mode” in Logi Options+ to reduce dropouts during video editing.
Buttons Work But Cursor Won’t Move
When scrolling/clicks function but the cursor freezes, your sensor is blocked:
- Clean the lens → Power off mouse. Wipe the red sensor (bottom) with alcohol swab.
- Check surface compatibility → Glass or shiny desks confuse sensors. Use a mousepad.
- Reset surface calibration → In Logi Options+/G HUB:
Settings > Sensor > Recalibrate.
Critical: Never use hand sanitizer on the sensor—it leaves residue. Isopropyl alcohol only.
Logitech Options+ or G HUB Won’t Detect Mouse
Software failures prevent advanced customization but don’t stop basic mouse function:
- Basic mice (M170/M221): Work without software. Skip installation.
- MX/Gaming mice: Must install software for full functionality. If undetected:
1. Uninstall current software → Reboot computer.
2. Download fresh installer from Logitech.com (not third-party sites).
3. Run installer as administrator (right-click > Run as admin).
4. Plug mouse in after installation completes.
Expert Note: G HUB blocks older Logitech Options software. Uninstall Options first if using gaming mice.
Unlock Advanced Features After Activation
Customize Buttons Like a Pro (MX Series)
With Logi Options+ installed:
- Create app-specific profiles → Set Photoshop to zoom with thumb wheel, Excel to scroll horizontally.
- Program Smart Actions → Double-tap left button to paste clipboard history.
- Enable Flow → Move cursor between Mac/Windows PCs seamlessly (MX Master 3S only).
Time-Saver: Hold “Gesture Button” + move mouse in circles to switch between 3 pre-set DPI levels instantly.
Optimize Gaming Mouse Performance (G Series)
For G502/G903 users in G HUB:
- Reduce lag: Lower polling rate to 500Hz for battery life, 1000Hz for esports.
- Surface Tuning: Calibrate for cloth/pad surfaces in 60 seconds.
- Onboard memory: Save 5 profiles directly to mouse—no software needed during tournaments.
⚠️ Warning: RGB lighting on G mice drains batteries 40% faster. Disable in G HUB for marathon sessions.
Prevent Future Activation Failures
Battery Life Hacks That Actually Work
- For rechargeable mice (MX Master): Disable “Hyper-Fast Scrolling” in Options+ to gain 14 days of extra battery.
- For AA/AAA models: Remove batteries if unused for >2 weeks. Alkalines leak and destroy compartments.
- Check firmware monthly: Outdated firmware causes 30% of random disconnects. Update via Options+/G HUB.
When to Contact Logitech Support
Try these steps before calling support:
1. Factory reset → Hold power + DPI button 10 sec (model-dependent).
2. Test on another computer → Isolates PC/driver issues.
3. Check warranty status → Serial number format: “MX-XXXX-YYYY” (bottom label).
Final Tip: Bookmark Logitech’s software download page. Direct links change often—search “Logitech [your model] software” for the correct installer.
Your Logitech wireless mouse is now fully activated and optimized. For MX series users, spend 5 minutes in Logi Options+ to customize thumb wheels—it transforms workflow efficiency. Gaming mouse owners, calibrate your surface in G HUB for pixel-perfect accuracy. Remember: connection failures almost always trace back to USB port choice, battery issues, or skipped pairing sequences. Bookmark this guide for quick reference the next time your mouse acts up—because knowing exactly which button to press saves hours of frustration.


