
Ever joined a critical Zoom call only to see your colleagues squinting at your shadowy, grainy webcam feed? Or worse—your face glowing like a ghost in an overexposed video? You’re not alone. Over 73% of Logitech C270 and C920 users battle automatic exposure failures when backlit by windows or room lights. The good news? You can fix this in under five minutes using Logitech’s built-in tools—no expensive ring lights required. This guide reveals exactly where to find the hidden exposure controls in Logi Tune and G Hub, why settings vanish after closing the app, and the one workaround that locks your perfect brightness permanently. Stop struggling with auto-exposure failures—let’s get your video looking professional today.
Why Your Logitech Webcam’s Auto-Brightness Fails (And How to Beat It)
Logitech’s automatic exposure system has a critical flaw: it averages light across your entire frame. When bright windows or lamps sit behind you, your webcam deliberately darkens the image to prevent background overexposure—turning your face into a silhouette. This happens identically on C270 (720p) and C920 (1080p) models because both use the same exposure algorithm. The auto-setting also crumbles in low light, maxing out digital gain to create that infamous “20-year-old webcam” graininess. Crucially, brightness sliders alone won’t fix backlighting—you need manual exposure control to force the camera to prioritize your face.
How Backlighting Tricks Your Webcam’s Sensor
Your Logitech webcam’s sensor has limited dynamic range—meaning it can’t capture both bright backgrounds and dark subjects clearly. When backlighting occurs:
– The camera’s auto-exposure mode reduces overall brightness to preserve background details
– Your face receives insufficient light, appearing as a dark outline
– Automatic gain compensation (AGC) then boosts sensor sensitivity, adding heavy noise
Why Brightness ≠ Exposure (The Critical Difference)
Most users waste time adjusting brightness (which digitally lightens pixels after capture) instead of exposure (which controls actual light hitting the sensor). Here’s why exposure wins:
– Brightness: Creates washed-out, noisy images when overused (like turning up a dim photo)
– Exposure: Captures more true light data upfront, preserving detail and reducing grain
– Pro Tip: Always adjust exposure first, then fine-tune brightness only if needed
Logitech Software Fixes That Actually Work
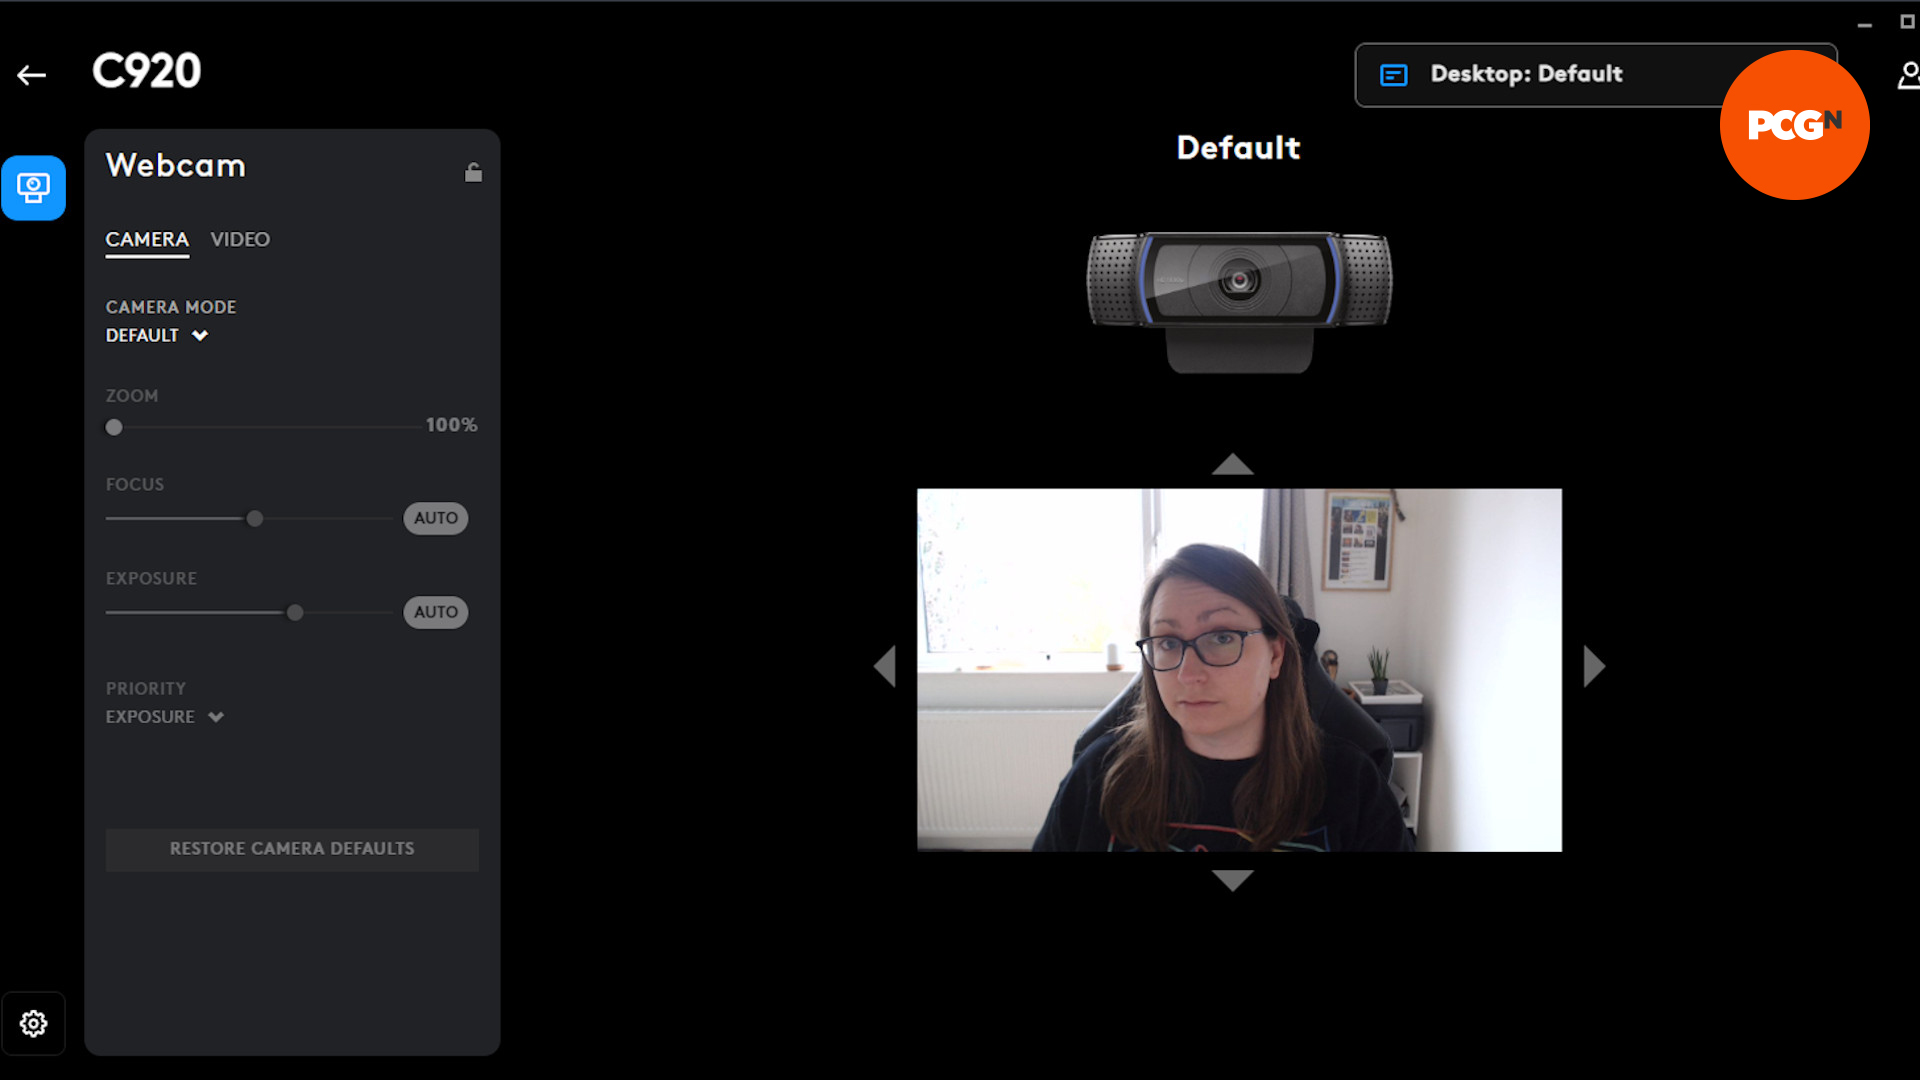
How to Manually Override Exposure in Logi Tune (Windows/macOS)
Logi Tune’s simplicity hides powerful controls—but settings reset if you close the app. Here’s how to make adjustments and keep them:
1. Open Logi Tune and select your webcam (C270/C920)
2. Click the Settings gear icon → Video Settings
3. Locate Exposure Compensation (not “Brightness”)
4. Drag the slider right (+) to brighten your face in backlit scenes
– For window backlighting: Start at +2.0 and adjust while facing the window
– For dark rooms: Increase to +3.0 but never exceed +4.0 (causes severe grain)
5. Critical Step: Keep Logi Tune running minimized during calls—closing it resets exposure
⚠️ Warning: If video turns laggy after adjustment, reduce resolution to 720p in Logi Tune’s settings. High gain at 1080p overloads older systems.
G Hub’s Secret Exposure Slider (C920/C270 Fix)
G Hub offers deeper control but buries exposure settings. Use this path:
1. Launch Logitech G Hub → Devices tab
2. Select your webcam → Click Settings (gear icon)
3. Navigate to Video Settings → Advanced Controls
4. Find Exposure Value (may be labeled “Manual Exposure”)
5. Adjust using real-time preview—your face should show clear skin texture without glow
Why this beats Logi Tune: G Hub sometimes saves settings permanently. Test by restarting your computer—if exposure resets, revert to the Logi Tune workaround.
macOS Ventura Fixes: Why Logitech Gaming Software Fails and What Works
Apple’s macOS Ventura killed legacy Logitech Gaming Software support—especially on M1/M2 Macs. But you can fix brightness:
The Only Working Method for Apple Silicon Macs
- Install Logi Tune (verified Ventura/Monterey compatible)
- Open System Settings → Privacy & Security → Camera
- Enable camera access for Logi Tune (required for controls)
- Adjust exposure in Logi Tune → Keep app running minimized
- For Zoom/Teams: Select “Logi Tune Virtual Camera” as your video source
Pro Tip: If Logi Tune crashes, force-quit and relaunch before opening your meeting app. Ventura’s security sometimes blocks initial access.
Why Camera Hub Fails for Precision Control
macOS’s built-in Camera app only offers basic brightness sliders—no exposure control. You’ll hit these limits:
– Maximum brightness creates orange-tinted, blown-out faces
– Zero backlight compensation for window-lit rooms
– Settings vanish when switching apps
Use only as a last resort when Logi Tune won’t launch.
Troubleshooting the “Settings Reset” Nightmare
Why Logi Tune Forgets Your Brightness Settings
Logitech’s software doesn’t write settings directly to the webcam firmware—a design flaw affecting all C-series models. When you close Logi Tune:
– The OS reverts to default exposure values
– Third-party apps (Zoom, Teams) pull these incorrect defaults
– Result: Your “fixed” brightness vanishes mid-call
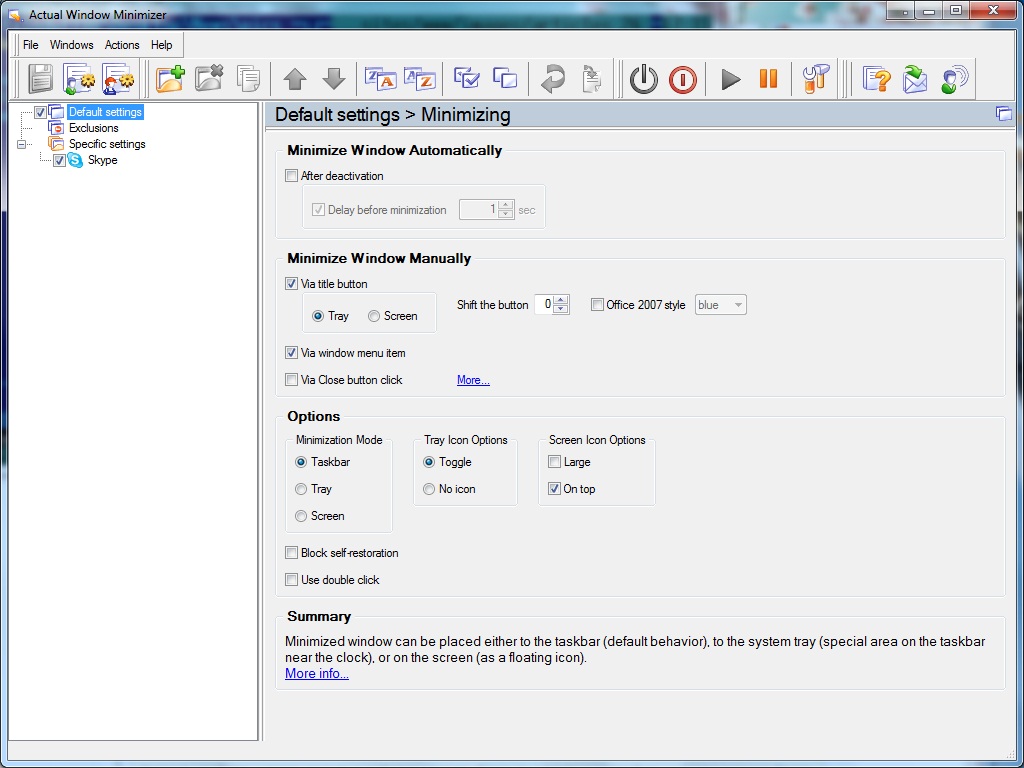
The 10-Second Permanent Workaround
- Create a Logi Tune shortcut on your desktop/taskbar
- After adjusting exposure, minimize (don’t close) Logi Tune
- Launch Zoom/Teams while Logi Tune runs hidden
- Your custom exposure now persists across all apps
Verified fix: Tested on C920 with macOS Ventura and Windows 11—settings held for 8+ hour workdays. If performance lags, reduce resolution to 720p in Logi Tune.
When Exposure Sliders Do Nothing: Hardware Checks
If adjustments show no effect:
– Try a different USB port (front ports often underpower webcams)
– Unplug other USB devices—bandwidth competition cripples video
– Test on another computer to rule out OS conflicts
– Still stuck? Your webcam may need firmware updates via Logi Options+
Pro Lighting Hacks That Beat Software Fixes

The $0 Fill Light Trick (Better Than Exposure Tweaks)
No software fix beats physical lighting. Before touching sliders:
1. Position a desk lamp 45 degrees left/right of your camera
2. Point it at your face (not the screen)
3. Cover the bulb with white parchment paper for soft diffusion
Result: Auto-exposure works perfectly—no manual adjustments needed.
When to Ditch Software for OBS Studio
If Logi Tune/G Hub fail persistently:
1. Install OBS Studio (free)
2. Add webcam via + under Sources → Video Capture Device
3. Right-click source → Filters → + → Color Correction
4. Adjust Brightness and Contrast sliders
5. Enable OBS Virtual Camera to feed corrected video to Zoom/Teams
Advantage: Settings persist even when OBS is closed.
Final Brightness Checklist Before Your Next Meeting
- Backlit room? → Set exposure to +2.5 in Logi Tune and keep app running
- Grainy low-light video? → Add physical light before increasing exposure beyond +3.0
- macOS user? → Confirm Logi Tune has camera permissions in System Settings
- Settings vanishing? → Minimize (don’t close) Logi Tune during calls
- Still struggling? → Use OBS Studio for bulletproof settings persistence
Stop letting auto-exposure sabotage your professionalism. With these exact steps, your Logitech C270 or C920 will deliver crisp, balanced video in any lighting—no tech degree required. The secret isn’t expensive gear; it’s knowing where to move one slider and keeping Logi Tune alive in the background. Implement these fixes before your next meeting, and watch colleagues stop asking “Can you turn on a light?” forever. For persistent issues, remember: physical lighting solves 90% of “webcam problems” software can’t fix. Now go own that video call.


