
That frustrating moment when you unbox your new Logitech Extreme 3D Pro joystick, plug it in, and realize your flight simulator won’t recognize it properly—it’s enough to ground your virtual aviation dreams before takeoff. The truth is, connecting a Logitech joystick to your PC involves more than simple plug-and-play; Windows only installs basic drivers that won’t unlock your stick’s full potential. Without proper configuration through Logitech’s official software, you’ll miss out on essential features like button remapping, profile switching between games, and precise calibration critical for flight simulators. In this guide, you’ll learn exactly how to connect Logitech joystick to PC with professional-level setup that works flawlessly in Microsoft Flight Simulator, DCS World, and other demanding games—saving you hours of troubleshooting and ensuring smooth, responsive control from your first virtual flight.
Plug in Your Logitech Extreme 3D Pro and Install Essential Software
The physical connection is just the beginning—your Logitech joystick needs the right software ecosystem to function properly. While Windows 10 and 11 will automatically recognize your Extreme 3D Pro with generic drivers (you’ll hear the connection sound and see a notification), this basic setup only lets your PC see the device as a standard game controller without advanced functionality.
Why Generic Windows Drivers Aren’t Enough for Full Functionality
Windows’ built-in drivers provide minimal functionality—your joystick will move a cursor or control basic in-game movement, but you won’t be able to customize button assignments, create game-specific profiles, or fine-tune axis sensitivity. Critical features like macro programming for complex flight sequences (battery on, avionics, etc.) require Logitech’s official software. The generic driver lacks the ability to adjust dead zones for aging joysticks that drift slightly off-center, which is essential for precision in flight simulators where even minor input errors can send your aircraft off course.
Step-by-Step Logitech G HUB Installation (Preventing Driver Conflicts)
Follow this sequence to avoid common installation pitfalls:
- Uninstall legacy software first: If you have older Logitech Gaming Software (LGS) installed, completely remove it through Windows Settings > Apps to prevent conflicts with the newer G HUB platform
- Download from official source: Visit Logitech’s support website and download the latest Logitech G HUB installer—never use third-party download sites
- Install with joystick disconnected: Run the installer while your Extreme 3D Pro remains unplugged to prevent driver conflicts during installation
- Launch G HUB before connecting: Open Logitech G HUB first, then plug in your joystick—this ensures proper device detection
- Verify recognition: Your joystick should appear in G HUB’s device list within 10-15 seconds of connection
Pro Tip: If G HUB doesn’t detect your joystick, restart your PC with the joystick unplugged, then launch G HUB before reconnecting the device—this clears any residual driver conflicts.
Calibrate Your Joystick for Precision Control in Flight Simulators
Without proper calibration, your aircraft will drift uncontrollably or respond sluggishly to stick inputs—common issues that frustrate new flight sim pilots. Calibration maps your physical stick movements to precise digital inputs, compensating for mechanical variations in your specific joystick.
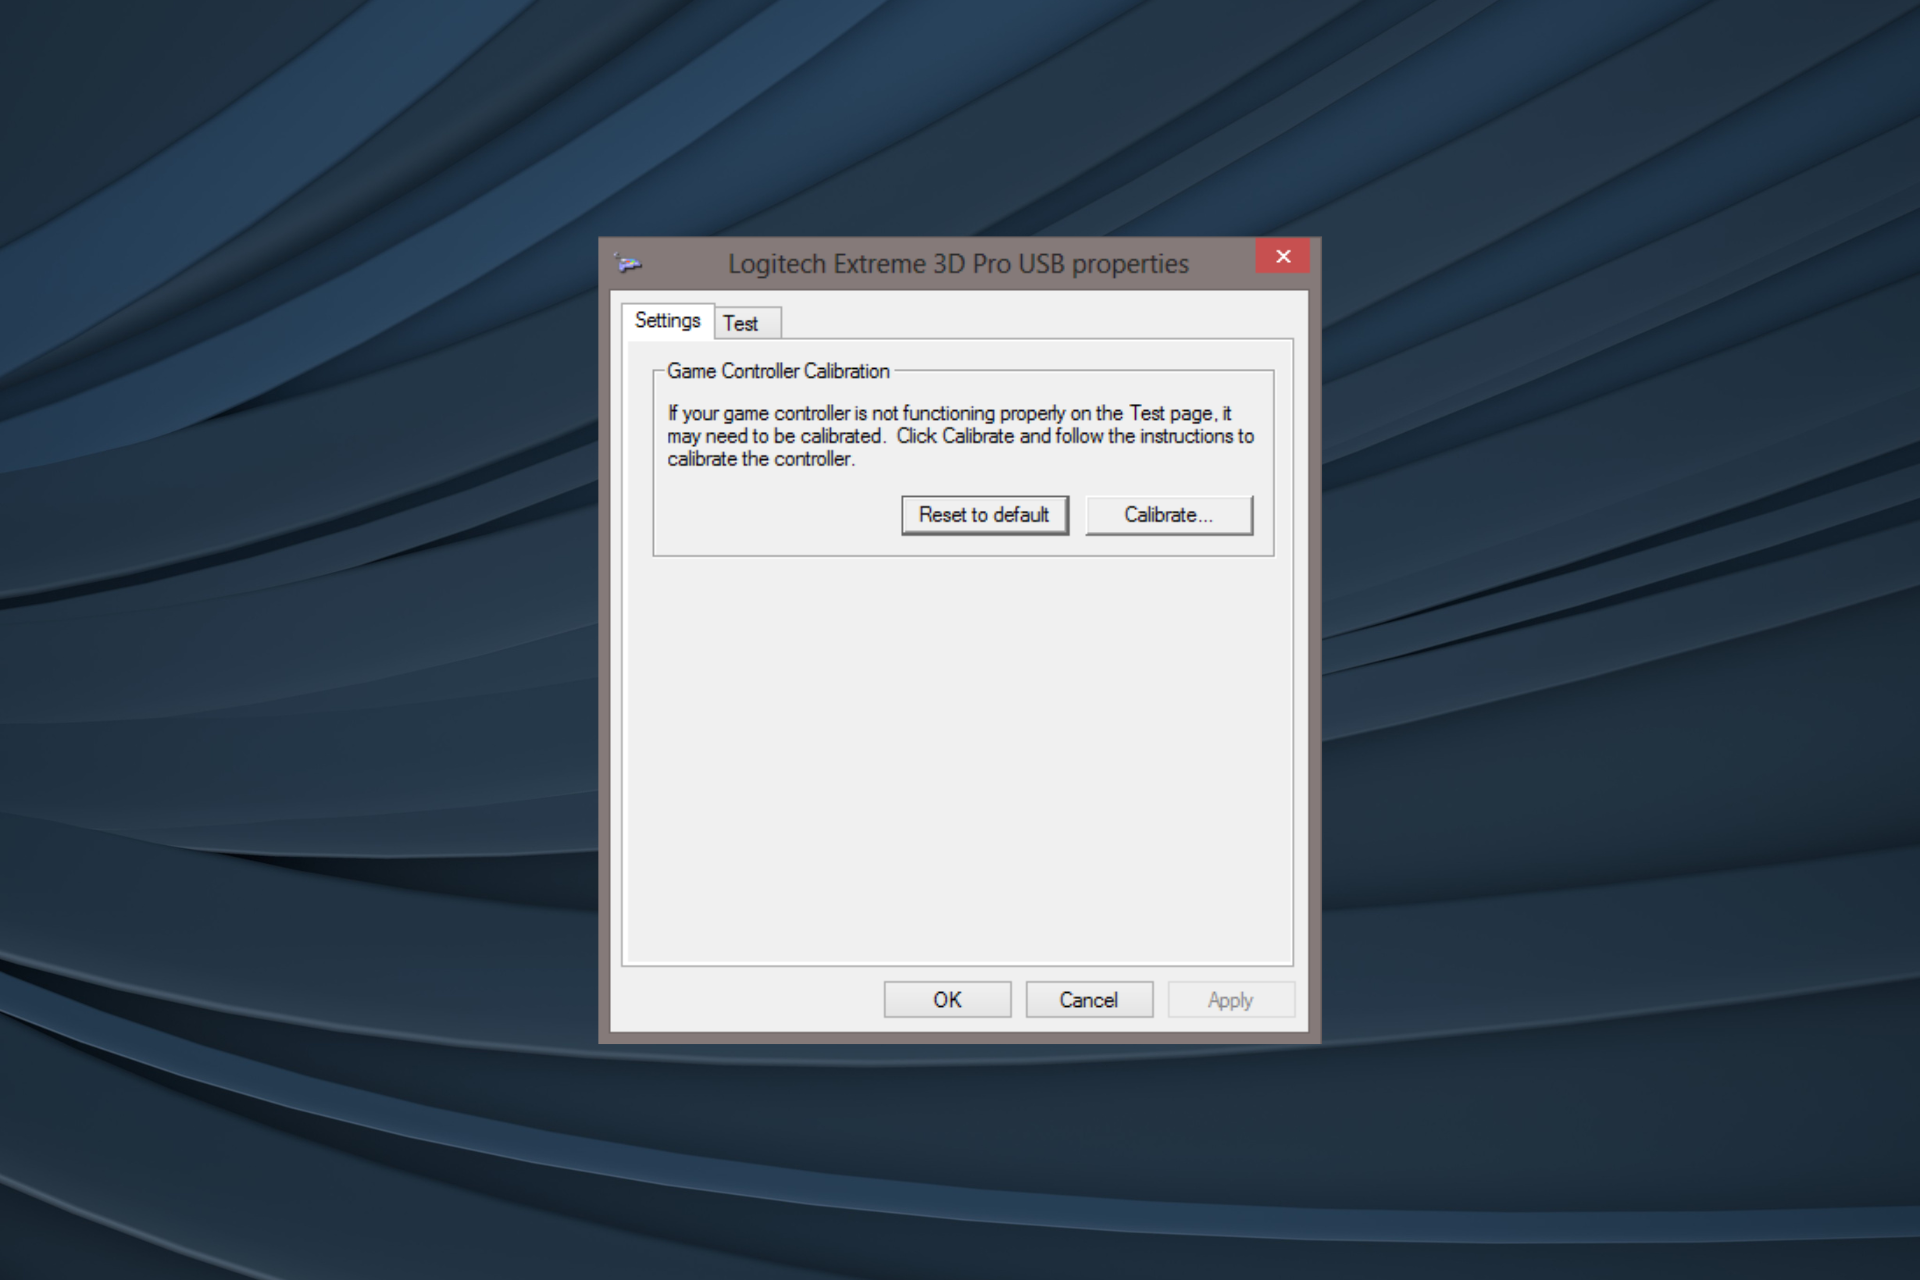
Windows joy.cpl Calibration Wizard: Step-by-Step Process
- Press Windows key + R, type
joy.cpl, and hit Enter to open Game Controllers - Select your Logitech Extreme 3D Pro and click Properties
- Go to the Settings tab and click Calibrate
- Follow the on-screen instructions precisely:
– Move the stick through full forward/backward and left/right motions when prompted
– Rotate the twist axis (rudder) through its complete range
– When asked to center the stick, release it completely and keep your hands off—don’t hold it in position
– Move the throttle lever through its full range
Critical Warning: Many users fail calibration by touching the stick during the centering phase—this is the #1 cause of persistent drift issues in flight simulators.
Setting the Perfect Dead Zone for Your Logitech Stick
A properly set dead zone ignores minor stick movements when centered, preventing unwanted aircraft movement:
- For new joysticks: Set 3-5% dead zone in both Windows calibration and your flight simulator
- For older sticks showing drift: Increase to 7-10% to compensate for spring tension wear
- In Microsoft Flight Simulator: Options > Controls > Sensitivity > adjust “Dead Zone” sliders
- In DCS World: Equipment > Controls > Axis Settings > modify “Dead Zone” values
Pro Tip: Test dead zone settings in a simple aircraft like the Cessna 172—your plane should hold straight and level flight with hands completely off the stick.
Program Custom Button Mappings with Logitech G HUB
The real power of your Logitech joystick emerges when you customize button assignments beyond what games offer natively. G HUB transforms your 12-button Extreme 3D Pro into a versatile control hub that adapts to each game you play.
How to Assign Keyboard Keys and Macros to Joystick Buttons
- In Logitech G HUB, select your joystick from the device list
- Click any button on the on-screen joystick diagram
- Choose from three assignment types:
– Keystroke: Map to any keyboard key (e.g., Button 1 = “E” for eject)
– Mouse: Assign mouse clicks or movements
– Macro: Create sequences (e.g., Button 2 = press F1, wait 1s, press F2 for aircraft startup)
Common Flight Sim Assignments:
– Pinky trigger: Hat switch for view control
– Top buttons: Weapon selection or landing gear
– Base buttons: Radio communication or autopilot functions
Creating Game-Specific Profiles for MSFS, DCS World, and More
G HUB’s profile system automatically switches configurations when you launch different games:
- Click the “+” icon next to Profiles in G HUB
- Name your profile (e.g., “DCS A-10C”)
- Configure all buttons and axes for that specific aircraft
- Click the game icon next to your profile and select the executable file (e.g., dcs.exe)
- Repeat for each game/simulator
Expert Note: For complex aircraft like the DCS F-14, create multiple profiles—one for carrier operations with specific button mappings, another for air-to-air combat.
Configure Your Joystick in Flight Simulator Games

Even with perfect hardware setup, your game must recognize and properly map your joystick inputs. This final configuration layer ensures your physical controls translate accurately to in-game actions.
Microsoft Flight Simulator 2020/2024 Control Setup
- Launch MSFS and go to Options > Controls
- Under “Control Profile,” select your Logitech Extreme 3D Pro
- Click “Reset to Recommended” for a solid baseline configuration
- Fine-tune in the “Sensitivity” menu:
– Adjust “Pitch” and “Roll” response curves for smoother handling
– Set “Throttle” to “Exponential” for better low-speed control
– Verify “Rudder” is assigned to your stick’s twist axis
Time-Saving Shortcut: In MSFS 2024, use the “Auto-Detect” feature under Controls—it often sets up basic axis mappings correctly on first run.
DCS World Axis and Button Configuration Guide
DCS requires more manual configuration but offers superior control precision:
- In DCS main menu, go to Options > Controls
- Select your aircraft (e.g., A-10C Warthog)
- Under “Device,” select your Logitech joystick
- Map critical axes:
– Pitch: Y-Axis (forward/backward stick)
– Roll: X-Axis (left/right stick)
– Rudder: Z-Axis (twist)
– Throttle: Slider Axis - Assign buttons to in-game functions through the “Assign” menu
Pro Tip: For the A-10C, map the hat switch to “Sight Cursor” for precise weapon aiming—this works better than mouse control in combat situations.
Troubleshoot Logitech Joystick Connection Failures
Even with careful setup, connection issues can ground your virtual flights. These targeted solutions address the most common problems Logitech joystick users face.
“Joystick Not Detected” Fixes: USB Ports, Drivers, and Power Management
When Windows doesn’t recognize your device:
- Try direct USB ports: Connect to a rear motherboard USB port instead of front panel or hub ports
- Disable USB power management: In Device Manager, find your joystick > Properties > Power Management > uncheck “Allow computer to turn off this device”
- Reinstall drivers: Right-click device in Device Manager > Uninstall device > unplug/replug joystick
- Test on another PC: Isolates whether the issue is with your joystick or PC configuration
Critical Warning: If using a USB 3.0 port (usually blue), try a USB 2.0 port instead—some older Logitech joysticks have compatibility issues with USB 3.0 controllers.
Solving Button Mapping and Calibration Issues
When buttons don’t respond or stick drifts:
- Recalibrate in both G HUB and Windows: Sometimes one calibration overwrites the other
- Check for software conflicts: Temporarily disable other input software like vJoy or Joystick Gremlin
- Reset to default profile: In G HUB, select “Default” profile to eliminate custom mapping errors
- Test with different games: Determines if the issue is game-specific or system-wide
Pro Tip: If your stick consistently drifts left, clean the internal potentiometers with contact cleaner—this often resolves mechanical wear issues in older Extreme 3D Pros.
Connect Logitech Joystick to Remote PCs and Cloud Gaming
For cloud gaming or remote desktop setups, standard USB connection won’t work—you need specific USB forwarding configuration to make your Logitech joystick function properly on remote systems.
USB Forwarding Setup for Shadow PC and Parsec
To connect your Logitech joystick to services like Shadow PC:
- Launch remote client first: Open Parsec, Shadow, or Remote Desktop before connecting your joystick
- Enable USB device sharing: In Parsec, click the USB icon in the top-right; in Shadow, go to Settings > Input
- Select your joystick: From the list of available USB devices, choose “Logitech Extreme 3D Pro”
- Verify recognition: Check the remote system’s Device Manager or
joy.cplto confirm detection
Critical Warning: Most remote services require you to re-enable USB forwarding each session—create a desktop shortcut to the USB settings for quick access before gaming.
By following these precise steps, you’ve transformed your Logitech joystick from a basic plug-and-play device into a finely calibrated flight control system. Remember to recalibrate every 2-3 months as mechanical components wear, and always check for G HUB updates that may improve compatibility with new flight simulators. The difference between a frustrating control experience and seamless virtual flight comes down to these configuration details—now that you know how to connect Logitech joystick to PC properly, you’re ready for smooth takeoffs, precise landings, and immersive combat missions in any flight simulator. Before your next virtual flight, spend five minutes verifying your calibration and profile settings—this small investment ensures every stick movement translates perfectly to your aircraft’s response.


