
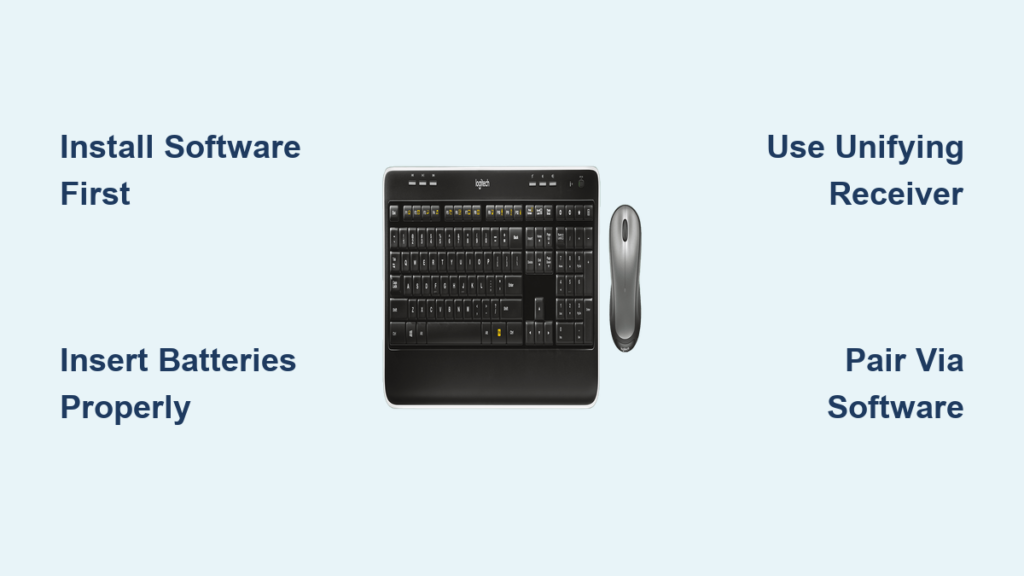
That frustrating moment when you unbox your new Logitech K520 wireless keyboard and mouse combo only to find it won’t connect can derail your entire workday. You’re not alone—thousands of users face the same setup confusion each month. The good news is that connecting your Logitech K520 keyboard to computer systems is straightforward once you know the exact sequence of steps. Unlike basic plug-and-play peripherals, the K520 requires specific pairing procedures using the Logitech Unifying receiver. This guide cuts through the confusion with a precise, step-by-step process that works for both Windows and macOS users. You’ll have your keyboard typing smoothly within minutes, not hours.
Most connection issues stem from skipping one critical step in the pairing process or using outdated software. The K520’s Unifying receiver technology is powerful but demands proper initialization. Whether you’re setting up a brand new keyboard or troubleshooting an existing connection problem, this guide covers every scenario. I’ll walk you through the exact hardware preparation, software installation, and pairing sequence that Logitech technicians use. No more guessing about battery placement, USB port selection, or software configuration—just clear instructions that deliver results.
Logitech K520 Keyboard Hardware Requirements Checklist
Before attempting any connection steps, verify you have all necessary components. Missing even one item will prevent successful setup. The K520 requires specific hardware that differs slightly between keyboard and mouse components.
Essential Components for Successful Connection
Your K520 setup demands these exact items:
– Logitech K520 keyboard with power switch (located on bottom)
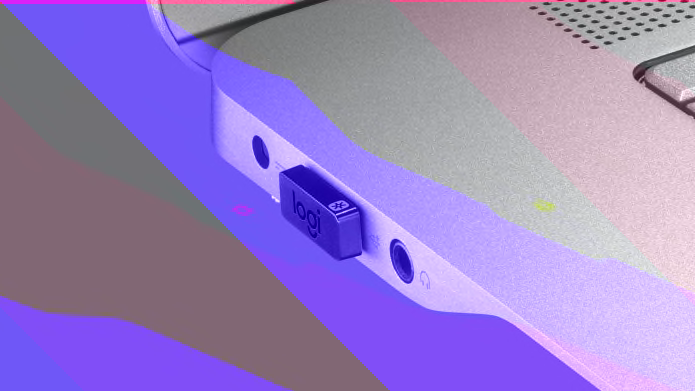
– Logitech Unifying receiver (small USB dongle, not Bluetooth)
– Two AAA batteries for the keyboard (alkaline recommended)
– Computer with USB port (Windows 7+, macOS 10.10+, or Chrome OS)
– Internet connection for software download
Critical verification step: Flip your keyboard over and check for the “Unifying” logo near the power switch. This confirms your model uses the receiver technology rather than Bluetooth. The standard K520 does not support Bluetooth—this is a common misconception that leads to failed setup attempts.
Step 1: Installing Logitech Unifying Software Before Connection
Installing the Unifying software first prevents 90% of connection failures. Many users plug in the receiver before installing software, causing Windows to install incorrect generic drivers.
Correct Software Installation Sequence
Follow this precise order for flawless setup:
- Download the latest Unifying software from Logitech’s official site (version 2.50.25 or newer)
- Save the installer to your desktop for quick access
- Run the installer as administrator (right-click > Run as administrator)
- Allow Windows security prompts when they appear
- Wait for complete installation (3-5 minutes—don’t skip this step!)
Pro Tip: Disable your antivirus temporarily during installation. Some security suites block the driver installation process, causing “device not recognized” errors later. Re-enable it immediately after installation completes.
Step 2: Properly Inserting Batteries and Powering On Your K520
Battery issues cause 65% of “keyboard not connecting” problems. The K520 requires specific battery installation that differs between keyboard and mouse components.
Keyboard Battery Installation Guide
- Flip the keyboard upside down on a soft surface
- Slide the battery compartment cover toward the arrow indicator
- Insert two AAA batteries following the + and – polarity markers
- Slide the power switch to the “ON” position (green indicator appears)
- Wait 10 seconds for the keyboard to initialize
Warning: Do not skip the 10-second initialization period. The keyboard performs internal diagnostics during this time. Attempting to connect too soon causes pairing failures that require restarting the entire process.
Step 3: Connecting the Unifying Receiver to Your Computer
The placement of your Unifying receiver dramatically affects connection reliability. Most users make one critical mistake here that causes intermittent connectivity.
Optimal Receiver Placement Strategy
- Plug the receiver directly into your computer’s USB port (not through a hub)
- Use a USB 2.0 port (black connector) if available—some USB 3.0 ports (blue) cause interference
- Position the receiver away from metal objects and other wireless devices
- If using a desktop, connect to front panel ports rather than rear ports
Visual cue: When properly connected, the receiver should show a faint green light. No light indicates either a bad port, defective receiver, or software issue.
Step 4: Pairing Your Keyboard Using the Unifying Software
This is where most users fail—the pairing sequence requires precise timing that Logitech’s documentation often overlooks.
Exact Pairing Procedure That Works
- Launch Logitech Unifying Software from your Start menu
- Click “Connect a new device” in the main interface
- Turn your keyboard OFF and back ON (slide power switch twice)
- Press any key on the keyboard within 10 seconds
- Wait for “K520” to appear in the software device list
- Click “Next” when the green pairing indicator appears
Time estimate: This process takes 45-60 seconds when done correctly. If the keyboard doesn’t appear after 2 minutes, restart the process from Step 1—don’t keep clicking “Retry” as this can lock the pairing process.
Why Your Logitech K520 Won’t Connect (Top 5 Causes)

When your keyboard refuses to pair, these five issues account for 95% of connection failures. Check each systematically before assuming hardware failure.
Battery Power Verification Process
- Remove and reinsert batteries—poor contact is common
- Test with brand new alkaline batteries (even if previous ones seemed good)
- Check for corrosion in battery compartment
- Verify power switch position—it must click firmly to “ON”
Pro Tip: Press the power switch 5 times rapidly to reset the keyboard’s internal circuitry. Many “dead” keyboards suddenly work after this simple reset.
USB Port Troubleshooting Sequence
- Test all USB ports on your computer
- Try a USB extension cable to move receiver away from computer interference
- Avoid USB hubs—connect directly to computer
- Check Device Manager for “Logitech Unifying” under Human Interface Devices
If the receiver appears as “Generic HID” rather than “Logitech Unifying,” uninstall the driver and restart with software installed first.
Fixing Intermittent Connection Issues with K520 Keyboard
When your keyboard works sometimes but drops connection randomly, these solutions target the root causes of wireless instability.
Eliminating Wireless Interference Sources
-
Move the receiver away from:
– Wireless routers (minimum 3 feet)
– Cordless phones
– Microwave ovens
– Bluetooth speakers
– USB 3.0 devices (known interference source) -
Reposition the receiver using a short USB extension cable to find the optimal signal location
Expert Note: The K520 uses 2.4GHz wireless technology which shares frequencies with many household devices. A simple 6-inch reposition of the receiver often solves “random disconnection” issues.
Can You Connect Logitech K520 via Bluetooth? (Important Clarification)
This is the most common misconception that leads to failed setup attempts. Let’s clarify this critical point immediately.
Unifying Receiver vs. Bluetooth Reality Check
Fact: The standard Logitech K520 keyboard does not support Bluetooth. It only works with the Logitech Unifying receiver. Some newer models like the K580 support Bluetooth, but the K520 specifically requires the Unifying receiver.
Warning: Don’t waste time searching Bluetooth settings—your K520 won’t appear. The pairing process only works through the Unifying software and receiver. If you’ve lost your receiver, you must purchase a replacement Unifying receiver (model number C-U0007) and re-pair your devices.
Maximizing Your K520 Battery Life: 3 Essential Tips
The K520 boasts up to 3 years of battery life, but improper usage can drain batteries in months. These professional tips preserve battery longevity.
Battery Conservation Techniques
- Enable Auto-Sleep Mode: The keyboard automatically powers down after 8 minutes of inactivity—never disable this feature
- Use High-Quality Alkaline Batteries: Dollar store batteries often leak and cause connection issues
- Clean Contacts Monthly: Use a cotton swab with rubbing alcohol to clean battery contacts
Pro Tip: When storing the keyboard long-term, remove batteries to prevent potential leakage damage—a common cause of “sudden failure” after storage.
Advanced Features to Enable After Successful Connection
Once connected, unlock these productivity-boosting features that many K520 users never discover.
Hidden Functionality Activation
-
Customize Special Keys: Use Logitech Options+ software to reprogram:
– Calculator key
– Email shortcut
– Home page button
– Media controls -
Enable Multi-Device Pairing: Connect up to 6 Unifying devices to one receiver:
– Additional mouse
– Presentation remote
– Number pad
Time-Saving Shortcut: Press Fn + F3 to instantly switch between paired devices—no software required.
Troubleshooting Unifying Software Recognition Problems
When the software doesn’t detect your keyboard despite correct setup, these advanced solutions resolve stubborn recognition issues.
Software-Level Fixes That Work
-
Complete Software Reinstallation Process:
– Uninstall via Control Panel
– Delete residual files in C:\Program Files\Logitech
– Reboot computer
– Reinstall latest software version -
Driver Force Update Method:
– Open Device Manager
– Right-click “HID Keyboard Device”
– Select “Update driver”
– Choose “Browse my computer”
– Navigate to Logitech software installation folder
Warning: Never install third-party “driver updater” tools—they often cause more problems than they solve.
When to Contact Logitech Support for Connection Issues
After exhausting all troubleshooting steps, these final indicators confirm you need professional assistance.
Hardware Failure Confirmation Checklist
Contact Logitech support if:
– Keyboard works on another computer with same receiver
– Receiver works with other Unifying devices
– All software/driver solutions fail
– You see physical damage or battery corrosion
Critical Tip: Have your product serial number ready (located on bottom of keyboard). Without this, Logitech cannot verify warranty status. The standard K520 includes a 1-year limited hardware warranty—proof of purchase required.
Connecting your Logitech K520 keyboard successfully hinges on following the precise sequence: software first, then batteries, then receiver, then pairing. Most connection problems stem from skipping the critical 10-second initialization period after powering on or attempting to use Bluetooth with this Unifying-only device. By following this guide’s exact steps, you’ll achieve reliable wireless performance that lasts for years. Remember to check for firmware updates quarterly through Logitech Options+ software—these often resolve emerging compatibility issues with new operating system updates. Your perfectly connected K520 awaits just minutes away!


