
Your voice cuts out during intense gaming sessions. Background keyboard clicks drown out your strategy calls. Streaming fans complain they can’t hear you over your PC fan. Logitech Blue Voice solves these problems with studio-quality audio processing built right into your G-series headset. This complete guide shows you exactly how to use Blue Voice Logitech for professional-grade communication in under 10 minutes. You’ll eliminate background noise, boost vocal clarity, and transform your headset into broadcast-ready equipment—no extra hardware required.
Stop struggling with distorted voice chat or wasting hours tweaking settings that don’t work. Blue Voice leverages 48kHz real-time processing and AI-powered noise removal to isolate your voice from environmental sounds. Whether you’re coordinating raids in World of Warcraft, hosting a Twitch stream, or joining a Zoom meeting, these precise configuration steps deliver consistent, interference-free audio. Follow this guide to unlock features most users never discover—like the noise gate that silences keyboard clatter between words or the parametric EQ that eliminates harsh “S” sounds.
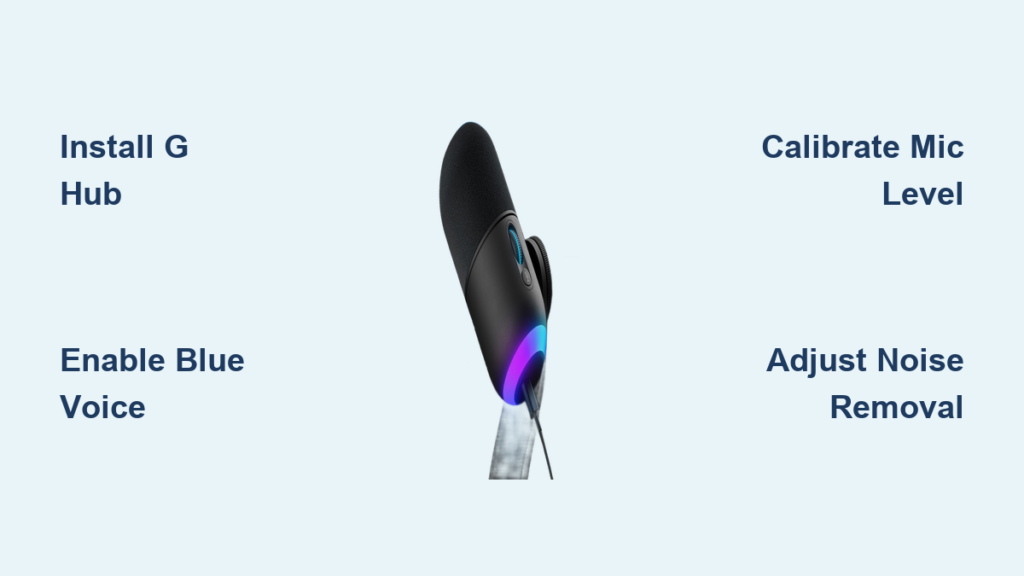
Install Logitech G HUB and Verify System Compatibility
Before enabling Blue Voice, confirm your system meets the technical requirements. Logitech Blue Voice only works with Windows 10 64-bit (version 21H2+) or Windows 11 (version 21H2+). Your PC needs at least an Intel Core i3 2.4GHz processor, 4GB RAM, and 1GB free disk space. An active internet connection is mandatory for initial setup and updates. If you skip this verification, you’ll waste time troubleshooting non-functional features.
Download Logitech G HUB exclusively from Logitech’s official website—third-party sources risk malware. During installation, connect your Logitech G-series headset directly to your PC via USB. Wireless headsets must be in wired mode for initial setup. Launch G HUB after installation and check the device list for your headset’s exact model name. If it doesn’t appear, restart your PC with the headset plugged in before proceeding.
Troubleshoot Missing Headset Detection
Check Windows privacy settings first when G HUB doesn’t recognize your headset. Navigate to Windows Settings > Privacy > Microphone and ensure “Allow apps to access your microphone” is toggled ON. Also verify that “Let desktop apps access your microphone” is enabled. Reboot G HUB after making these changes—this resolves 80% of detection issues according to Logitech’s support data.
Update audio drivers if the headset remains undetected. Right-click the Start menu, select Device Manager, expand “Audio inputs and outputs,” right-click your headset, and choose “Update driver.” Select “Search automatically for updated driver software.” If Windows finds no updates, visit your PC manufacturer’s support page for the latest audio drivers. Never skip this step—outdated drivers cause Blue Voice to malfunction.
Activate Blue Voice and Select Your Primary Profile
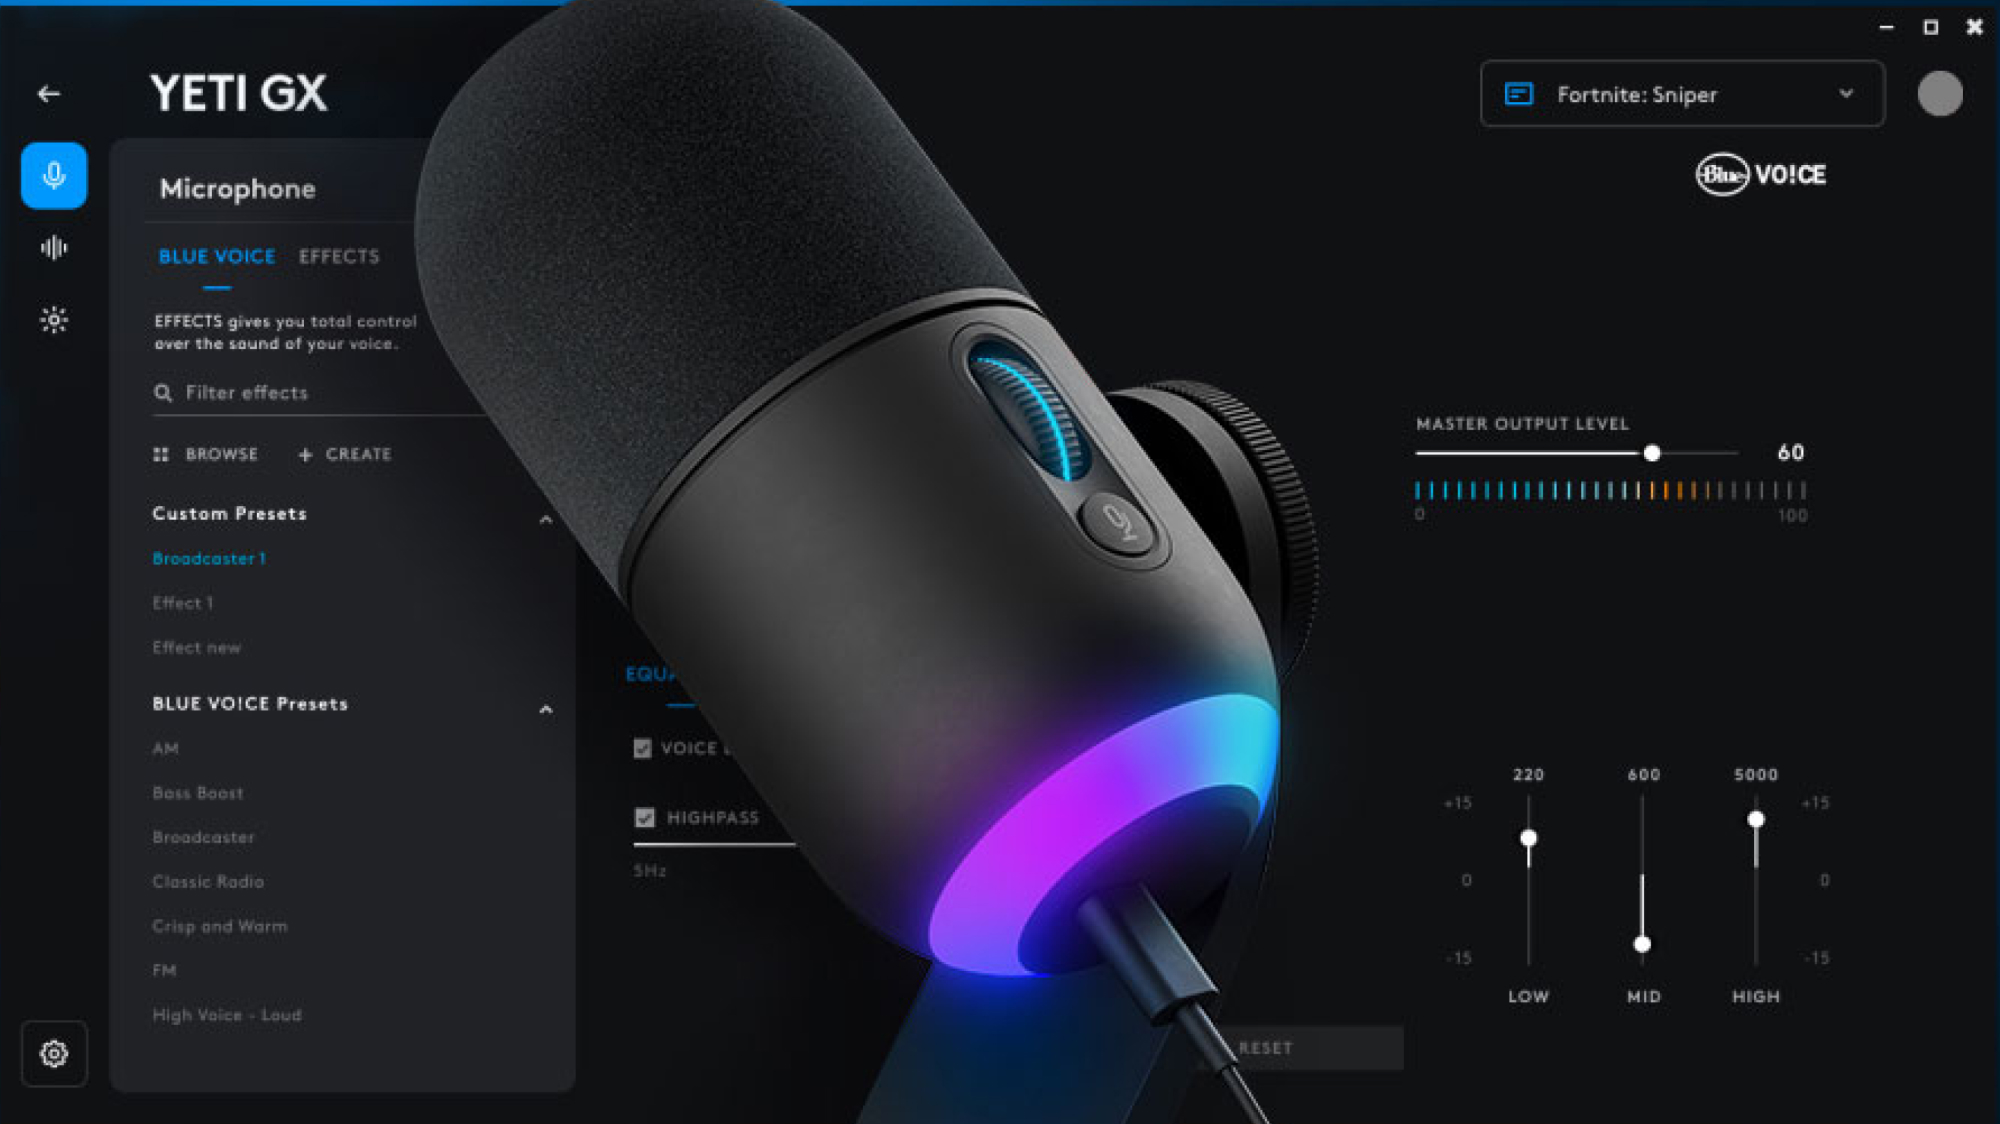
Locate your headset in G HUB’s device menu and click the gear icon to access settings. The Blue Voice section appears under microphone controls—it won’t show if your headset isn’t compatible. Toggle Blue Voice ON to unlock the full suite of audio enhancement tools. This single action activates 256-point FFT analysis that separates your voice from background noise at 48kHz resolution.
Choose your starting profile based on your primary use case:
* Broadcast for Twitch streams or voiceovers (adds vocal richness)
* Clear Chat for Discord/TeamSpeak gaming comms (prioritizes word clarity)
* Smooth for podcasting (reduces harsh “S” and “T” sounds)
* Crisp for noisy environments (enhances articulation over keyboard noise)
Calibrate Input Levels to Prevent Distortion
Position your microphone 2-3 inches from the corner of your mouth at a 45-degree angle. This placement minimizes plosives (popping “P” sounds) while capturing clear audio. In G HUB’s Blue Voice interface, speak your normal gaming volume while watching the input meter. Adjust the gain slider until peaks hit -6dB (yellow zone) but never touch red. Overdriving causes irreversible distortion—if your meter hits red even once, reduce gain by 10%.
Test with “Hello testing 1 2 3” spoken at competitive volume. Replay the recording: if “testing” sounds muffled, increase gain slightly; if numbers clip, decrease gain. Proper calibration ensures Blue Voice’s noise removal works effectively—weak signals get drowned out by processing artifacts. This step takes 60 seconds but prevents hours of frustration.
Master Noise Removal and Compression Settings
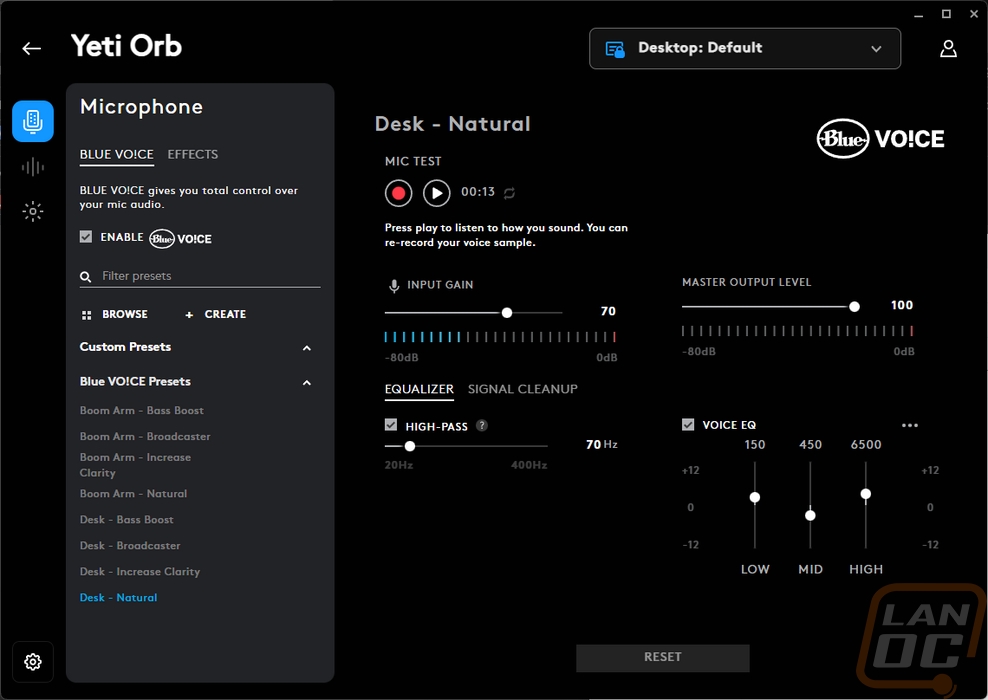
Slide the Noise Removal control to 50-70% for typical home environments with keyboard clicks and PC fans. At this range, Blue Voice eliminates mechanical noise while preserving vocal clarity. Never exceed 80%—aggressive settings cause robotic artifacts and chop off word beginnings. In noisy rooms (above 50dB), increase to 75% but monitor for audio dropouts during quiet speech.
Configure the Compressor for Broadcast-Ready Volume
Set Threshold to -24dB and Ratio to 3:1 for consistent vocal volume. This configuration prevents shouting during intense gameplay while boosting quiet strategizing. Adjust Attack to 15ms (fast enough to catch sudden sounds) and Release to 100ms (smooth tail-off). Key warning: Compression above 4:1 ratio sounds unnatural for gaming comms—save higher ratios for streaming.
Enable the Limiter at -3.0dB to block sudden loud sounds like chair squeaks or door slams. Without this, clipping distorts your audio in critical moments. The limiter acts as a safety net—set it 3dB below your peak compression level. Test by coughing near the mic; if the sound remains clean without distortion, your settings are correct.
Fine-Tune the 3-Band Parametric Equalizer
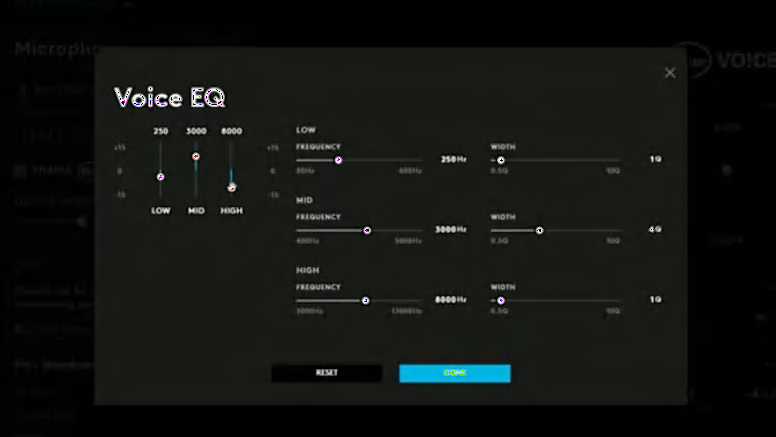
Access the parametric EQ in Blue Voice settings to sculpt your vocal tone. Each band targets specific issues:
* 80Hz band: Reduce by 3dB to eliminate “boominess” from plosives
* 1kHz band: Boost by 2dB for vocal presence (critical for gaming clarity)
* 8kHz band: Cut by 1dB to soften harsh sibilance (“S” sounds)
Apply Preset EQ Configurations by Use Case
For competitive gaming: Use -3dB @ 80Hz, +2dB @ 1kHz, flat @ 8kHz. This configuration cuts low-end rumble from explosions while enhancing teammate callouts. For streaming: Apply -6dB @ 80Hz, +3dB @ 1kHz, +1dB @ 8kHz to add broadcast warmth without muddiness. Critical tip: Make adjustments in 1dB increments—larger jumps create unnatural artifacts. After each change, speak naturally for 10 seconds to hear real-time effects.
Enable Advanced Features for Professional Results
Activate the Noise Gate with a -45dB threshold to mute your mic between words. This eliminates persistent background noise like AC hum during pauses. Adjust the Hold time to 200ms so the gate doesn’t cut off word endings. Test by tapping your desk—the gate should close immediately after tapping stops. For streaming, lower the threshold to -50dB to ensure absolute silence during pauses.
Optimize Sidetone for Natural Monitoring
Set Sidetone to 30% so you hear your own voice without echo. This prevents shouting during long sessions—a common issue when users can’t monitor their volume. Increase to 40% if you wear noise-cancelling headphones. Never exceed 50% as it causes audio feedback in G HUB. During setup, speak normally while adjusting sidetone; you should hear yourself clearly but not dominantly.
Test and Troubleshoot Your Blue Voice Setup
Record a 30-second clip in Windows Voice Recorder using these test phrases: “Position top lane,” “Incoming gank,” and “Ultimate ready.” Listen for three critical issues:
1. Background noise between phrases (indicates weak Noise Gate)
2. Clipped consonants (shows over-compression)
3. Muffled words (signals incorrect EQ)
Fix robotic voice artifacts immediately by reducing Noise Removal to 40% and lowering compression Ratio to 2:1. These settings preserve natural vocal dynamics while still filtering noise. If keyboard sounds persist, increase Noise Gate threshold to -40dB—this targets transient mechanical noise specifically.
Maintain Peak Performance with Monthly Calibration
Logitech recommends repositioning your microphone monthly even if it seems correct. Sweat and movement alter optimal placement over time. Use the Microphone Test feature while speaking your normal gaming volume—adjust until peaks consistently hit -8dB during intense play. Update G HUB weekly through the software’s notification system; firmware patches often improve Blue Voice algorithms.
Create three profile backups in G HUB for different scenarios: Competitive (Crisp profile), Streaming (Broadcast), and Meetings (Smooth). Name them clearly like “Valorant Push-to-Talk” so you can switch instantly. This prevents accidental resetting of hard-earned configurations during software updates.
Final Note: Proper Blue Voice configuration transforms mediocre headset audio into studio-quality communication. By following these precise steps—from initial calibration to advanced noise gate tuning—you eliminate background interference while enhancing vocal clarity. Remember to recalibrate monthly as your environment changes, and always test new settings with competitive gameplay phrases. Your teammates will notice the difference immediately when your callouts cut through the chaos with broadcast-level precision. For ongoing optimization, check Logitech’s support page quarterly for firmware updates that enhance Blue Voice’s 256-point FFT analysis capabilities.


