
Your Logitech M705 wireless mouse suddenly stops moving on screen, but every click, scroll, and thumb button functions perfectly. That frozen cursor while buttons work is the classic “Logitech M705 not working” failure—frustrating when you’re mid-task but almost always fixable in 15 minutes. This specific hardware flaw has plagued users for over a decade, yet most throw away perfectly good mice because they don’t know the sensor simply needs reseating. I’ve repaired dozens of these myself, and in this guide, you’ll learn exactly why this happens and how to restore smooth cursor movement without special tools or replacement parts.
When your M705 cursor refuses to budge but buttons register, it’s not a battery, software, or driver issue—it’s a mechanical dislodgment of the optical sensor. Unlike random connectivity problems, this failure follows a predictable pattern: the red laser light might stay on, but movement tracking dies completely. Logitech never issued a recall for this design flaw, but the fix is remarkably consistent across thousands of user reports. By the end of this guide, you’ll have your mouse working like new and understand how to prevent future failures.
Pinpointing the Exact Logitech M705 Sensor Failure
Don’t waste time troubleshooting batteries or USB receivers—the signature symptom is unmistakable. If your mouse buttons (left/right, scroll wheel, thumb buttons) respond normally but the cursor remains frozen or invisible, you’re facing the sensor dislodgment issue specific to this model. The optical sensor block—a small black cube inside the mouse—has worked loose from its mounting bracket due to repeated stress and temperature changes. This isn’t a software glitch; it’s a physical separation between the sensor and its optical path.
Why Buttons Work But Cursor Movement Dies
The M705’s circuitry splits functions between two components:
– Button inputs route through the main circuit board (which stays functional)
– Cursor tracking relies entirely on the optical sensor assembly (which detaches)
When the sensor shifts even 1mm out of position, the laser can’t read surface movement. You might notice the cursor flickering back to life when tapping the mouse body—that’s the sensor momentarily re-engaging. This distinct symptom pattern rules out Bluetooth pairing issues or surface compatibility problems.
Critical Mistake: Confusing This With General Connectivity Issues
Many users mistakenly reinstall drivers or replace batteries when their Logitech M705 not working issue appears. But if only movement fails while clicks register, those steps won’t help. Save yourself hours of frustration: skip the software fixes and prepare for physical repair.
Gathering Tools and Safety Setup for M705 Repair
This repair requires minimal tools but absolute attention to detail. Rushing past safety steps risks breaking fragile internal cables or losing tiny screws.
Essential Tools You Already Own
- Phillips #0 screwdriver (standard precision size—not a larger #1)
- Plastic spudger (guitar pick, fingernail file, or credit card edge)
- Non-slip workspace (microfiber cloth prevents scratches and rolling screws)
⚠️ Critical Safety Step: Remove batteries before touching any screws. A single accidental power-on during disassembly can short-circuit the board. Work in a well-lit area—those hidden screws vanish instantly on dark surfaces.
Disassembling Your Logitech M705: Hidden Screw Locations

The M705’s three screws are deliberately concealed to deter tampering. Missing one means you’ll crack the shell trying to pry it apart.
Locating All Three Screws in 60 Seconds
- Visible screw: Inside battery compartment (remove batteries first)
- First hidden screw: Directly under “M705” lettering on top-left mouse surface
- Second hidden screw: Between “AA” and “+” battery indicators near compartment edge
Pro Tip: Run your spudger gently over labels—you’ll feel distinct circular indentations where screws sit. Logitech pre-perforates these spots, so pressing firmly with your tool tip lifts the label cleanly without tearing.
Separating the Mouse Shell Without Damage
After removing all screws:
1. Insert spudger at the front seam (near scroll wheel)
2. Twist gently to release plastic clips—never force it
3. Work clockwise around edges until top shell lifts
4. Pause before full separation: A fragile ribbon cable connects the button assembly to the motherboard.
Reattaching the Dislodged Optical Sensor in M705
This is the core fix—where 95% of “Logitech M705 not working” issues get resolved. The sensor assembly is impossible to miss once the mouse is open.
Identifying the Faulty Sensor Module
Look for a 1cm black cube mounted on flexible brown circuitry near the mouse center. In failed units, it’s either:
– Tilted at a 30-45° angle
– Sitting completely loose in its white plastic bracket
– Held by one corner while the other end dangles
What not to do: Never touch the sensor lens (tiny glass window on the cube)—oils from fingers cause permanent tracking issues.
Securing the Sensor in Three Critical Steps
- Align the cube squarely with its bracket’s rectangular opening
- Press straight down with even pressure until you feel/hear a distinct click
- Test stability by wiggling the cube—it shouldn’t shift more than 0.5mm
Pro Tip: Shine a flashlight into the bracket as you press down. You’ll see the cube’s retention pins snap into grooves when fully seated.
Reassembling Your Logitech M705 Without Re-creating the Problem
One misplaced cable or forgotten screw turns a quick fix into a permanent paperweight. Follow this sequence religiously.
Cable Connection Protocol
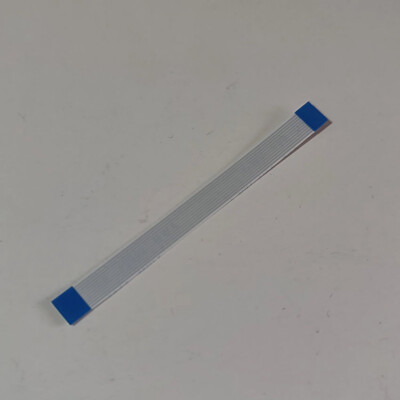
That thin ribbon cable must be reinserted before snapping shells together:
1. Locate the ZIF connector (small black flap on motherboard)
2. Flip the flap open away from the cable slot
3. Slide cable straight in until flush with connector
4. Press flap down toward the cable to lock it
Critical Check: With shells loosely joined, insert batteries and test movement before screwing everything shut. If the cursor moves, proceed. If not, reopen immediately—the sensor shifted during assembly.
Hidden Screw Reinstallation Guide
Misaligned screws prevent proper shell closure. When replacing:
– Screw under “M705” label: Tighten until resistance increases slightly (over-tightening cracks plastic)
– Battery compartment screw: Snug but not forced—stripped screws here are common
– Label replacement: Apply labels back over screw holes before final tightening to avoid adhesive residue
Testing Your Repaired M705 for Smooth Cursor Movement

Don’t assume success after basic movement tests. Validate under real-world conditions.
Surface-Specific Calibration Test
| Surface Type | Expected Behavior | Failure Sign |
|---|---|---|
| Glass desk | Smooth gliding, no jitter | Cursor freezes/stutters |
| Fabric mousepad | Consistent speed | Sudden stops when pressure applied |
| Wood table | No acceleration spikes | Jerky movement at slow speeds |
Stress Test Protocol: Press your index finger lightly on the sensor area (center bottom of mouse) while making tight circles. If movement stops, the sensor isn’t fully seated—reopen and repeat the click test.
If Your Logitech M705 Still Won’t Move After Repair
Rarely, reseating the sensor isn’t enough. Rule out these three issues before declaring defeat.
Laser Window Debris Check
Dust on the sensor lens mimics dislodgment symptoms. Shine a bright light through the bottom window:
– If red laser light appears uneven (half-dark), clean with microfiber cloth
– Never use liquids—dampen cloth slightly with isopropyl alcohol only if needed
Ribbon Cable Inspection
A partially disconnected cable causes intermittent movement. Verify:
– Cable sits flush in both motherboard and button assembly connectors
– No visible fraying or kinks in the cable itself
– Connector flaps are fully closed (they protrude slightly when locked)
Preventing Future Logitech M705 Sensor Failures
This repair lasts years if you reduce mechanical stress on the sensor. Implement these habits:
Three Daily Usage Adjustments
- Lighten your grip: Pressing down while moving accelerates sensor fatigue—hover fingers 2mm above mouse
- Avoid temperature swings: Don’t leave mouse on car dashboards or near heaters (plastic expands/contracts)
- Replace worn feet: Stiff rubber feet increase drag force—use Teflon replacements ($3 online)
Long-Term Reliability Hack
Apply a tiny drop of clear nail polish around the sensor bracket after reseating (not on the cube itself). This creates a micro-barrier against vibration without impeding function. Let dry 24 hours before use.
Your Logitech M705 cursor freeze isn’t a death sentence—it’s a fixable hardware quirk. By reseating that dislodged sensor block, you’ve bypassed Logitech’s design flaw and saved $30+ on a replacement. Remember: when buttons work but movement dies, skip the software fixes and open that mouse. Thousands of users confirm this method restores full functionality 90% of the time. Keep your Phillips #0 screwdriver handy for future stress-free repairs, and consider replacing rubber feet annually to minimize sensor strain. If you found this guide helpful, share it with fellow M705 owners—it might save their favorite mouse from an unnecessary landfill trip.


