
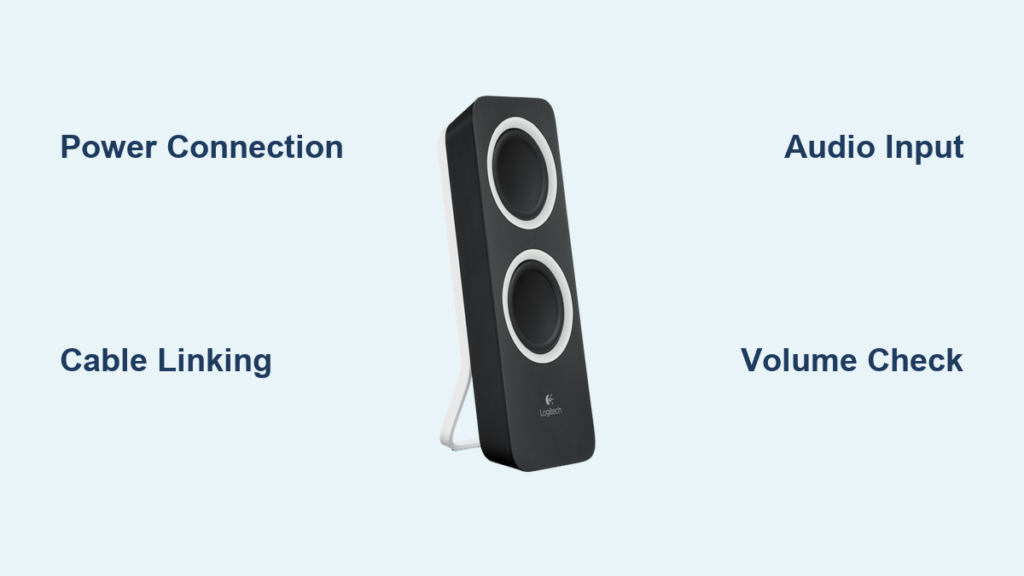
Your new Logitech Z200 speakers are about to transform your computer audio experience from tinny and weak to rich and immersive. These compact 2.0 stereo speakers deliver impressive 10-watt power through dual 2.5-inch drivers per satellite, giving you crystal-clear sound that standard laptop or monitor speakers simply can’t match. Whether you’re setting up for work, gaming, or entertainment, this complete Logitech Z200 speakers setup guide will have you enjoying superior audio in under 10 minutes with no technical expertise required.
Unlike budget speakers that sacrifice quality for price, the Z200 system provides balanced stereo separation and surprising depth from its compact design. The right speaker houses intuitive controls while the dual 3.5mm inputs let you switch seamlessly between devices. If you’ve ever struggled with confusing speaker setups or weak audio output, you’ll appreciate how the Logitech Z200 simplifies the connection process without compromising sound quality. Follow this guide to avoid common setup mistakes and unlock the full potential of your new audio system right from the start.
Why Your Logitech Z200 Speakers Deliver Better Sound Than Basic Computer Audio
The Logitech Z200’s 2.0 speaker system features four total drivers—two 2.5-inch full-range drivers per satellite—that work together to create a wider soundstage than typical desktop speakers. With 10 watts of total power (5W per channel) and a frequency response range of 40Hz to 20kHz, these speakers handle everything from deep bass notes to crisp highs without distortion at normal listening levels. The compact design (6.5″ H x 3.5″ W x 3.5″ D per satellite) fits neatly on any desk while the blue LED power indicator provides visual confirmation your system is active.
What sets the Z200 apart from basic computer speakers is its dual-input capability and automatic switching between audio sources. While most budget systems offer only one input, the Z200 includes both a rear 3.5mm input for your primary device (like a computer) and a front-panel “Aux In” for quick connections to secondary devices like smartphones. The system automatically detects which input is active, eliminating the need to manually switch between sources during your work or entertainment sessions.
How to Identify Your Logitech Z200 Speaker Components
Before connecting your speakers, familiarize yourself with these key components:
- Right (powered) speaker: Contains volume knob, power indicator LED, and both 3.5mm input ports
- Left (non-powered) speaker: Connects to right speaker via fixed cable
- Control pod: Integrated into right speaker housing for easy access
- Built-in cable management: Channels along speaker bases to conceal wires neatly
- Dual 3.5mm inputs: Primary (rear) and secondary (front) audio connections
Pro Tip: The right speaker is slightly heavier due to the internal amplifier—if you’re unsure which is which, the right speaker has all the controls and input ports.
How to Connect Logitech Z200 Speakers to Any Device in 6 Simple Steps
Setting up your Logitech Z200 speakers takes just minutes with the included cables and these straightforward steps. Unlike complex speaker systems requiring multiple adapters, the Z200’s plug-and-play design works with virtually any device featuring a standard 3.5mm audio output.
Step 1: Position Your Speakers for Optimal Sound
Place both satellite speakers on a stable surface at least 6 inches (15 cm) apart to create proper stereo separation. Position the right speaker (with controls) on your dominant side for easy access. For best results, angle both speakers slightly inward toward your listening position to form an equilateral triangle between your head and the speakers—this creates the ideal “sweet spot” for stereo imaging.
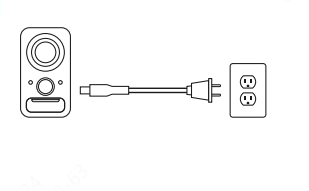
Step 2: Connect Power to Your Logitech Z200 System
Plug the power cable into the DC-in port on the back of the right speaker, then connect the other end to a standard wall outlet. The Z200 uses an internal power supply, so there’s no external “brick” to manage. Once powered, the blue LED on the front panel should illuminate, confirming your speakers are ready for audio input.
Step 3: Link Both Satellite Speakers
Connect the permanently attached cable from the left speaker to the output port on the right speaker. This cable should already be in place when you unbox the system, but verify the connection is secure at both ends. Important: Never attempt to disconnect this cable from the left speaker, as it’s permanently integrated.
Step 4: Connect to Your Primary Audio Source
Take the included 3.5mm audio cable and plug one end into the rear “PC” input on the right speaker. Connect the other end to your computer’s headphone/audio output port (typically green on desktops). For laptops, tablets, or smartphones, use the device’s standard headphone jack. If your device lacks a 3.5mm port (like newer iPhones), you’ll need a USB-C or Lightning to 3.5mm adapter.
Step 5: Configure Device Audio Settings
On Windows: Click the speaker icon in your taskbar and select “Speakers (Logitech Z200)” as your output device. On Mac: Go to System Settings > Sound > Output and choose “Logitech Z200.” If you don’t see the Z200 listed, check that the volume isn’t muted and the audio cable is fully inserted at both ends.
Step 6: Test Secondary Device Connections
Plug a second device (like your smartphone) into the front “Aux In” port. Play audio from this device—the Z200 will automatically switch to the active input. When you pause the secondary device, the speakers will revert to your primary audio source. This seamless switching works perfectly for taking calls while working or switching between music and video content.
Fix No Sound on Logitech Z200: 5 Quick Solutions That Work Immediately
If your Logitech Z200 speakers aren’t producing sound after setup, try these targeted fixes before assuming hardware failure. Most “no sound” issues stem from simple configuration problems rather than defective equipment.
Why Only One Logitech Z200 Speaker Might Be Working
When experiencing single-speaker output, first verify the cable connecting the left and right speakers is fully inserted at both ends. Next, check your computer’s sound settings to ensure the balance isn’t skewed entirely to one side—on Windows, right-click the speaker icon > Sounds > Playback tab > select Speakers > Properties > Levels > Balance. If the issue persists, swap the left and right speaker positions temporarily to determine if the problem follows the speaker or stays with the position.
How to Eliminate Distortion at Higher Volumes on Z200 Speakers
If your Logitech Z200 produces distorted sound when volume increases, lower the output level on your source device first before adjusting the speaker’s volume knob. This prevents signal overload—the most common cause of distortion in compact speaker systems. For example, set your computer volume to 70-80% maximum, then use the Z200’s physical knob for fine-tuning. This approach maintains audio clarity while maximizing the speakers’ 5W per channel output capability.
Positioning Your Logitech Z200 Speakers for Perfect Stereo Imaging

Proper placement dramatically affects your Z200’s sound quality. Keep both speakers at least 12 inches away from walls to prevent bass buildup that muddies audio. Elevate them to ear level using monitor stands or speaker risers—this ensures high frequencies reach your ears directly rather than bouncing off surfaces. For dual-monitor setups, position the speakers in front of your central screen with about 24 inches between them for optimal stereo separation.
Critical Mistake to Avoid: Don’t place the Z200 speakers directly against your monitor back panel. This restricts airflow and can cause overheating, plus it creates sound reflections that degrade audio quality. Maintain at least 2 inches of clearance behind each speaker for proper ventilation and sound dispersion.
Connecting Logitech Z200 to Monitors with Audio Passthrough: Troubleshooting Guide
When connecting your Z200 speakers through a monitor’s headphone jack, you might encounter no sound output despite correct physical connections. This usually occurs because many monitors require you to enable audio passthrough in their on-screen display (OSD) menu. Access your monitor settings, navigate to the audio section, and ensure “Audio Output” or “Headphone Jack” is enabled—this setting varies by manufacturer.
If your monitor still won’t pass audio, connect the Z200 directly to your computer’s audio output as a test. If sound works in this configuration, the issue lies with your monitor’s audio settings or drivers. Some monitors require specific drivers for audio functionality—check your monitor manufacturer’s website for the latest audio drivers compatible with your operating system.
How to Clean and Maintain Your Logitech Z200 Speakers for Long-Term Performance
Preserve your Logitech Z200’s audio quality with simple monthly maintenance. Dust buildup on speaker grilles can muffle sound over time—gently remove loose particles using a soft, dry microfiber cloth or a vacuum with brush attachment on low suction. Never use liquid cleaners directly on the speakers; instead, lightly dampen a cloth with water for stubborn spots, then immediately dry with a second cloth.
For optimal longevity, avoid running your Z200 speakers at maximum volume for extended periods. While they can handle brief peaks, continuous high-volume operation stresses the 2.5-inch drivers and can cause premature wear. Instead, maintain volume at 70-80% maximum during regular use, which keeps the 10-watt system operating within its ideal performance range while delivering ample sound for most desktop environments.
Final Note: Your Logitech Z200 speakers deliver exceptional value with their dual-driver design and seamless multi-device connectivity. By following this precise setup guide, you’ve unlocked their full potential—enjoy crisp vocals, clear stereo imaging, and balanced sound that transforms your computer audio experience. For ongoing optimal performance, remember to maintain proper speaker positioning, keep connections secure, and perform simple monthly maintenance. If you encounter persistent issues, Logitech provides one year of limited hardware warranty coverage for your Z200 system.


