
Nothing disrupts your professional video call or streaming session like a poorly configured webcam. When you’ve invested in a premium device like the Logitech Brio, proper setup makes all the difference between mediocre video quality and a crisp, professional appearance that commands attention. This guide delivers exactly what you need to know about how to use Logitech Brio webcam effectively—whether you’re leading important business meetings, creating content, or connecting with friends and family. You’ll learn the precise setup sequence, critical software configurations, and professional adjustments that transform your video presence from amateur to polished in under 15 minutes.
What’s in the Box and Initial Physical Setup
Unboxing Your Logitech Brio Package
When you open your Logitech Brio package, you’ll find the webcam itself with its distinctive circular design, a magnetic privacy shutter that snaps securely over the lens, and a USB-C cable. Some versions include a USB-C to USB-A adapter for compatibility with older computers. The privacy shutter isn’t just a gimmick—it’s your immediate visual indicator that your camera is protected when not in use, giving you complete control over when you’re on camera.
Connecting Your Brio to Your Computer
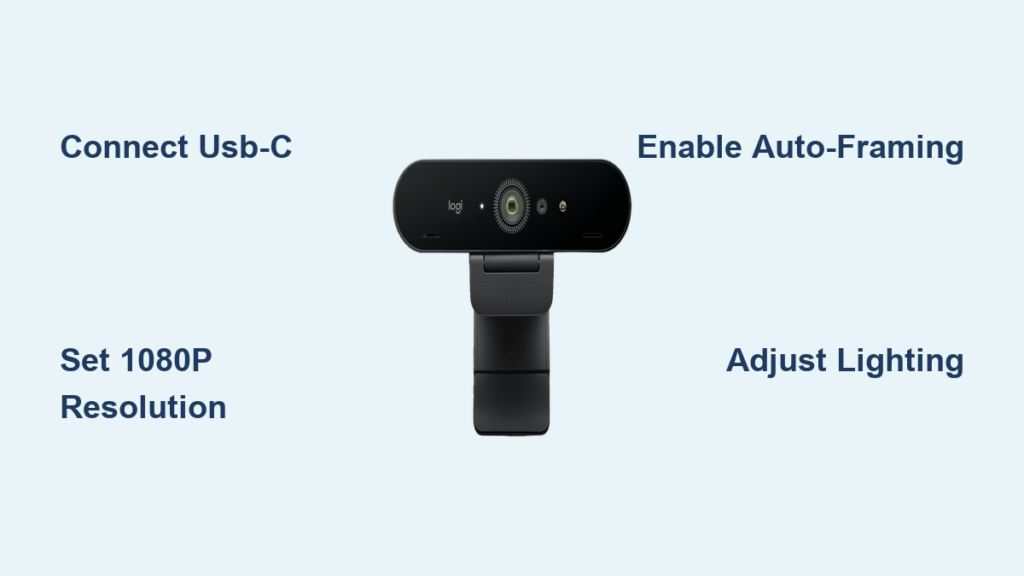
Start by clipping the Brio securely to the top of your monitor, ensuring it’s positioned at eye level for the most natural viewing angle. This positioning prevents unflattering upward camera angles that make you look less professional. Connect the USB-C cable directly to a USB 3.0 or higher port on your computer—never use a hub for your webcam connection as this can cause performance issues. If your computer only has USB-A ports, use the included adapter but connect it directly to your computer, not through another device. You’ll know the connection is successful when the LED indicator on the Brio turns solid blue.
Verifying Basic Functionality Without Additional Software
Before installing any software, test your Brio using your computer’s built-in camera application. On Windows, search for “Camera” in the Start menu; on Mac, open Photo Booth. When the app launches, you should see a clear video feed confirming your Brio is recognized by your operating system. This basic test verifies the hardware connection works before you proceed to advanced configuration. If you don’t see a video feed, disconnect and reconnect the USB cable, trying different ports until you get a successful connection.
Configuring Logi Tune for Professional Results
Installing and Launching Logi Tune
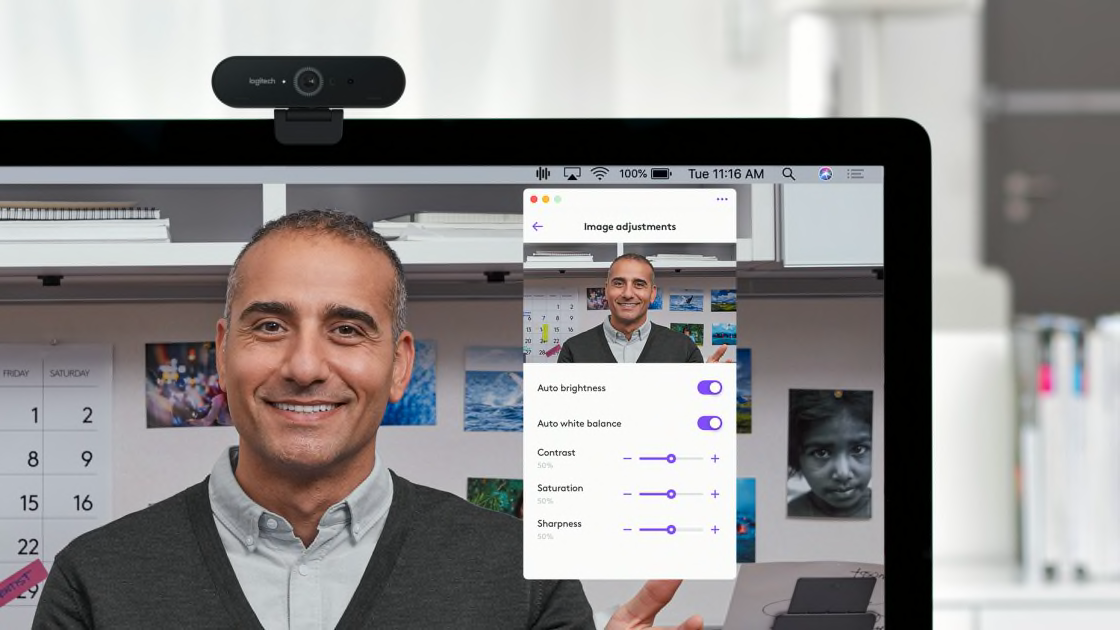
Download Logi Tune from the official Logitech website—never third-party sites—to ensure you get the latest secure version. The installation takes less than two minutes. After installation, launch Logi Tune and select your Brio from the device menu. The interface presents three main sections: Video, Audio, and Settings. This clean organization makes it simple to adjust exactly what you need without hunting through complex menus.
Essential Video Quality Adjustments
Within Logi Tune’s Video tab, you’ll find critical settings that transform your appearance:
- Resolution Selection: Choose between 4K (for recording), 1080p (ideal for most video calls), or 720p (when bandwidth is limited). For daily Zoom or Teams meetings, 1080p at 30fps provides the best balance of quality and performance.
- Field of View Options: Select between 65° (tightly focused on you), 78° (standard view), or 90° (wider angle for showing more of your workspace). Most professionals prefer 78° for standard video conferencing.
- Auto-Framing Activation: Toggle this feature ON to keep you centered in the frame even if you move slightly away from your desk—perfect for quick reference checks during presentations.
Optimizing Lighting with Built-In Features
Poor lighting ruins even the most expensive webcam. In Logi Tune’s Video settings, adjust these critical parameters:
- HDR Mode: Enable this in mixed lighting conditions where windows create bright backgrounds. HDR balances exposure so you’re not a silhouette against a window.
- White Balance: Set to “Auto” for most situations, but switch to “Indoor” if you’re under artificial lighting to eliminate unnatural orange tones.
- Brightness and Contrast: Make subtle adjustments here—never push sliders to extremes. A slight brightness increase (5-10%) often makes the biggest improvement in typical home office lighting.
Perfecting Audio Quality for Professional Calls
Testing and Adjusting Microphone Settings
The Brio’s dual omnidirectional microphones deliver clear audio, but require proper configuration. In Logi Tune’s Audio tab:
- Click “Test microphone” and speak at your normal volume
- Watch the level meter—aim for the green zone without hitting red (which causes distortion)
- Adjust microphone sensitivity to 75% as a starting point, reducing if background noise is picked up
- Enable noise cancellation to filter keyboard clicks and other office sounds
Positioning for Optimal Sound Capture
Your physical setup dramatically affects audio quality. Keep these positioning principles in mind:
- Place your monitor (with attached Brio) 18-24 inches from your face
- Angle the webcam slightly downward if you sit farther back
- Avoid placing near noisy devices like fans or air conditioners
- For critical recordings, consider using a dedicated external microphone while keeping the Brio for video
Troubleshooting Common Logitech Brio Issues
“Webcam Not Detected” Error Solutions
When your computer doesn’t recognize the Brio, follow this troubleshooting sequence:
- Check physical connection: Unplug and firmly reconnect the USB cable at both ends
- Try different USB ports: Use a rear port on desktops (more stable power) or a different port on laptops
- Restart your computer: Many USB recognition issues resolve with a simple reboot
- Update USB drivers: Visit your computer manufacturer’s website for the latest chipset drivers
- Test on another computer: Determines if the issue is with your computer or the webcam
If the Brio still isn’t detected after these steps, contact Logitech support with your purchase details.
Fixing Blurry or Out-of-Focus Video
The Brio’s autofocus normally works flawlessly, but sometimes needs intervention:
- Clean the lens: Use a microfiber cloth to remove smudges (never paper towels)
- Check for obstructions: Ensure the privacy shutter is fully open and nothing is blocking the lens
- Reset autofocus: Point the camera at a high-contrast object (like a newspaper) for 10 seconds to recalibrate
- Adjust lighting: Poor lighting confuses autofocus systems—add a desk lamp in front of you
If persistent focus issues occur, check for Logi Tune updates which often include camera firmware improvements.
Resolving Low-Light Performance Problems
The Brio performs well in low light but has limits. When your image appears grainy or dark:
- Disable HDR: In very low light, HDR can actually reduce image quality
- Increase exposure: In Logi Tune, raise the exposure setting slightly (don’t exceed +20%)
- Add front lighting: Position a desk lamp or ring light in front of you, never behind
- Avoid backlighting: Close blinds on windows behind you that create silhouettes
Remember that no webcam can perform miracles in near darkness—supplemental lighting is always the professional solution.
Maximizing Your Brio for Specific Use Cases

Optimizing for Professional Video Conferencing
For daily Zoom, Teams, or Google Meet calls:
- Set resolution to 1080p at 30fps for smooth video without bandwidth strain
- Disable auto-framing during presentations to prevent distracting movement
- Position the camera at eye level using books or a stand if needed
- Use the 78° field of view to show just enough of your upper body
Pro Tip: Before important meetings, do a test call with a colleague to verify both video and audio quality.
Configuring for Content Creation and Streaming
Content creators should:
- Record in 4K using Logi Tune, then downscale to 1080p for final output (improves sharpness)
- Use a consistent background that doesn’t distract viewers
- Enable manual focus for consistent sharpness during long recording sessions
- Position the Brio 24-30 inches from your face for optimal framing
For streaming, set your streaming software (OBS, Streamlabs) to capture the Brio at its native resolution before any scaling occurs.
Maintaining Peak Performance Long-Term
Clean your Brio lens weekly with a microfiber cloth to prevent dust buildup that degrades image quality. Store it with the privacy shutter closed when not in use for several days to protect the lens. Every three months, check for firmware updates through Logi Tune which often include performance improvements. Most importantly, position your workspace with lighting in front of you rather than behind—this simple habit makes the biggest difference in consistent video quality.
Your Logitech Brio delivers professional results only when properly configured. By following these specific setup sequences and optimization techniques, you’ll consistently present your best self on camera—whether you’re closing business deals, teaching students, or connecting with loved ones. The investment in proper configuration pays immediate dividends in how you’re perceived and the quality of your digital communications.


