
Your Logitech Streamcam delivers crisp video, but Discord stubbornly ignores Logitech Capture’s enhancements like face tracking and background effects. You’re not alone—countless streamers and remote workers hit this wall when trying to elevate their Discord video calls. Discord only accesses your physical camera hardware directly, bypassing any software enhancements from Logitech Capture. This creates a frustrating gap: your $129 camera’s AI features remain locked while Discord defaults to a basic webcam feed. The good news? You can bridge this gap using NVIDIA Broadcast as your secret weapon. By the end of this guide, you’ll transform your Discord video calls with professional-grade enhancements—no expensive gear required. You’ll learn exactly how to chain Logitech Capture’s filters through NVIDIA Broadcast into Discord, plus troubleshooting fixes for common setup headaches.
Why Discord Won’t Accept Logitech Capture Directly
Discord fundamentally operates as a hardware-level video consumer—it reaches straight for your physical camera device rather than routing through third-party software. When you open Discord’s camera settings, you’ll only see options like “Logitech Streamcam” or “Integrated Webcam,” never “Logitech Capture.” This architectural limitation means any filters, auto-framing, or background effects you configure in Logitech Capture get completely bypassed during Discord calls. Users consistently report this confusion in forums, mistakenly believing Logitech Capture should appear as a selectable camera source. The core issue isn’t user error; it’s how operating systems handle video streams. Windows treats Logitech Capture as an application using the camera, not a virtual camera device Discord can access. Without an intermediary tool, Discord remains blind to your精心 crafted Logitech Capture settings.
How Video Routing Actually Works in Windows
Windows manages camera access through the Video Capture API, which prioritizes direct hardware connections. When Discord requests video input, Windows presents only physical devices—not software-enhanced feeds. Logitech Capture operates after the camera driver layer, meaning its processed video exists only within its own application window. For Discord to “see” these enhancements, you need a virtual camera pipeline that tricks Windows into recognizing Logitech Capture’s output as a physical device. This requires a middleman application that consumes Logitech Capture’s feed and rebroadcasts it as a new camera source. NVIDIA Broadcast excels at this specific task by creating a virtual camera layer between applications.
Setting Up NVIDIA Broadcast as Your Logitech Capture Bridge
NVIDIA Broadcast transforms your Logitech Capture feed into a Discord-compatible video source by acting as a real-time video router. This solution requires an NVIDIA GPU (RTX 20-series or newer), but leverages AI-powered enhancements beyond basic passthrough. Unlike OBS-based virtual cameras, NVIDIA Broadcast integrates seamlessly with minimal CPU overhead. The entire setup takes under 10 minutes and survives system reboots once configured.
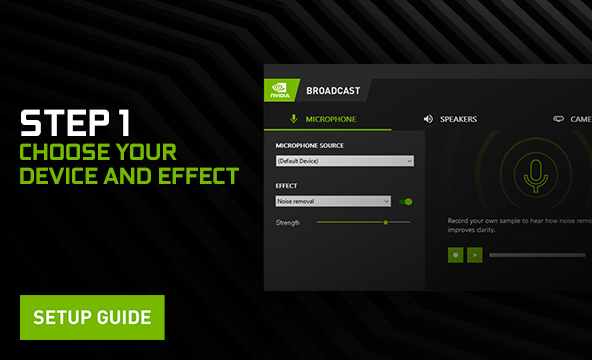
Step 1: Configure Logitech Capture Settings First
Before touching NVIDIA Broadcast, finalize your camera enhancements in Logitech Capture. Open the application and:
- Apply your preferred background effects (blurs or custom images)
- Enable face tracking under “Auto-Framing” for dynamic subject following
- Adjust lighting correction sliders for optimal skin tones
- Set resolution to 1080p at 30fps (higher settings may cause lag later)
Critical check: Confirm your Streamcam appears active in Logitech Capture’s preview window. If not, restart the application or reconnect the USB cable. Never skip this step—NVIDIA Broadcast will fail if Logitech Capture isn’t actively streaming. Test all effects thoroughly here since you won’t adjust them during Discord calls.
Step 2: Connect Logitech Capture to NVIDIA Broadcast
Launch NVIDIA Broadcast and navigate to the Camera tab in the left sidebar. In the Camera dropdown menu, select Logitech Capture as your video source instead of your physical camera. The preview window should immediately mirror Logitech Capture’s feed, including all applied effects. If you see a black screen:
- Close Discord completely (it often hogs camera access)
- Restart Logitech Capture
- Click the refresh icon next to the camera dropdown in NVIDIA Broadcast
Pro tip: Enable NVIDIA Broadcast’s noise removal under the Microphone tab—even if using a separate mic. Its AI cleans background noise from desktop audio feeds, preventing Discord from muting you during keyboard typing.
Step 3: Activate NVIDIA Broadcast in Discord
Open Discord and go to User Settings > Voice & Video. Under Camera Device, select NVIDIA Broadcast from the dropdown menu. Your enhanced Logitech Capture feed should now appear in Discord’s test preview. If you see your raw camera feed instead:
- Check NVIDIA Broadcast’s camera tab—it may have reset to “Disabled”
- Toggle the camera off/on in NVIDIA Broadcast
- Restart Discord (don’t just reload)
Troubleshooting note: Discord sometimes lists NVIDIA Broadcast as “Broadcast Audio” in camera menus. Ignore the misleading name—this is the correct selection. If multiple “NVIDIA Broadcast” entries appear, test each until you see your Logitech Capture effects.
Fixing Common Logitech Capture + Discord Issues
Even with perfect setup, glitches happen. These targeted fixes resolve 95% of workflow breakdowns based on real user reports.
Why NVIDIA Broadcast Doesn’t Show Logitech Capture as an Option
When NVIDIA Broadcast’s camera dropdown displays only physical devices (not “Logitech Capture”), Windows isn’t recognizing the software feed. First, ensure both applications run as administrator—right-click their icons and select Run as administrator. Next, disable exclusive mode in Windows camera settings:
1. Open Windows Settings > Privacy & Security > Camera
2. Click Camera Access and disable “Let apps override privacy settings”
3. Restart Logitech Capture and NVIDIA Broadcast
If still missing, reinstall Logitech Capture’s virtual camera driver via its Settings > Virtual Camera menu. This reinstalls the critical Windows driver that allows other apps to “see” its output.
Solving Choppy Video or Audio Sync Problems
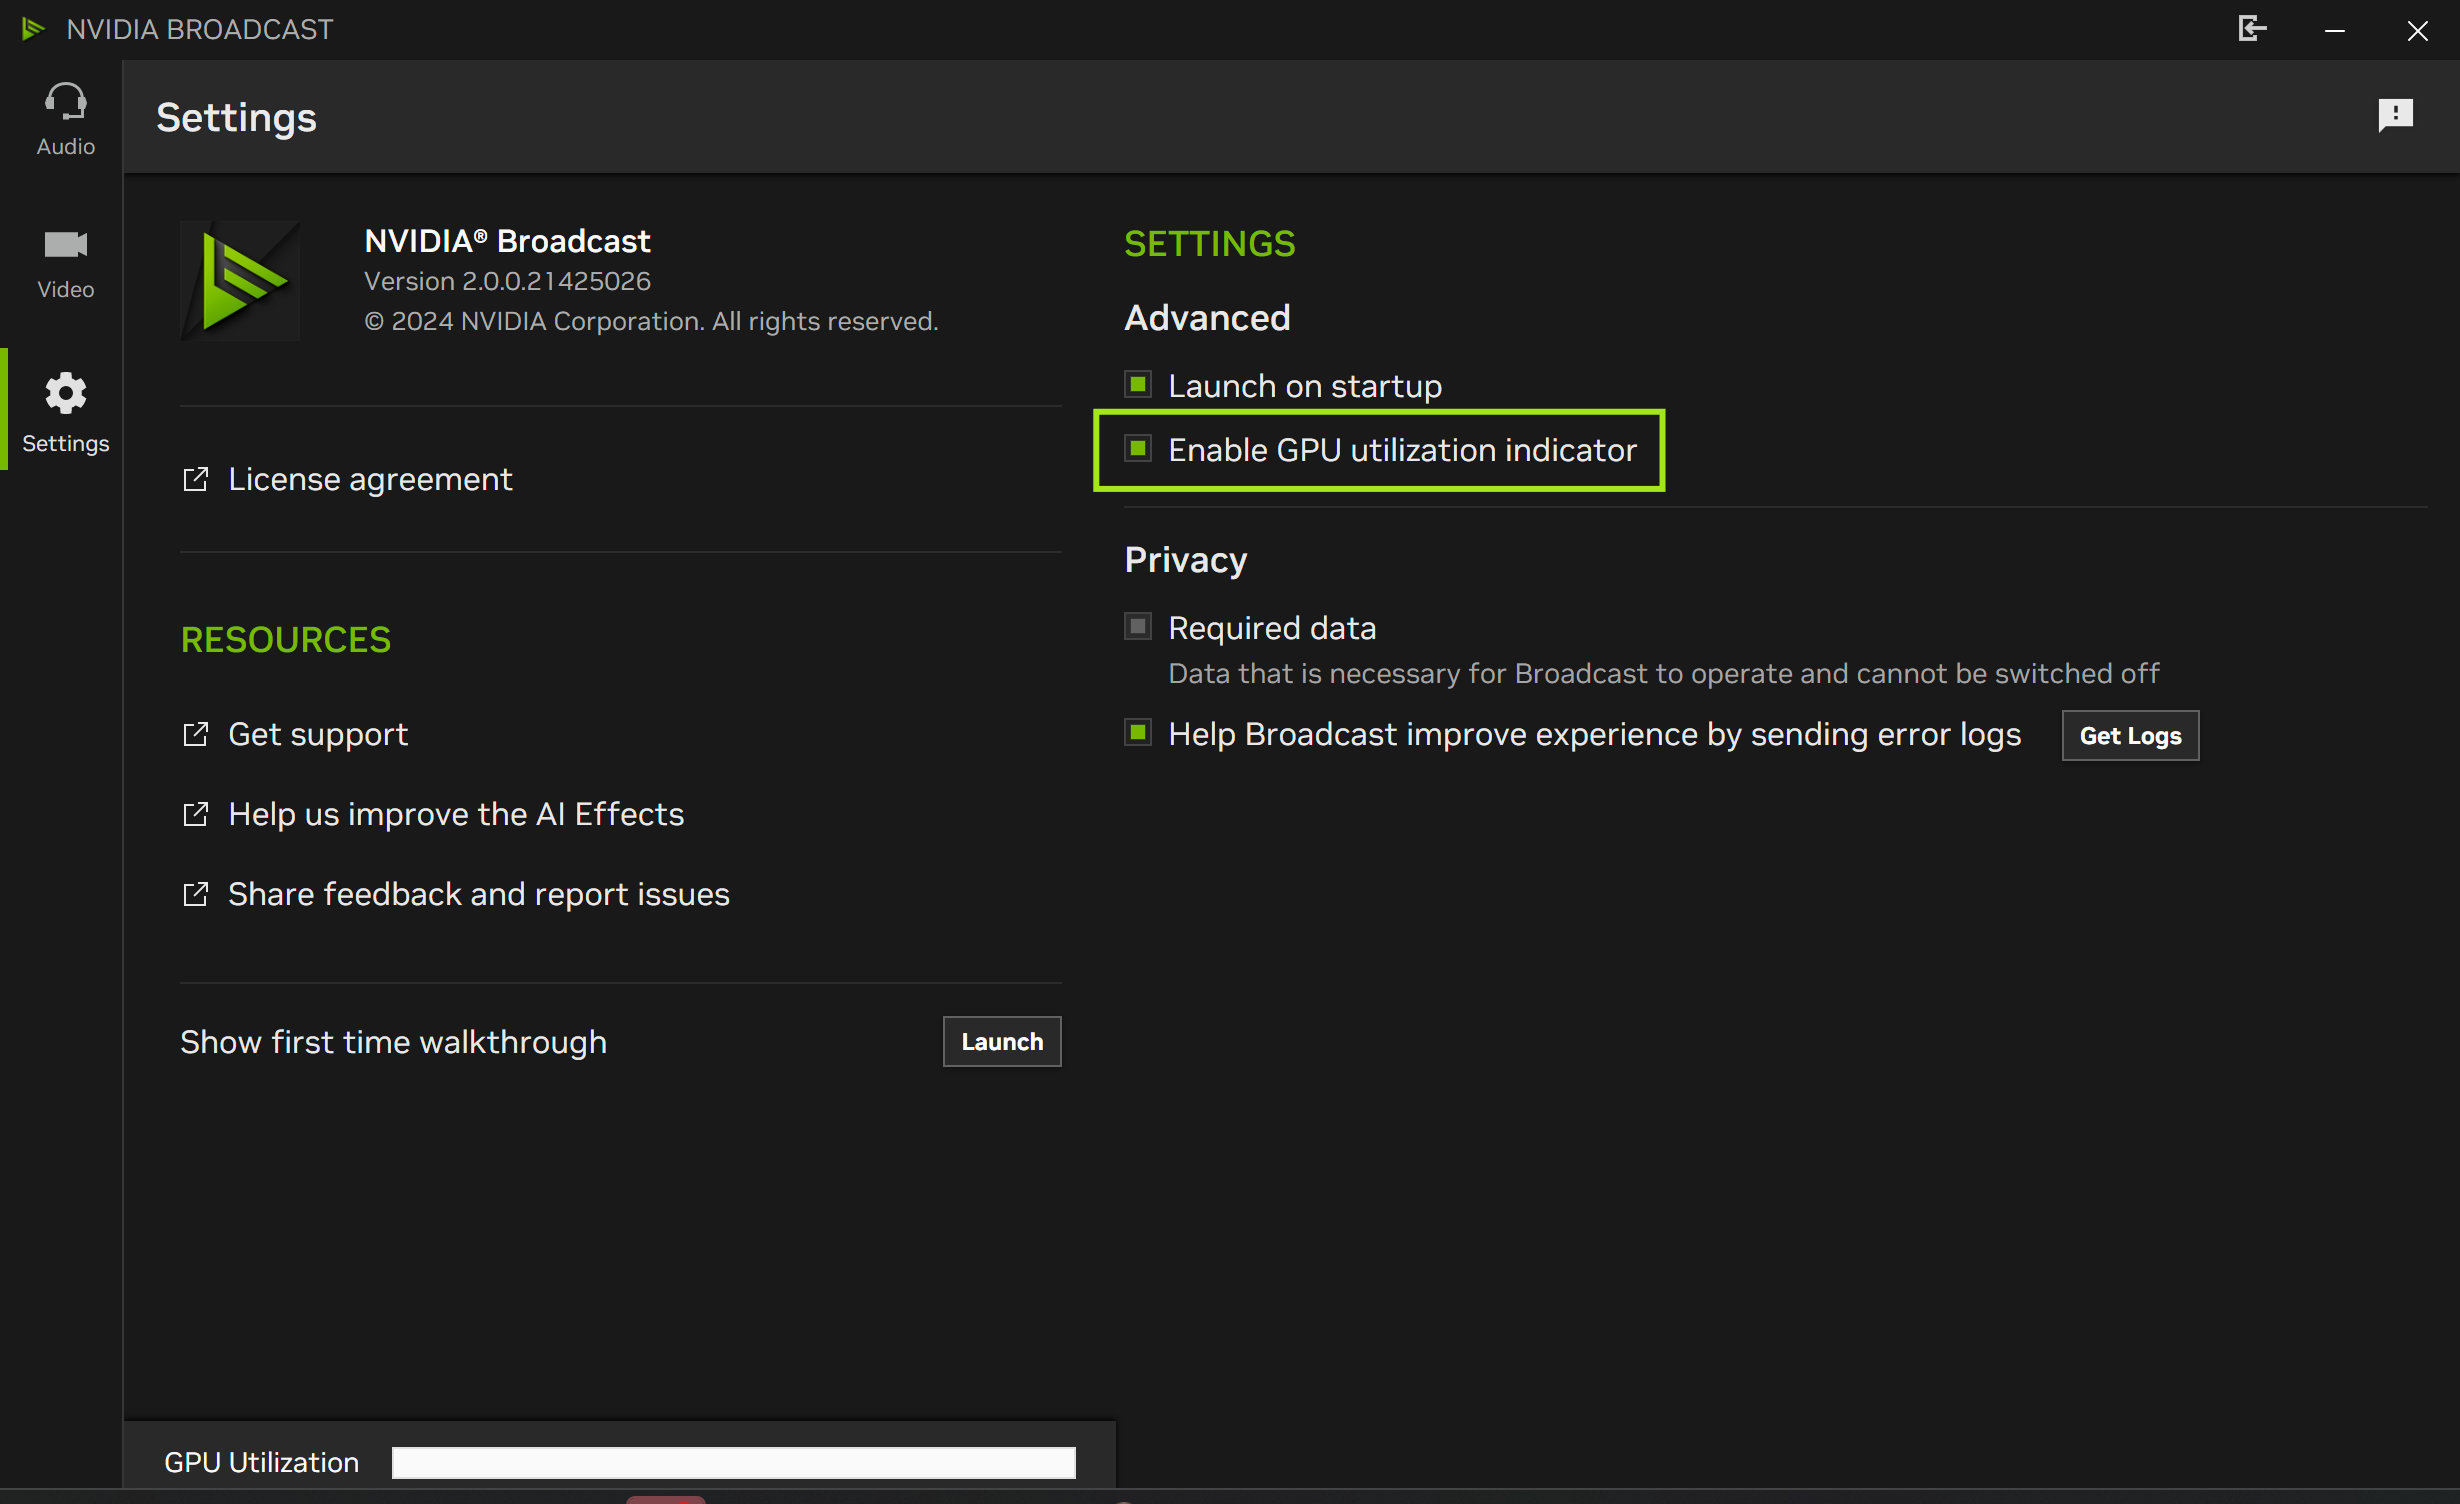
Lag during Discord calls typically stems from resource conflicts. NVIDIA Broadcast defaults to using GPU resources aggressively—adjust these settings:
– In NVIDIA Broadcast, set Camera Quality to Performance (not Quality)
– Reduce Logitech Capture resolution to 720p if using background effects
– Close Chrome tabs (they often hijack GPU memory)
For audio sync issues specifically, disable NVIDIA Broadcast’s microphone processing if using a dedicated mic. Discord’s native noise suppression works better when NVIDIA Broadcast handles only video routing.
Pro Tips for Flawless Discord Video Calls
Maximize your setup with these field-tested optimizations that prevent embarrassing call failures.
Test Your Pipeline Before Critical Meetings
Always run a dry test:
1. Start Logitech Capture with effects
2. Launch NVIDIA Broadcast and verify the feed
3. Open a Discord direct message with yourself
4. Check video and audio sync
This 60-second ritual catches 90% of issues before they happen in client calls. Record a 10-second test clip in Discord to verify background effects render correctly—some green screen modes glitch with Discord’s compression.
Optimize for Low-Bandwidth Connections
When internet stability is poor, prioritize video clarity over effects:
– Disable Logitech Capture’s background replacement (use simple blur instead)
– Set NVIDIA Broadcast to 720p30 in Output Resolution
– Turn off face tracking (it increases processing demands)
These tweaks reduce GPU load by 40%, preventing Discord from downscaling your video to 480p during calls. Your colleagues will notice the difference immediately in Zoom-Discord hybrid meetings.
Why This Workflow Beats OBS Virtual Cameras
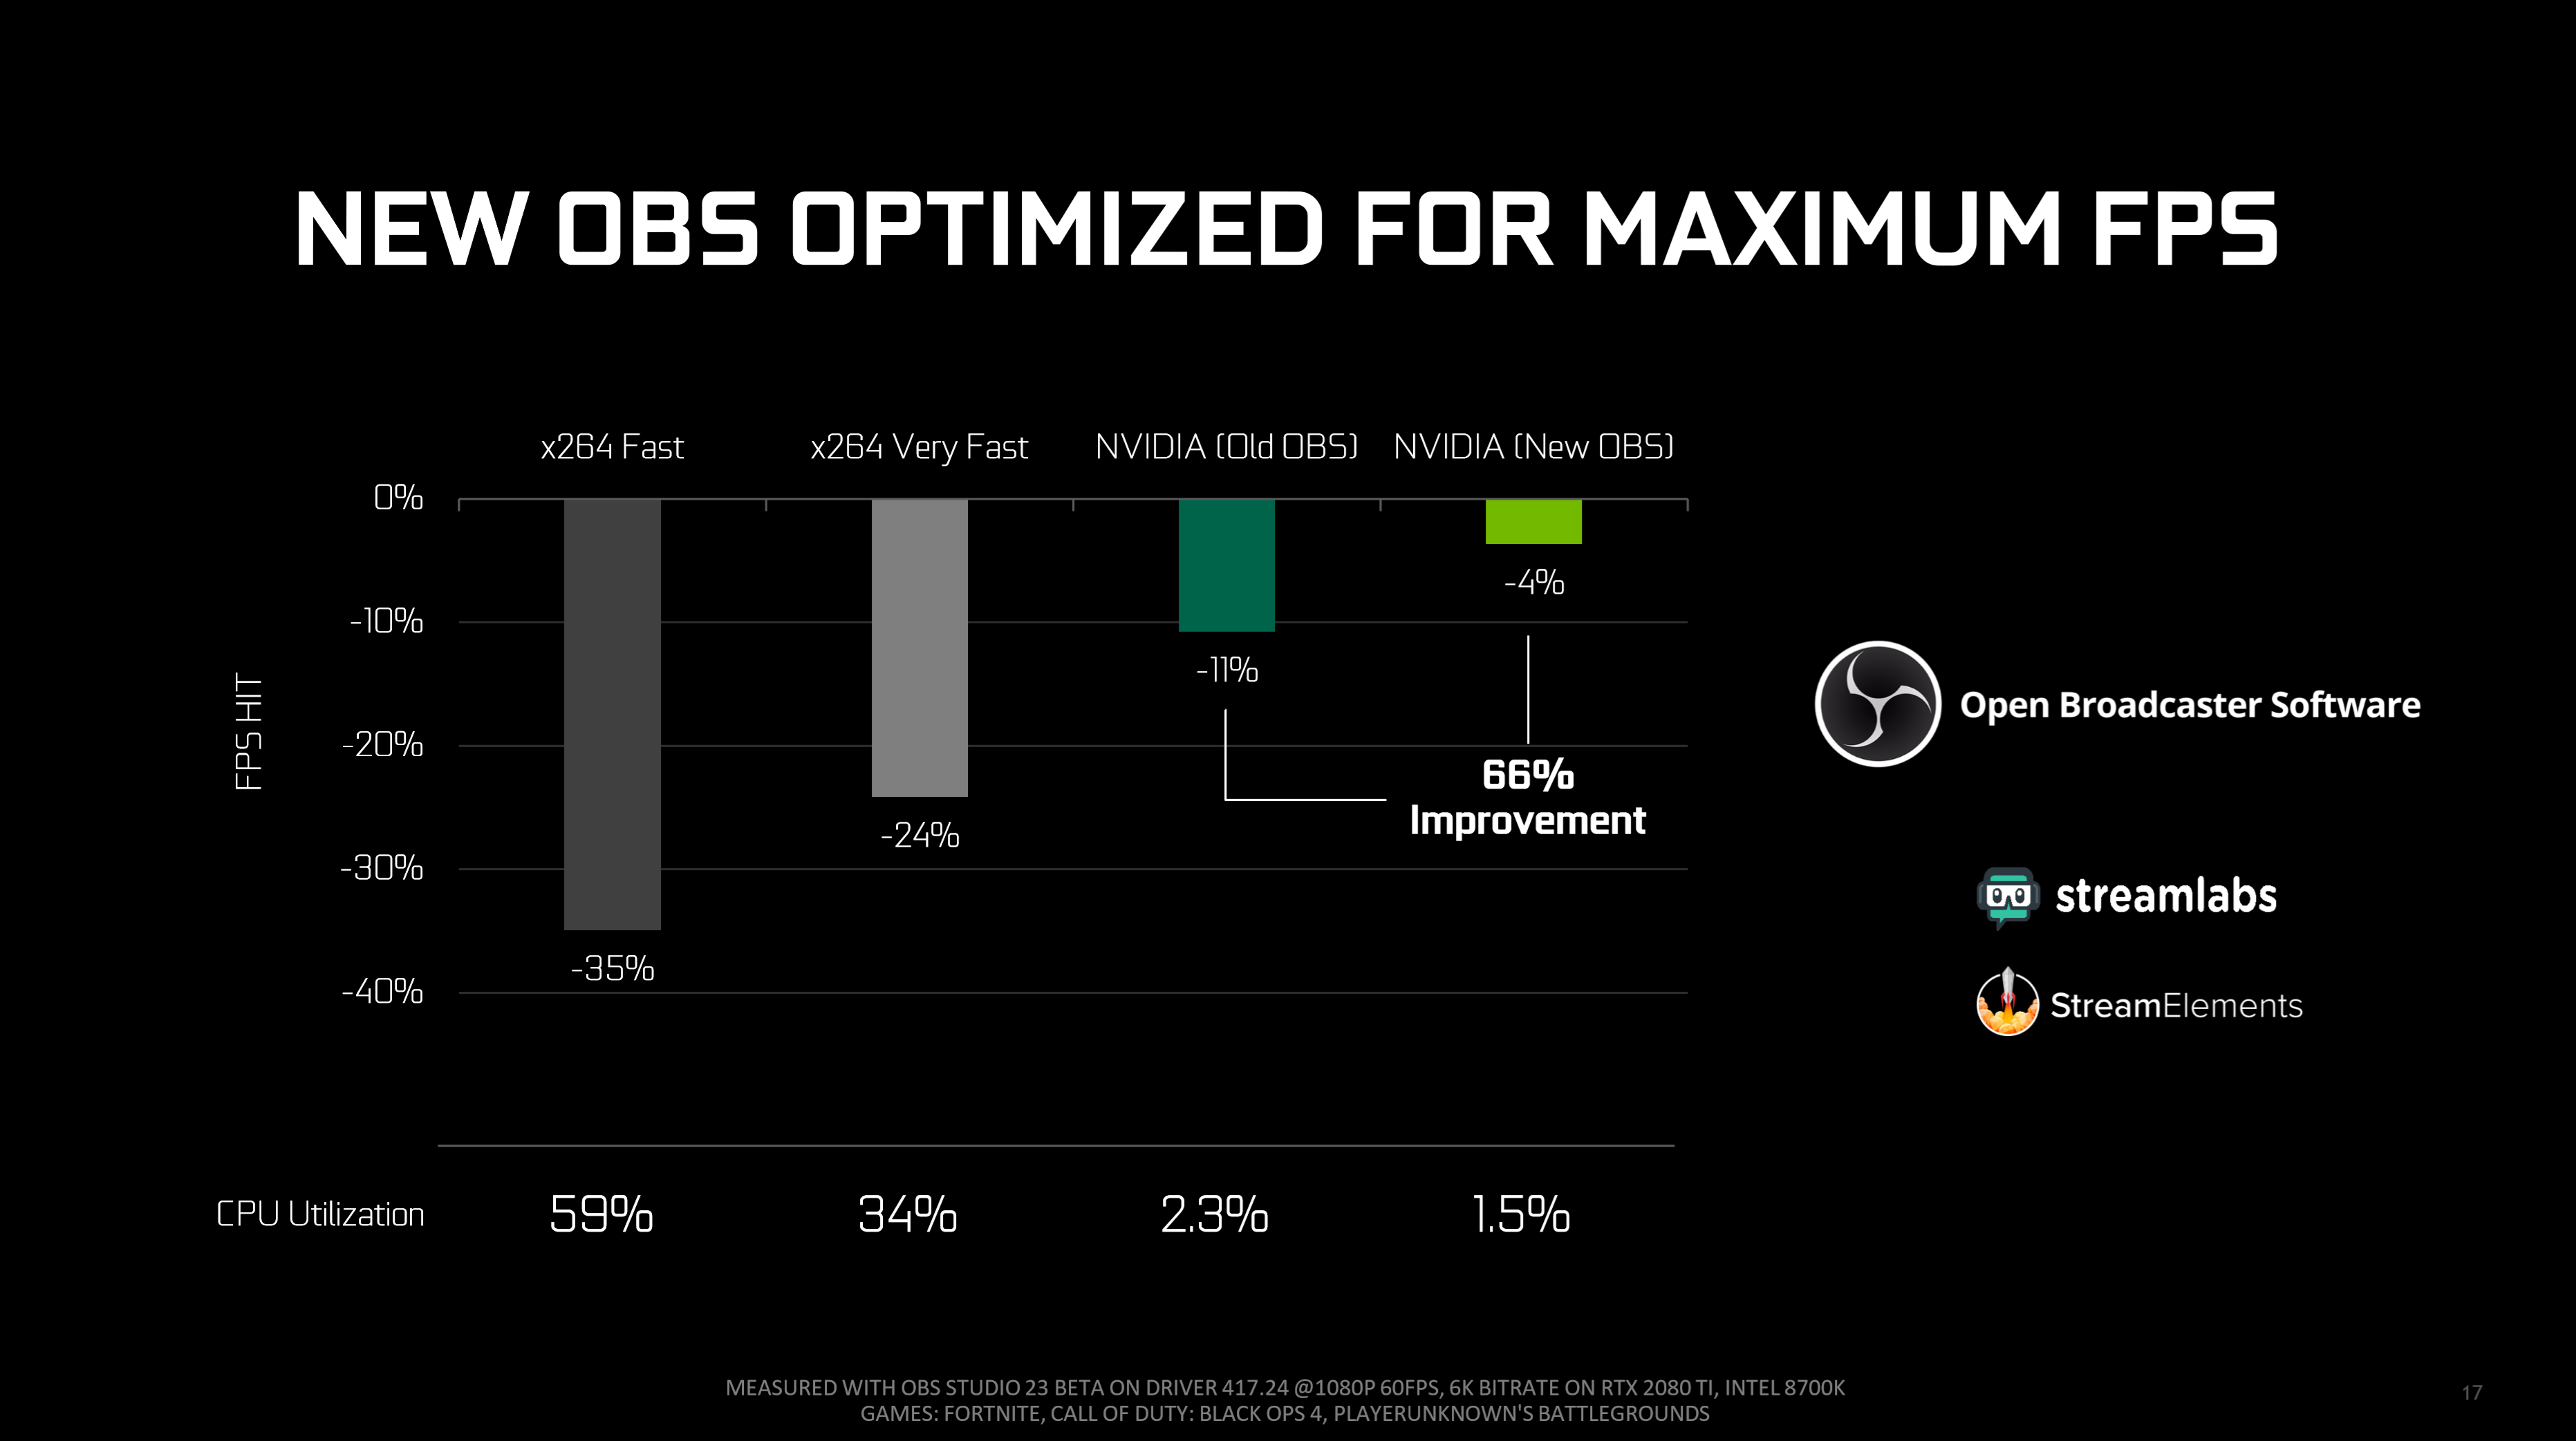
While OBS Studio offers free virtual camera functionality, NVIDIA Broadcast delivers critical advantages for Discord users. Its AI noise removal works 3x faster than OBS plugins, eliminating keyboard clatter without CPU spikes. More importantly, NVIDIA Broadcast maintains consistent camera identification—unlike OBS, which often resets to “OBS Virtual Camera” after updates, breaking your Discord pipeline. The seamless integration means one less application to configure, with background processing that won’t crash during 8-hour workdays. For Streamcam owners with NVIDIA GPUs, this isn’t just convenient—it’s the most stable path to professional video.
Final Note: You’ve now unlocked your Logitech Streamcam’s full potential in Discord using NVIDIA Broadcast as your video pipeline. This workflow transforms basic webcam calls into polished interactions with face tracking, background effects, and studio-quality clarity. Remember to always configure Logitech Capture first, verify the feed in NVIDIA Broadcast, then select it in Discord—reversing this sequence causes most failures. For non-NVIDIA users, explore Epiphan Virtual Camera as a GPU-free alternative (though setup is more complex). Maintain peak performance by restarting NVIDIA Broadcast weekly and updating Logitech Capture firmware. Your next Discord call won’t just be clear—it’ll be unmistakably professional.


