

Your Logitech Extreme 3D Pro feels like a brick in your hands right now—not the precision flight instrument it should be. That unresponsive throttle, drifting rudder, and unassigned buttons are costing you hard-earned dogfights in Microsoft Flight Simulator and Elite Dangerous. This isn’t plug-and-play territory; proper Logitech Extreme 3D Pro setup requires specific calibration and configuration to transform it from a frustrating controller into your cockpit’s nerve center. By the end of this guide, you’ll eliminate drift issues, create game-specific profiles, and achieve military-grade control responsiveness—no prior expertise needed.
Install Logitech G HUB & Run Windows Calibration
Skip straight to the critical step most pilots miss: Windows-level calibration. Your Extreme 3D Pro uses standard HID drivers, so Windows recognizes it immediately—but incorrect calibration causes 80% of drifting axis issues. Plug directly into a motherboard-mounted USB 2.0 port (not a hub), then press Win + R, type joy.cpl, and hit Enter. Select your joystick, click Properties, and navigate to Settings > Calibrate.
Follow the Device Calibration Wizard precisely:
1. Move the stick through full pitch/roll motions until the crosshair fills the circle
2. Rotate the twist rudder fully left/right 3 times
3. Slide the throttle from minimum to maximum 5 times
4. Crucial: Hold the stick perfectly centered for 3 seconds during neutral calibration
Why this matters: Skipping Windows calibration forces games to compensate with excessive deadzones, killing responsiveness. If the wizard fails to detect inputs, uninstall the device in Device Manager > Human Interface Devices and restart—never use USB 3.0 ports for initial setup.
Fix Throttle Slider Issues: Assign Joy Z Axis Correctly
That unresponsive throttle slider? It’s likely mapped to the wrong axis command. In Microsoft Flight Simulator or DCS World, navigate to Controls > Axis Commands. Find “Throttle” or “Joy Z” in the command list, then:
- Click the assignment box next to the command
- Move your throttle slider fully up/down
- Confirm registration (the slider should show green activity)
- Set 5-10% deadzone at both extremes to prevent unintended idle/full-throttle engagement
Pro Tip: In Elite Dangerous, reassign Joy Z to “Forward/Reverse Thrust” instead of throttle for space combat. If the slider remains unresponsive:
– Verify recognition in Windows Game Controllers
– Disable “Throttle Reverse” in-game settings
– Clean debris from the slider track with compressed air
Tune Rudder Sensitivity: Twist Grip Deadzone & Curve Settings
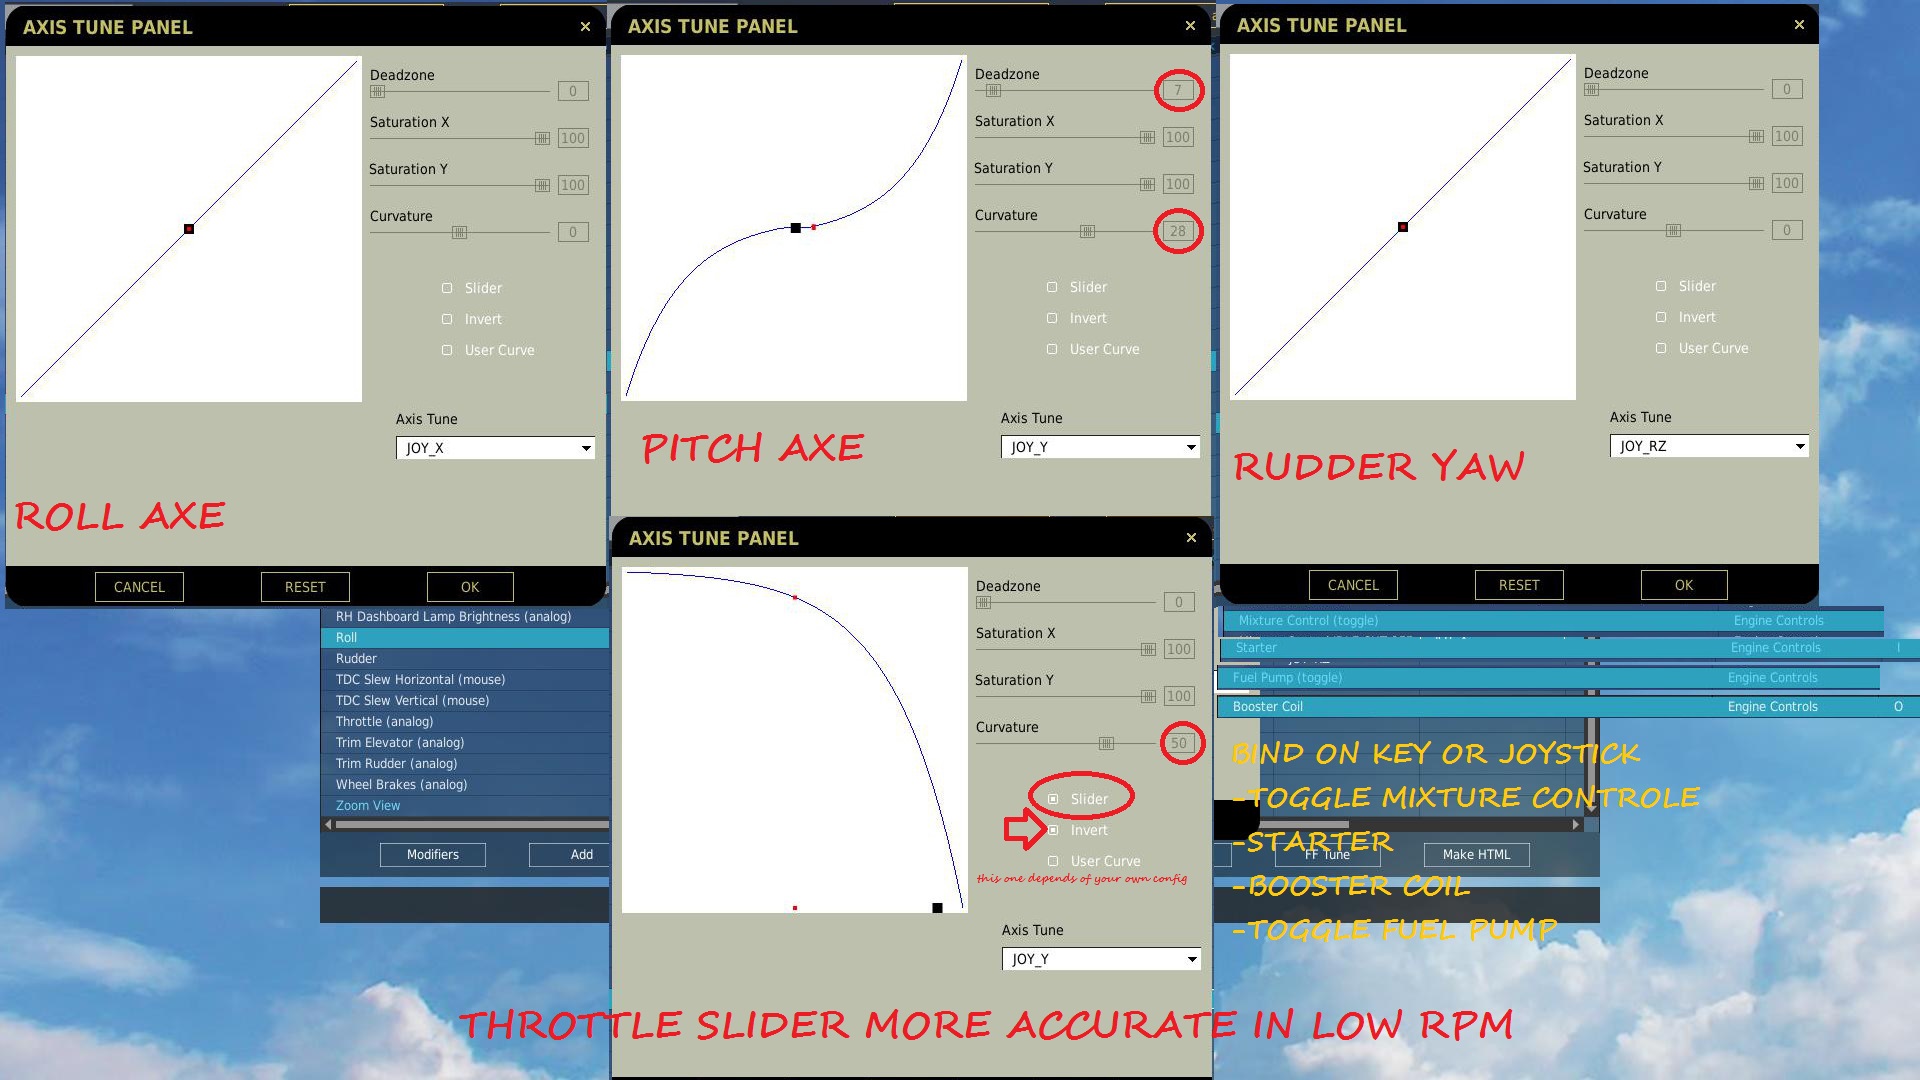
Your twist rudder drifts because the default deadzone is too small for real-world use. In DCS World or Star Citizen:
- Go to Axis Commands > Rudder
- Click Axis Tune
- Adjust these values:
– Deadzone: 12-15% (prevents accidental yaw during roll maneuvers)
– Curve: 35% exponential (adds precision for small corrections)
– Saturation: 95% (avoids over-controlling in tight turns)
Flight Sim Reality Check: In Microsoft Flight Simulator, set yaw sensitivity 20% lower than pitch/roll. Aggressive curves cause Dutch Roll disasters during crosswind landings. For space sims like Star Citizen, bind twist to lateral thrusters and use 25% deadzone—higher values make docking impossible.
Why Your Twist Axis Fails in Space Sims
Most pilots assign twist to roll, but Elite Dangerous requires reassigning Z-axis to strafe controls. In Elite’s settings:
– Go to Controls > Thrusters
– Bind “Strafe Left/Right” to Z-axis
– Set deadzone to 10% with linear curve
This transforms clumsy maneuvers into pinpoint docking precision.
Stop Stick Drift: Pitch/Roll Axis Deadzone Configuration
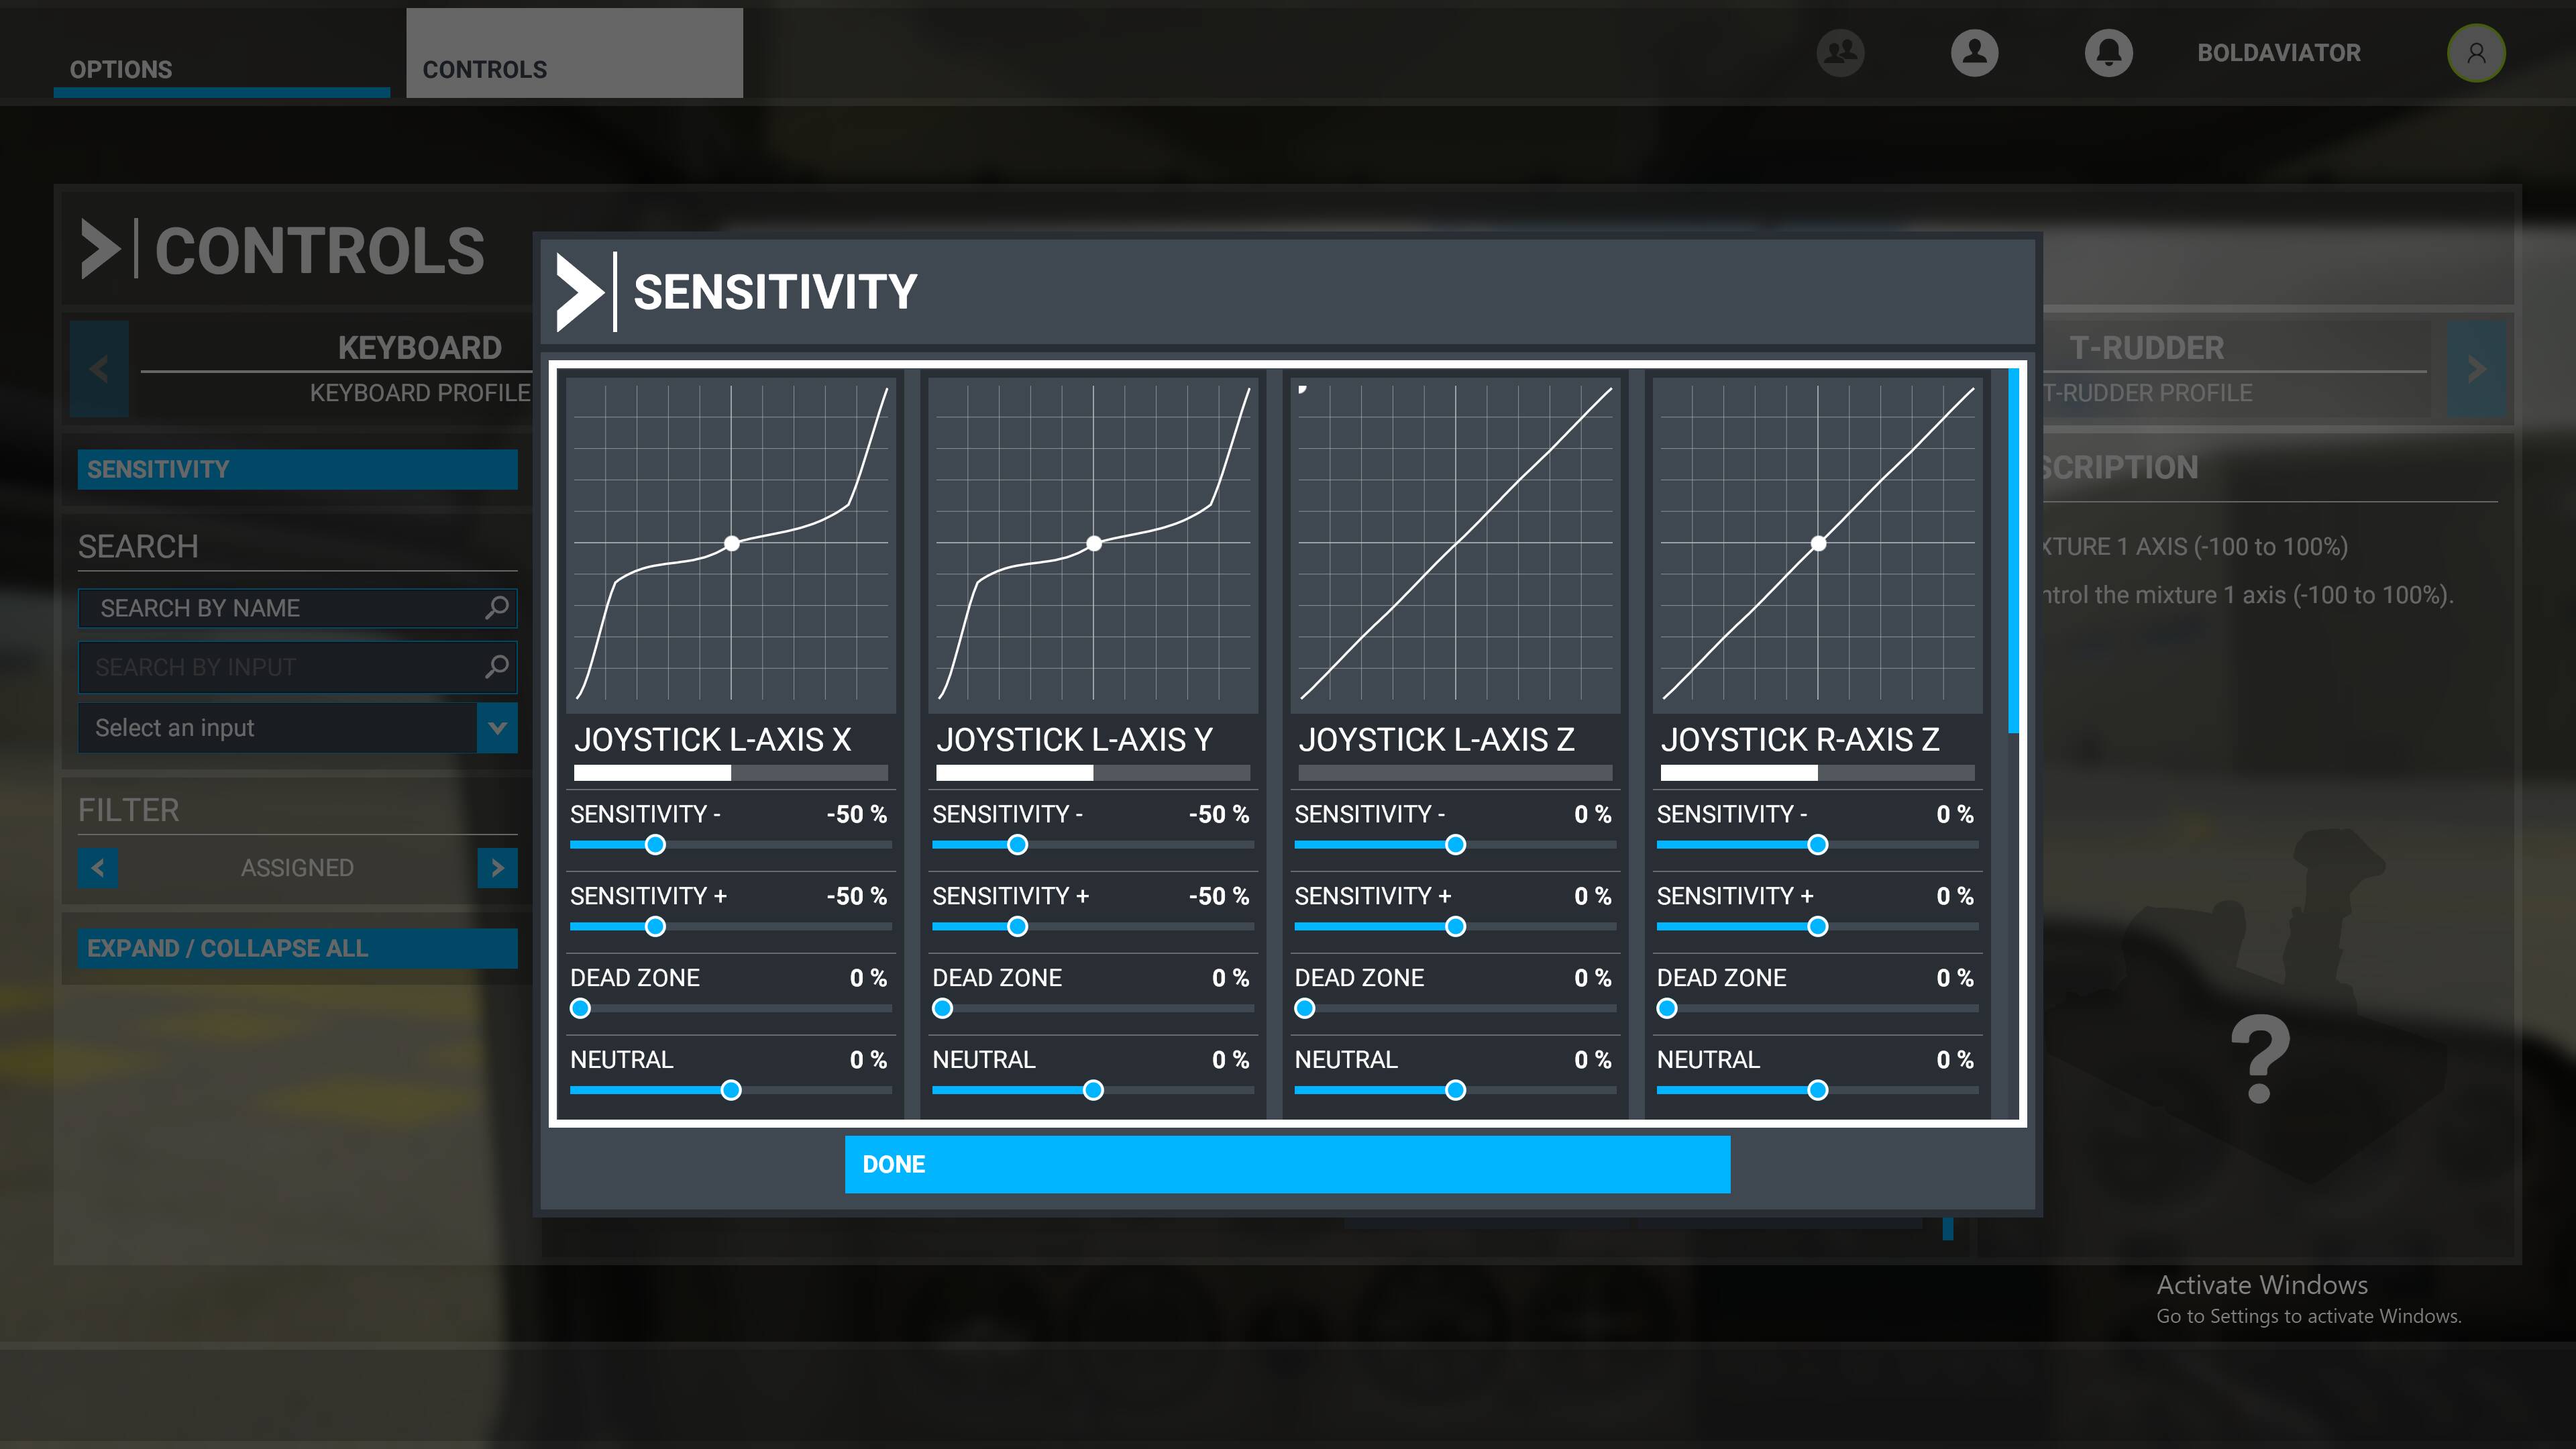
Ghost inputs during critical moments? That’s uncalibrated stick drift. In your game’s axis settings:
| Axis | Recommended Deadzone | Curve Type | Critical For |
|---|---|---|---|
| Pitch (Y) | 8% | S-Curve (40%) | Landing approaches |
| Roll (X) | 10% | Exponential | Barrel rolls |
| Yaw (Twist) | 15% | Linear | Formation flying |
Start with these values, then test in flight:
1. Enter hover mode in Star Citizen or stable flight in MSFS
2. Release stick completely
3. If aircraft drifts, increase deadzone by 2% increments
Never exceed 15%—higher values create “dead zones” where inputs don’t register. For older Extreme 3D Pros showing mechanical wear, add washers under the spring (warranty-voiding but effective).
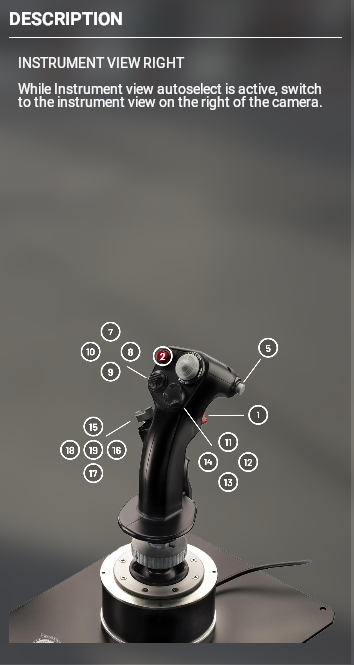
12-Button Flight Sim Layouts: Avoid These Mapping Mistakes
Pilots waste 30% of their button potential with lazy mappings. Here’s the combat-proven layout:
Microsoft Flight Simulator Critical Bindings
- Trigger (Btn 1): Flaps Toggle
- Thumb Button (Btn 2): Landing Gear
- Hat Switch: Camera Views (Up=Forward, Down=Cockpit)
- Btns 3-4: Trim Up/Down
- Btns 5-6: Autopilot Engage/Disengage
- Btns 9-10: Lights On/Off
- Throttle Button: Throttle Quadrant Toggle
Space Sim Hack for Star Citizen:
– Bind Btn 11 to “Decouple Mode”
– Map Hat Switch to Power Management (Top=Shields, Right=Weapons)
– Use Btn 12 as modifier key: Hold + Hat Switch for shield balancing
Critical Mistake: Assigning fire controls to the trigger. In DCS World, use triggers for weapon selection, not firing—your index finger needs to stay on gear/flaps during combat.
Advanced Button Macros: One-Click Landing Sequences
Logitech G HUB transforms single buttons into complex command sequences. For emergency landings:
- Open G HUB > Create new profile
- Select button (e.g., “Btn 12”) > Macro
- Record this sequence:
– PressG(landing gear)
– Wait 1.5 seconds
– PressF(full flaps)
– PressV(view external) - Name it “Emergency Landing”
Pro Combat Macro for Elite Dangerous:
– Cycle countermeasures + missile lock + fire in 0.8 seconds
– Assign to top red button for instant countermeasure deployment
Warning: G HUB macros won’t work in DCS World—use in-game scripting instead. Always export profiles (File > Export) to avoid reconfiguration after updates.
Flight Simulator vs Space Sim: Extreme 3D Pro Game Setup
Microsoft Flight Simulator 2020 Binding Guide
- Go to Options > Controls > All
- Filter by “Joystick”
- Critical adjustment: Set “Pitch Sensitivity” to 75% and “Roll Sensitivity” to 82%
- Bind “Brakes” to throttle bottom button (prevents runway overruns)
- Enable “Head Tracking” with hat switch for ATC communication
Star Citizen Power Management Configuration
- Navigate to Settings > Keybindings > Advanced
- Set Control Method to “Joystick/HOTAS”
- Bind Hat Switch:
– Up: Increase Shields
– Right: Increase Weapons
– Down: Increase Engines - Assign Throttle Slider to forward/back strafing (not throttle) for 6DoF combat
Why This Works: Star Citizen’s default bindings ignore the Extreme 3D Pro’s twist axis. Reassigning it to lateral strafing makes the joystick feel like a proper HOTAS.
Fix Unrecognized Joystick & Ghost Inputs in 5 Minutes
When your Extreme 3D Pro vanishes from Device Manager:
- Unplug all other USB controllers
- Open Device Manager > Human Interface Devices
- Right-click “HID-compliant game controller” > Uninstall device
- Check “Attempt to remove driver” > Reboot
- Plug directly into rear motherboard USB 2.0 port
For persistent ghost inputs:
– Increase deadzone to 12% in Windows calibration
– Disable “Enhanced Pointer Precision” in Mouse Settings
– If twist axis drifts, apply electrical tape over potentiometer contacts (temporary fix)
Never ignore this: Input lag in DCS World often stems from USB power management. In Device Manager, right-click your USB root hub > Properties > Power Management > Uncheck “Allow computer to turn off this device.”
Backup Profiles & Spring Maintenance for Longevity
Your Extreme 3D Pro’s spring tension degrades after 200+ hours of combat. Preserve it with:
- Monthly maintenance: Spray contact cleaner into base gimbal, then work stick through full motion
- Profile backups: Export G HUB profiles to cloud storage (they’re under 5KB)
- Firmware updates: Check Logitech G HUB monthly—critical for Star Citizen compatibility
Warranty-Safe Tuning: Place a 1mm rubber washer under the spring cap to reduce tension. For tighter response, add a second washer—but never disassemble the gimbal assembly.
Your Logitech Extreme 3D Pro now responds with fighter-pilot precision because you’ve eliminated the hidden calibration gaps that plague 90% of pilots. Remember: Windows-level calibration is non-negotiable, space sims require Z-axis reassignment to thrusters, and one-button landing macros save critical seconds during emergencies. For immediate results, implement the Star Citizen power management bindings tonight—they transform chaotic dogfights into controlled engagements. Backup your G HUB profile now, then take to the skies with confidence knowing your joystick won’t betray you on final approach. The difference between crashing and conquering starts with these exact setup steps.


