You click, scroll, and glide your mouse thousands of times a day, yet you probably never think about what builds up under your fingertips. Sweat, skin oils, crumbs, and dust accumulate quietly, turning your trusted mouse into a sticky, germ-laden surface. When your cursor starts jumping or your scroll wheel catches, the culprit is almost always grime, not a broken computer.
Learning how to clean a computer mouse properly takes less than 15 minutes and dramatically improves performance and hygiene. This guide walks you through safe, effective methods for optical, laser, trackball, and vertical ergonomic mice. You will discover which tools to use, which mistakes to avoid, and how to keep your mouse running like new for years to come.
Disconnect and Prepare Your Mouse Safely
Skipping preparation risks electrical damage or data loss. Take these steps before touching any cleaning tool.
Unplug Wired Mice or Power Off Wireless Models
Pull the USB cable from your computer for wired devices. Flip the power switch to “off” for wireless mice. This prevents accidental clicks, signal interference, and short circuits during cleaning.
Remove Batteries When Possible
Many trackball and vertical mice run on AA or AAA batteries. Slide the compartment open and remove them. This eliminates corrosion risk and lets you clean the battery cavity safely.
Shut Down Your Computer
Powering down your PC before disconnecting prevents input errors and static discharge. It is a small step that protects both your data and your device.
Choose a Clean, Dry Workspace
Lay a microfiber towel on a flat surface to prevent scratches. Keep all your cleaning supplies within arm’s reach so you never set the mouse down on a dirty counter.
Gather the Right Cleaning Tools
Using the wrong materials can scratch coatings or damage sensors. Stick to this proven toolkit for safe, effective results.
Essential Supplies
- Microfiber cloth: Lint-free and gentle on delicate finishes.
- Compressed air canister or electric blower: Ejects dust from sensors and seams.
- Toothpick or plastic spudger: Scrapes grime without scratching plastic.
- 70% isopropyl alcohol wipes: Sanitizes high-touch zones.
- Small brush or tweezers: Pulls out hair and stubborn debris.
- Dry lint-free cloth: Dries components and polishes surfaces.
Items to Avoid
Never use paper towels; they scratch and leave lint behind. Do not spray liquids directly onto the mouse. Skip household cleaners containing ammonia or bleach, since these degrade plastic and specialty coatings over time.
Clean Optical and Laser Mice Step by Step

Most desktop and gaming mice fall into this category. They use an LED or laser sensor that attracts dust and finger residue.
Clear the Sensor Lens First
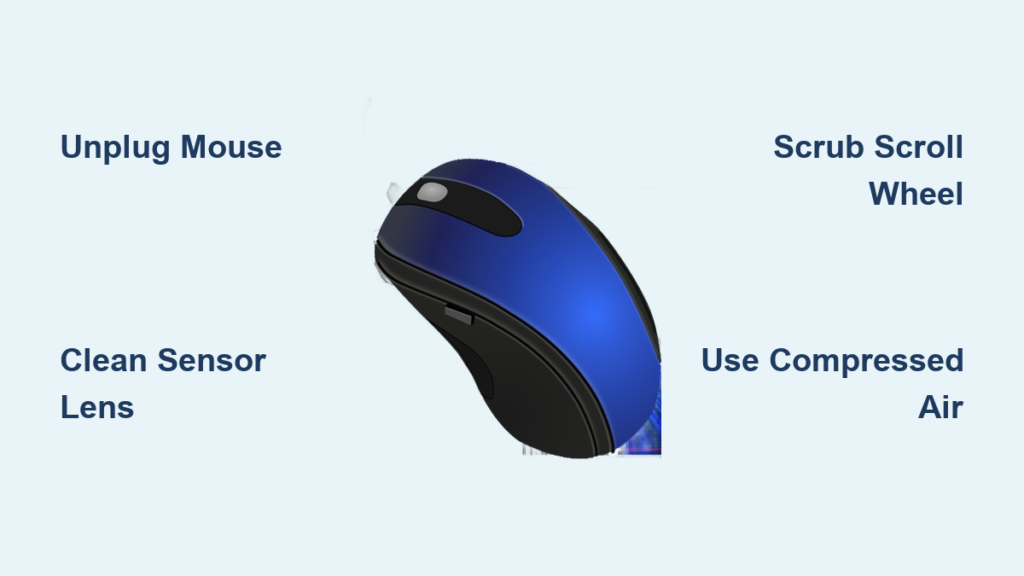
Flip the mouse over and locate the small glowing dot, which is the optical sensor. Blast it with a short burst of compressed air to dislodge dust. If smudges remain, gently wipe with a dry cotton swab. Never apply liquid here, since moisture can permanently damage the sensor.
Scrape Crevices and Button Edges
Run a toothpick or spudger along every seam, groove, and button gap. Focus on the spaces between left and right click switches, around side buttons, and along the scroll wheel housing. Rotate the scroll wheel slowly while scraping its edges to loosen trapped crumbs.
Sanitize the Outer Surface
Wipe the entire mouse body with an alcohol wipe or a microfiber cloth lightly dampened with water. Pay extra attention to the palm rest, thumb grip, and scroll wheel. Immediately follow with a dry cloth to prevent moisture from seeping into seams.
Blast with a Final Air Burst
Finish by spraying compressed air around buttons and seams. This pushes any loosened debris out of the interior before you reconnect.
Deep-Clean Trackball Mice
Trackball mice collect more grime than standard models because your fingers constantly contact the exposed ball.
Remove the Trackball Properly
For top-mounted balls, press the release button or gently pop the ball out with your fingers. For bottom-mounted models, twist the retaining ring counterclockwise until the ball releases. Set the ball aside on a clean cloth.
Clean the Ball and Housing
Wipe the trackball thoroughly with an alcohol wipe or a damp microfiber cloth. Let it air dry completely. Blast the interior cavity with compressed air, then wipe the inner walls with a dry or slightly damp cloth. Avoid touching electronic contacts with any wet material.
Clear the Internal Rollers
Inside the housing, you will see small rollers that translate ball movement into cursor motion. Blow them clean with compressed air, then gently rotate each roller with a toothpick to break up sticky residue. For stubborn grime, lightly dampen a cotton swab with alcohol and wipe each roller. Let everything dry fully before reassembly.
Reassemble and Test
Once every part is dry, drop the ball back into the housing and secure the retaining ring. Power on the mouse and test smooth tracking and free rolling.
Care for Vertical Ergonomic Mice
Vertical mice feature unique shapes and soft-touch coatings that attract dirt and show wear easily.
Decide Whether to Disassemble
Most vertical mice are not designed for user disassembly. Unless the manufacturer provides explicit instructions, avoid opening the shell. Stick to external cleaning only.
Target Grooves and Finger Contours
Use a toothpick to clear the contoured grooves designed for finger placement. Pay special attention to the base seam and side grips where grime tends to accumulate.
Wipe with Caution
Spray compressed air over the entire surface, then wipe with a microfiber cloth that is barely damp. Avoid oversaturating the cloth, since moisture can seep into seams and damage internal electronics.
Accept Coating Limitations
If the soft-touch surface feels sticky or looks discolored, cleaning will improve hygiene but may not restore the original appearance. Coating degradation is often permanent, so focus on function rather than cosmetics.
Fix Common Problem Areas on Any Mouse

Some parts wear out faster or trap more debris than others. These targeted techniques solve the most frustrating issues.
Unclog a Sticky Scroll Wheel
If your wheel catches, skips, or resists rotation, follow these steps:
- Run a toothpick or small brush inside the crevice surrounding the wheel.
- Rotate the wheel slowly while applying light pressure to break up debris.
- Blast the area with compressed air to eject loosened particles.
Clear Grime Around Buttons and Seams
Dirt builds up where buttons meet the body, causing sticky or mushy clicks. Run a toothpick along every seam to aggregate debris. Use tweezers to pull out visible fibers or crumbs. Finish with compressed air to push particles out of the interior.
Deep-Clean the Optical Sensor
For persistent tracking issues, start with compressed air. If smudges remain, lightly dampen a corner of a microfiber cloth and gently wipe the lens. Dry the area immediately with a clean cotton swab to prevent moisture damage.
Test Your Mouse After Cleaning

Always verify performance before returning to work. A quick functional check catches problems early.
Check Button Response
Click the left, right, and side buttons multiple times. Each press should feel crisp and springy, never mushy or stuck.
Spin the Scroll Wheel
The wheel should rotate smoothly without catching, stuttering, or grinding. If resistance remains, repeat the cleaning process.
Test Cursor Tracking
Move the mouse across a clean surface. The cursor should glide smoothly without jumping, freezing, or drifting. Clean tracking confirms a spotless sensor.
Prevent Future Buildup with Simple Habits
A few daily habits keep your mouse cleaner for longer and reduce how often you need deep cleaning.
Wipe Daily and Deep-Clean Monthly
Use a dry microfiber cloth to wipe your mouse at the end of each workday. Perform a full cleaning every four to six weeks, or weekly if you eat at your desk or have naturally oily skin.
Wash Your Hands Before Use
Clean hands transfer far less oil and grime to your mouse. This single habit dramatically reduces buildup over time.
Use a Quality Mouse Pad
A mouse pad creates a smooth, clean tracking surface and prevents direct contact with dusty desks. It also protects your sensor from scratches.
Store Your Mouse Properly
When not in use, keep your mouse covered or stored in a drawer. This minimizes dust exposure and extends the time between cleanings.
Troubleshoot Persistent Mouse Problems
| Problem | Likely Cause | Quick Fix |
|---|---|---|
| Scroll wheel still sticky | Deep-seated grime | Repeat scraping and air blasting |
| Cursor jumps or drifts | Dirty sensor lens | Re-clean with dry swab and compressed air |
| Buttons unresponsive | Internal debris or moisture | Let dry for 24 hours, then retest |
| Trackball drags | Dirty internal rollers | Clean rollers with alcohol swab |
| Coating peeling | Material wear | Replace mouse; clean gently to slow further damage |
Frequently Asked Questions About Cleaning a Computer Mouse
How often should I clean my computer mouse?
Wipe your mouse with a dry microfiber cloth daily. Perform a full deep clean every four to six weeks for average users. Daily gamers or people who eat at their desk should clean weekly to prevent heavy buildup.
Can I use rubbing alcohol to clean my mouse?
Yes, 70% isopropyl alcohol wipes are safe and effective for sanitizing the outer surface. Avoid getting alcohol inside the mouse, near the sensor, or inside the battery compartment. Always dry the surface immediately after wiping.
What is the best way to clean a mouse sensor?
Use compressed air as your first option. If dust remains, gently wipe the lens with a dry cotton swab or a barely damp microfiber cloth. Never spray liquid directly onto the sensor, since moisture can permanently damage the electronics.
How do I clean a mouse scroll wheel that is stuck?
Run a toothpick or small brush inside the crevice around the wheel. Rotate the wheel slowly while applying light pressure to break up debris. Finish with a burst of compressed air to eject loosened particles from the housing.
Is it safe to open my mouse to clean the inside?
Only open your mouse if the manufacturer provides disassembly instructions. Most optical and vertical mice are not designed for user servicing. Trackball mice are typically safe to open because they require regular ball removal for cleaning.
Why does my mouse feel sticky even after cleaning?
Sticky surfaces usually come from degraded soft-touch coatings, not just dirt. Cleaning improves hygiene but cannot restore worn coatings. If stickiness persists, the mouse may need replacement, especially if it affects grip and comfort.
Key Takeaways for Keeping Your Computer Mouse Clean
A clean mouse delivers smoother tracking, crisper clicks, and a more hygienic workspace. The entire process takes less than 15 minutes and requires only a few basic tools: microfiber cloth, compressed air, toothpicks, and alcohol wipes. Avoid spraying liquids directly onto the device and never use abrasive materials like paper towels.
Stick to a simple routine: disconnect, de-gunk, disinfect, and dry. Wipe daily, deep clean monthly, and store your mouse properly when not in use. With consistent care, your mouse will perform better and last significantly longer.
Now that your mouse is spotless, consider giving your keyboard the same treatment for a fully refreshed workspace.