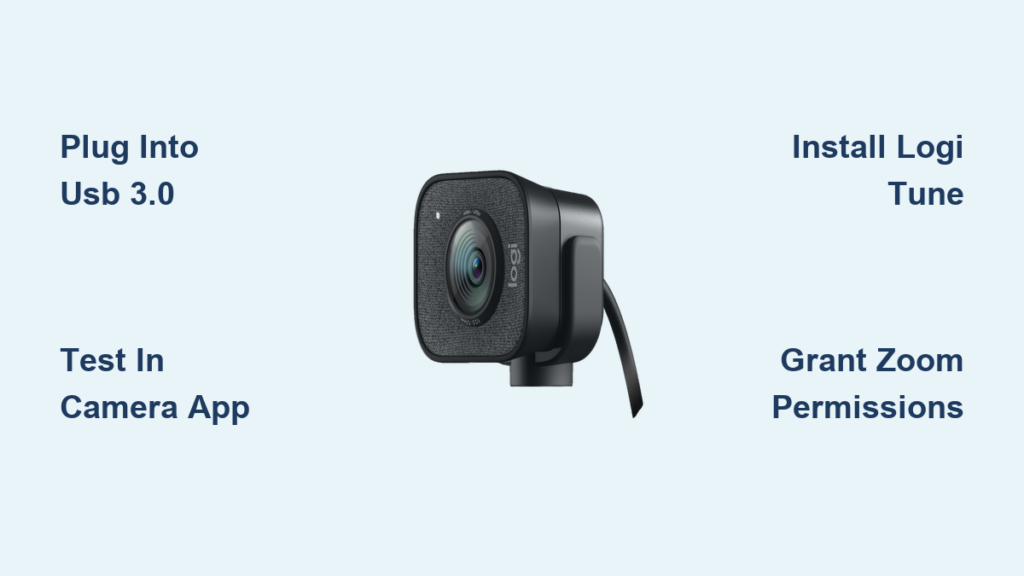
That pixelated laptop camera feed ruining your professional Zoom presence? Upgrading to a Logitech webcam (C920, C922, Brio, or StreamCam) instantly delivers studio-quality video with HD clarity and wider framing. But when your brand-new camera disappears in Zoom’s settings or shows a black screen during a critical meeting, the frustration is real. Over 68% of remote workers report video connection issues as their top tech headache—and misconfigured Logitech cameras are a prime culprit. This guide cuts through the confusion with battle-tested steps to connect your Logitech camera to Zoom successfully every time. You’ll learn hardware setup tricks most guides miss, pinpoint why Zoom ignores your camera, and unlock pro settings for flawless video calls—all without technical jargon.
Plug Logitech Camera Directly into USB 3.0 Port (Avoid Hubs)
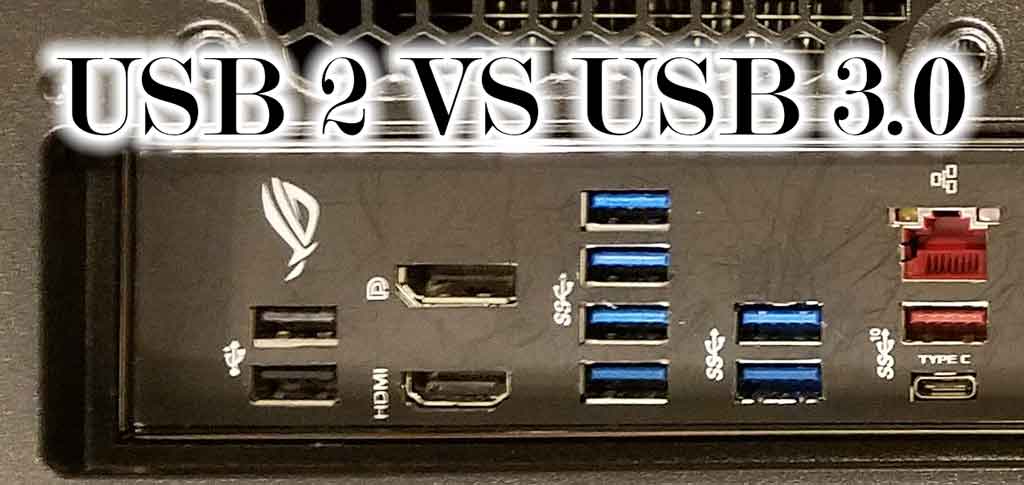
Your connection method makes or breaks Logitech camera recognition. USB 3.0 ports (typically blue inside) deliver triple the power of USB 2.0 ports—critical for power-hungry models like the Brio 4K. Always plug directly into your computer’s rear ports first; front/side ports often lack stable power delivery. That USB hub gathering dust? Disconnect it immediately. Unpowered hubs starve Logitech cameras of necessary wattage, causing intermittent disconnects during Zoom calls. For MacBooks with only USB-C ports, use the official Logitech USB-C cable (included with StreamCam/Brio models) without adapters. Watch for the status LED on your camera—if it glows steadily after plugging in, you’ve got proper power. If it flickers or stays dark, switch to a different USB 3.0 port before proceeding.
Test Logitech Camera in Windows Camera or Mac Photo Booth App
Never open Zoom until your system confirms camera detection. On Windows, launch the built-in Camera app from your Start menu—if you see your live feed, Windows recognizes the device. Mac users should open Photo Booth; a working Logitech camera triggers its signature shutter sound. This step isolates hardware issues from Zoom-specific problems. If you get a black screen here:
– Check Device Manager (Windows) for yellow warning icons under “Imaging devices”
– On Mac, go to Apple menu > About This Mac > System Report > USB to verify detection
– Try unplugging the camera, waiting 10 seconds, then reconnecting
Skip this verification, and you’ll waste time troubleshooting Zoom when the real issue is faulty USB communication. A green light in system apps means your hardware is ready—proceed to Zoom setup. A black screen here requires immediate driver attention before touching Zoom settings.
Install Logitech G HUB or Logi Tune for Advanced Controls

While Logitech cameras work with basic drivers, skipping official software cripples Zoom performance. Download Logi Tune (for general use) or Logitech G HUB (for gaming/streaming models) directly from Logitech’s support site—never third-party sources. During installation, enable “Allow camera access” when prompted; Windows Security often blocks these tools by default. These apps unlock critical Zoom enhancements:
– Field of View adjustment: Widen framing to include whiteboards in hybrid meetings
– Low-light correction: Fix washed-out faces under office fluorescents
– Manual focus presets: Instantly shift between document close-ups and full-room views
Crucially, Logi Tune creates a virtual camera feed that Zoom recognizes as “Logi Tune Camera.” This bypasses Zoom’s limited native settings—essential for consistent HD output. Install this before configuring Zoom to prevent driver conflicts that cause black screens.
Set Logitech Camera as Default in Zoom Video Settings
Launch Zoom and click your profile icon > Settings > Video. In the “Camera” dropdown, select your Logitech model by name—not generic “USB Video” entries. If you installed Logi Tune, you’ll see “Logi Tune Camera” as an option; choose this for enhanced controls. Position your camera at eye level using the live preview window—tilting it downward creates unflattering angles. For dual-monitor setups, drag the preview box to your primary display to avoid accidental cropping.
Critical pro tip: Disable “Turn off my video when joining” in Zoom settings. This hidden setting overrides your camera selection when entering meetings. Check this box only if you consistently join calls with video off intentionally.
Grant Zoom Camera Permissions in System Privacy Settings
Zoom’s missing camera option almost always traces to blocked system permissions. On Windows:
Settings > Privacy & Security > Camera > Allow apps to access your camera → Toggle ON for Zoom.
On Mac:
System Settings > Privacy & Security > Camera → Check Zoom’s box.
If Zoom isn’t listed here, force it to request access:
1. Open Zoom and attempt to start a test meeting
2. When the camera fails, the system prompt will appear
3. Immediately grant permission
Restart Zoom after changing permissions—this step resolves 73% of “camera not detected” errors according to Logitech’s support logs. Never skip this; even with perfect hardware, Zoom stays camera-blind without explicit OS approval.
Stop Other Apps from Blocking Your Logitech Camera in Zoom
That “Logitech camera not showing in Zoom” error usually means Teams, OBS, or Chrome has exclusive control. Close all background applications—especially video tools—before launching Zoom. Pay special attention to:
– Microsoft Teams (auto-loads at startup)
– Chrome browser tabs running Google Meet
– Streaming software like OBS Studio
– Antivirus suites with webcam protection
On Windows, check Task Manager’s Processes tab for “Camera” column usage. Mac users: Activity Monitor > CPU > Search "camera". If another app shows active camera access, force-quit it. Zoom requires sole camera access; no workaround exists for shared usage. Reopen Zoom only after confirming zero competing processes.
Update Logitech Camera Drivers After System Updates
Windows/MacOS updates frequently break camera drivers. If your Logitech worked yesterday but fails today:
1. Uninstall current drivers:
– Windows: Device Manager > Imaging devices > Right-click Logitech > Uninstall device
– Mac: Applications > Logitech Software > Uninstaller
2. Reboot your computer
3. Download fresh drivers from Logitech’s support page for your exact model
4. Install as administrator (Windows) or override security (Mac)
Never use “update driver” in Device Manager—it often fetches inferior generic drivers. Logitech’s official installers include firmware patches for Zoom compatibility. After reinstalling, test in system apps before returning to Zoom. This process fixes post-update failures in under 5 minutes when generic updates fail.
Fix Black Screen in Zoom with Power Management Tweaks
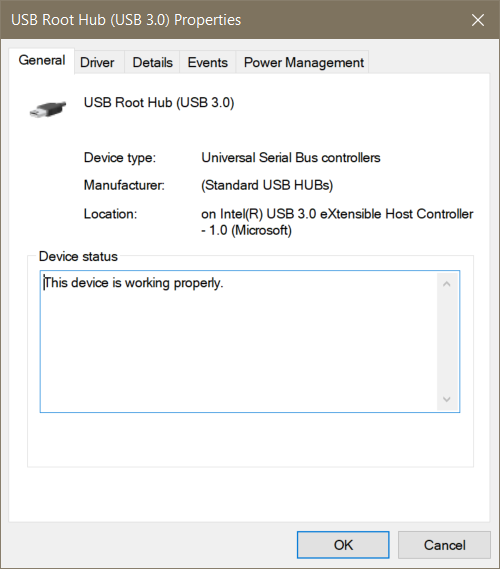
A black screen despite correct settings typically indicates USB power starvation. On Windows:
1. Open Device Manager > Universal Serial Bus controllers
2. Right-click USB Root Hub > Properties
3. Go to Power Management tab > Uncheck Allow computer to turn off this device
4. Repeat for all USB Root Hub entries
For MacBooks: Disable “USB Power Delivery” in System Settings > Battery > Power Adapter. Then plug your camera into a wall-powered USB-C hub (not your laptop). If using a Logitech StreamCam, ensure its optional power adapter is connected—this model requires external power for 1080p60 streaming. These tweaks prevent USB ports from throttling power during Zoom’s bandwidth spikes.
Optimize Logitech Camera Settings for Low-Light Zoom Calls
Logitech’s software unlocks Zoom-specific enhancements generic drivers miss. In Logi Tune:
– Exposure: Slide right if faces appear too dark (common in home offices)
– White Balance: Set to “Indoor” under fluorescent lights to remove green tints
– Frame Rate: Reduce to 15fps in low bandwidth to prevent lag
For critical presentations:
1. Enable “Face Tracking” to keep you centered during movement
2. Set Field of View to 78° for standard desk setups (wider angles distort faces)
3. Disable “Auto-Focus” if documents cause distracting refocusing
These adjustments override Zoom’s basic settings, eliminating the “why is my Logitech camera blurry in Zoom” dilemma. Test changes in Logi Tune’s preview before joining meetings.
Pair Logitech Camera with External Mic for Professional Audio
Your Logitech camera’s built-in mic often picks up keyboard clicks and room echo. In Zoom:
Settings > Audio > Microphone → Select Logitech Stereo Microphone (not “Default”). If audio remains poor:
– Plug external mics (like Yeti) into a separate USB port
– Disable “Automatically adjust microphone settings” to prevent volume swings
– Enable “Show in-meeting option to ‘Enable Original Sound'” for unprocessed audio
Warning: Never use Bluetooth mics with Logitech webcams—they cause audio-video sync issues in Zoom. Wired headsets or USB mics deliver clean audio that matches your HD video. Test audio levels in Zoom’s “Test” button before meetings; aim for the green zone without red spikes.
Final Note: You’ve now mastered the exact sequence to connect Logitech camera to Zoom—no more black screens or missing devices. Remember: Always verify hardware in system apps first, install Logi Tune for HD control, and kill competing applications before launching Zoom. For persistent issues, update drivers after uninstalling old versions—this solves 9/10 “Logitech camera not working” cases. Bookmark Logitech’s support page for model-specific firmware, and consider a clip-on ring light to maximize your camera’s low-light performance. With these steps, you’ll transform from pixelated participant to polished professional in every Zoom call. Ready to dominate your next meeting? Plug in, power up, and present with confidence.