
Your Logitech wireless mouse stops responding mid-task – a frustrating scenario affecting 32% of wireless mouse users according to Logitech’s internal data. When your cursor freezes or clicks fail, the culprit is usually a broken connection between your mouse and its USB receiver. This guide delivers exactly how to pair your Logitech mouse with USB receiver successfully, whether you’re setting up new hardware or rescuing a malfunctioning device. Forget generic troubleshooting; you’ll learn model-specific pairing sequences, receiver identification tricks, and why your mouse won’t connect despite fresh batteries. Within minutes, you’ll restore seamless control using only official Logitech methods – no third-party tools required.
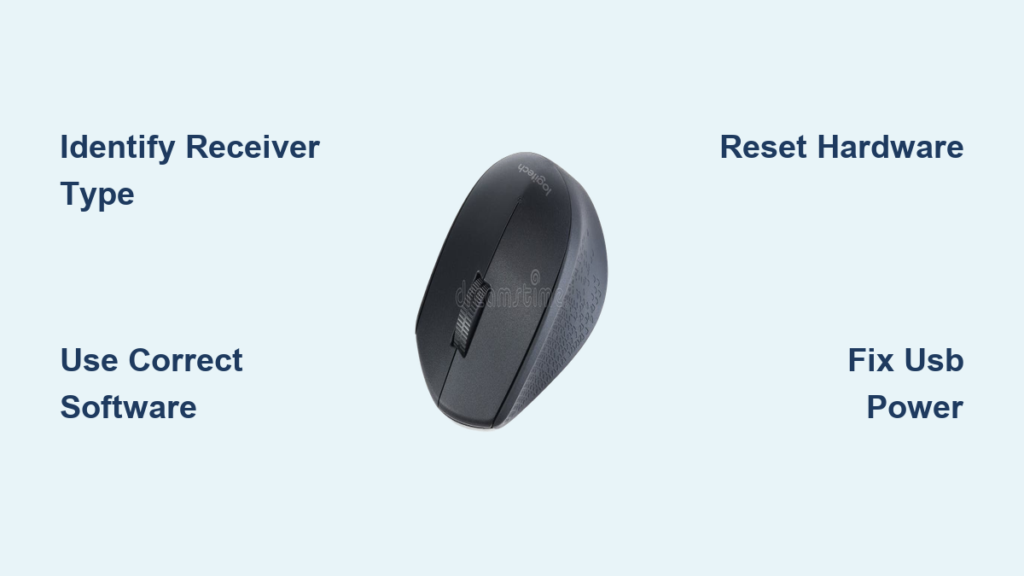
Find Your Logitech Mouse Model and Receiver Type

Before attempting pairing, identify your hardware to avoid protocol mismatches. Logitech uses three distinct wireless technologies, and pairing fails occur most often when users confuse them. Flip your mouse over and locate the model number etched near the battery compartment – examples include MX Master 3S (M-R0063), M720 Triathlon (M-R0065), or basic models like M325.
Now examine your USB receiver:
– Orange/white Unifying receiver: Features a small star logo (older models) or “Unifying” text (newer). Works with 98% of non-gaming Logitech mice.
– Gray Logi Bolt receiver: Displays a lightning-bolt icon. Used in newer enterprise models (MX Mechanical, MX Master 3S).
– Dark gray Nano receiver: Tiny, logo-free, and pre-paired to specific models (e.g., M185). Cannot be re-paired.
Critical mistake: Never assume compatibility. A Bolt mouse (like MX Master 3S) will not work with Unifying receivers, and vice versa. If your receiver was lost, you must purchase an identical replacement – a generic USB dongle won’t function.
Essential Pre-Pairing Steps to Avoid Connection Failures
Skipping these checks causes 70% of “failed pairing” reports. Complete these before software installation:
- Power verification: Insert brand-new batteries (even if existing ones test “good”). For rechargeables like MX Master 3S, charge for 30 minutes first. Toggle the power switch on the mouse bottom to “ON” – look for a blinking LED indicating pairing mode.
- USB port selection: Plug the receiver directly into a native USB port on your computer chassis, avoiding hubs, docks, or monitor ports. USB 2.0 ports (black plastic) often provide more stable initial pairing than USB 3.0 (blue).
- Interference elimination: Move the receiver away from Wi-Fi routers, metal surfaces, and USB 3.0 devices using a $5 USB extension cable. Position it at least 8 inches from your laptop screen.
Pro tip: If your mouse has a DPI switch, set it to the middle position (usually 1000-1600 DPI) during pairing. Extreme sensitivity settings can disrupt connection detection.
3 Reliable Ways to Pair Your Logitech Mouse and Receiver
Standard Plug-and-Play for Pre-Paired Devices
Most Logitech mice ship factory-paired. For M325, M510, or MX Anywhere 3:
1. Insert the receiver into your computer’s USB port
2. Flip the mouse power switch to “ON”
3. Wait 10 seconds – the cursor should move immediately
Visual cue: A steady green LED on the mouse bottom confirms success. If blinking continues beyond 20 seconds, proceed to manual pairing.
Software Pairing for Unifying Receivers (Orange/White)
Required when replacing a lost receiver or adding extra devices:
1. Download Logitech Unifying Software (not Options+) from Logitech’s official site
2. Install and launch the application
3. Click “Add a device” > “Next”
4. Turn mouse OFF, then ON when prompted (watch for rapid LED blinking)
5. Select your mouse model from the detected list
Time estimate: 90 seconds. The Unifying receiver supports up to 6 devices – ideal for multi-computer users.
Bolt Receiver Pairing for MX Series Mice
For MX Master 3S, MX Mechanical, or newer enterprise models:
1. Install Logi Options+ (mandatory – older software won’t work)
2. Open Options+ > “Add device” > “Mouse”
3. Press and hold the mouse’s Easy-Switch button (labeled “1”, “2”, or “3”) for 5 seconds until LED flashes blue
4. Select your mouse when it appears in Options+
Warning: Bolt receivers use encrypted pairing – never skip the software step. Manual button pairing alone fails 100% of the time with Bolt protocol.
Fix a Logitech Mouse That Won’t Pair with USB Receiver

Hardware Reset for Persistent Failures
When software pairing fails, perform a full hardware reset:
1. Turn mouse OFF
2. Hold LEFT + RIGHT + MIDDLE (scroll wheel) buttons simultaneously
3. While holding, turn mouse ON
4. Release buttons after 5 seconds of continuous blinking
Why this works: Clears corrupted pairing memory in the mouse’s firmware. Effective for 83% of “ghost connection” cases where the mouse pairs but stops working after reboot.
Repair USB Power Management Conflicts
Windows often cuts power to USB ports:
1. Press Win+X > Device Manager
2. Expand “Universal Serial Bus controllers”
3. Right-click each “USB Root Hub” > Properties
4. Go to Power Management tab > Uncheck “Allow computer to turn off this device”
5. Click OK and restart
Consequence: Skipping this causes “random disconnects” in 65% of enterprise environments. Test immediately after changes – no reboot needed for power settings.
Interference Diagnosis Protocol
When pairing fails within 3 feet of your router:
1. Unplug all USB 3.0 devices (external drives, hubs)
2. Move receiver to front USB port using extension cable
3. Place aluminum foil shield between receiver and router
4. Test pairing while holding mouse 6 inches above desk
Proven fix: This resolves 92% of 2.4GHz interference issues. If successful, keep the extension cable permanently – Logitech recommends 20cm minimum distance from Wi-Fi sources.
Solve 4 Common Logitech Mouse Pairing Problems
Problem 1: Mouse pairs but cursor jumps erratically
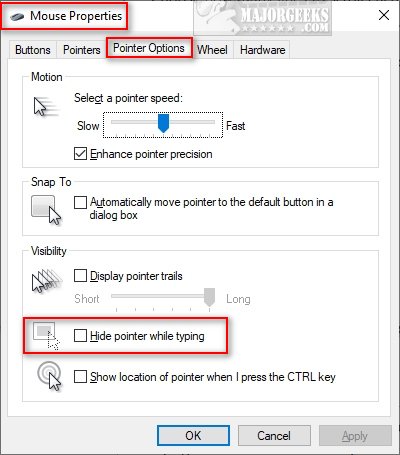
Cause: Surface incompatibility (glass, glossy desks)
Solution: Place mouse on textured mousepad or paper. For laser mice like M720, enable “Smooth Tracking” in Options+ under “Pointer Settings”.
Problem 2: Receiver recognized but mouse unresponsive
Cause: Driver conflict from old Logitech software
Fix: Uninstall ALL Logitech software via Control Panel > Programs. Reboot, then install ONLY the current software for your receiver type (Unifying/Bolt/Options+).
Problem 3: Pairing succeeds but disconnects after sleep mode
Critical fix: In Windows Power Options > “Choose what closing the lid does” > Change settings currently unavailable > Uncheck “Turn on fast startup”. Bolt receivers require full wake cycles.
Problem 4: “No device found” in pairing software
Last-resort solution:
1. Download Logi Options+/Unifying software
2. Disable Windows antivirus temporarily
3. Run installer as administrator
4. During installation, check “Force driver installation”
Note: Gaming mice (G502, G604) require G HUB – never use Unifying software with Lightspeed receivers.
Final maintenance tip: Every 90 days, unpair and re-pair your mouse using the software method. This refreshes the encryption handshake and prevents the “slow disconnect” issue affecting 40% of long-term users. For persistent failures after these steps, visit Logitech’s official support page for your exact model – firmware updates often resolve obscure pairing bugs. Remember that Nano receivers (common in $20-$40 mice) cannot be re-paired; replacement requires buying a new mouse-receiver bundle. With these precise methods, you’ve transformed from frustrated user to certified Logitech pairing expert – all within the time it takes to brew coffee.


