

You’ve just unboxed your new Logitech webcam, plugged it into your Mac, and… nothing happens. Or maybe it works in Photo Booth but not in Zoom. This frustrating scenario happens to Mac users daily because while Logitech webcams are technically “plug-and-play” on macOS, they often require specific permissions, software, and settings adjustments to work properly across all applications. Unlike Windows, Mac doesn’t offer built-in controls for advanced webcam features, leaving many users confused about why their high-quality Logitech camera underperforms.
The good news is that setting up your Logitech webcam on Mac doesn’t need to be complicated. This guide cuts through the confusion with precise, actionable steps to get your Logitech C920, C922, StreamCam, or other model working perfectly for video calls, streaming, and content creation. You’ll learn exactly which permissions to grant, what software to install (and avoid), and how to fix those annoying “camera not detected” errors that plague Mac users.
Why Your Logitech Webcam Might Not Work Right After Plugging Into Mac
Logitech webcams connect to Macs via USB and are recognized as standard video devices, but macOS handles them differently than Windows. The core issue isn’t compatibility—it’s control. While your Mac sees the camera, it lacks native interfaces for adjusting focus, exposure, or white balance that Windows users get with Logitech’s software suite. This limitation means your webcam might work in basic apps but fail in others, or deliver subpar video quality despite its high-end capabilities.
Most Mac users encounter one of three problems: the camera isn’t recognized by specific apps despite working elsewhere, video quality is poor with no adjustment options, or audio from the webcam’s built-in mic doesn’t sync properly. These issues stem from macOS’s strict privacy permissions and the absence of Logitech’s full feature set on Mac. Understanding this distinction is crucial—you’re not doing anything wrong; macOS simply requires different setup steps than Windows.
Fix “Camera Not Detected” Errors in Zoom and Teams Immediately
When your Logitech webcam appears in Photo Booth but not in Zoom, Teams, or Google Meet, permissions are almost always the culprit. Here’s how to fix it in under 60 seconds:
- Open System Settings (Apple menu > System Settings)
- Go to Privacy & Security > Camera
- Ensure every app you use (Zoom, Teams, Slack) has the toggle switched ON
- Repeat for Microphone if audio isn’t working
- Quit and relaunch the application—changes don’t apply while apps are running
Pro Tip: If an app doesn’t appear in the Camera list, open that app first, then check permissions—macOS only shows apps that have requested camera access.
Grant Full Disk Access for Advanced Webcam Software
Some third-party webcam control apps require Full Disk Access to function properly, especially those that create virtual camera devices. Without this permission, apps like OBS or ManyCam may fail to detect your Logitech webcam:
- Go to System Settings > Privacy & Security > Full Disk Access
- Click the + icon and navigate to Applications
- Select the webcam control app (e.g., OBS, Webcam Settings)
- Relaunch the application after granting access
Warning: Never grant Full Disk Access to apps you don’t recognize—this is a common security vulnerability exploited by malware.
Confirm Your Logitech Model Works With Your Mac Version

Not all Logitech webcams work equally well across all macOS versions. Apple Silicon Macs (M1, M2, M3) generally have better compatibility than older Intel models, but specific webcam models still face limitations. Before troubleshooting further, verify your setup will work.
Check Compatibility for Your Specific Mac Model
Your Mac’s processor type significantly impacts webcam performance. Here’s what you need to know:
- Apple Silicon Macs (M1/M2/M3): Run Logitech webcams natively with excellent performance. Logi Tune works in native ARM64 mode for best results.
- Intel Macs (2020 and older): May require Rosetta 2 for some apps but generally support all Logitech models with minor limitations.
- macOS Ventura and newer: Introduces stricter privacy controls that often block camera access until permissions are explicitly granted.
Quick Check: Click the Apple logo > About This Mac > Chip to identify your processor type. Older Intel Macs (2015-2020) work with all Logitech models but may experience occasional driver conflicts.
Verify Your Logitech Webcam Model Supports Mac
While most modern Logitech webcams work on Mac, some models have known limitations:
- Logitech C920/C920e: Works perfectly with basic functions; limited manual controls
- Logitech C922: Excellent compatibility with streaming features
- Logitech StreamCam: Native Mac support with Logi Tune; best overall Mac experience
- Logitech Brio: Full 4K support but requires third-party apps for manual controls
- Older Models (C525, C615): May work but lack software support for manual adjustments
Critical Note: Logitech does not provide native macOS drivers like they do for Windows. Advanced controls require third-party software regardless of your webcam model.
Install Logi Tune: Logitech’s Official Mac Webcam Control Software
https://www.logitech.com/en-us/support/webcams.html
Logi Tune is Logitech’s primary solution for Mac users wanting to adjust their webcam settings. Unlike Windows software, it’s intentionally simplified but provides essential controls that macOS lacks. This lightweight application (just 25MB) runs in your menu bar for quick access to camera adjustments during calls.
Download and Install Logi Tune Correctly
Many Mac users install the wrong software or skip critical steps. Follow this precise process:
- Visit Logitech’s official support page (not third-party sites)
- Search for your specific webcam model (e.g., “C920 Mac support”)
- Download “Logi Tune for Mac” (avoid “Logi Options+” for webcam control)
- Open the downloaded .dmg file and drag Logi Tune to Applications
- Launch Logi Tune and allow camera permissions when prompted
Common Mistake: Installing Logi Options+ thinking it controls webcam settings—it primarily manages mice and keyboards, with limited camera functionality.
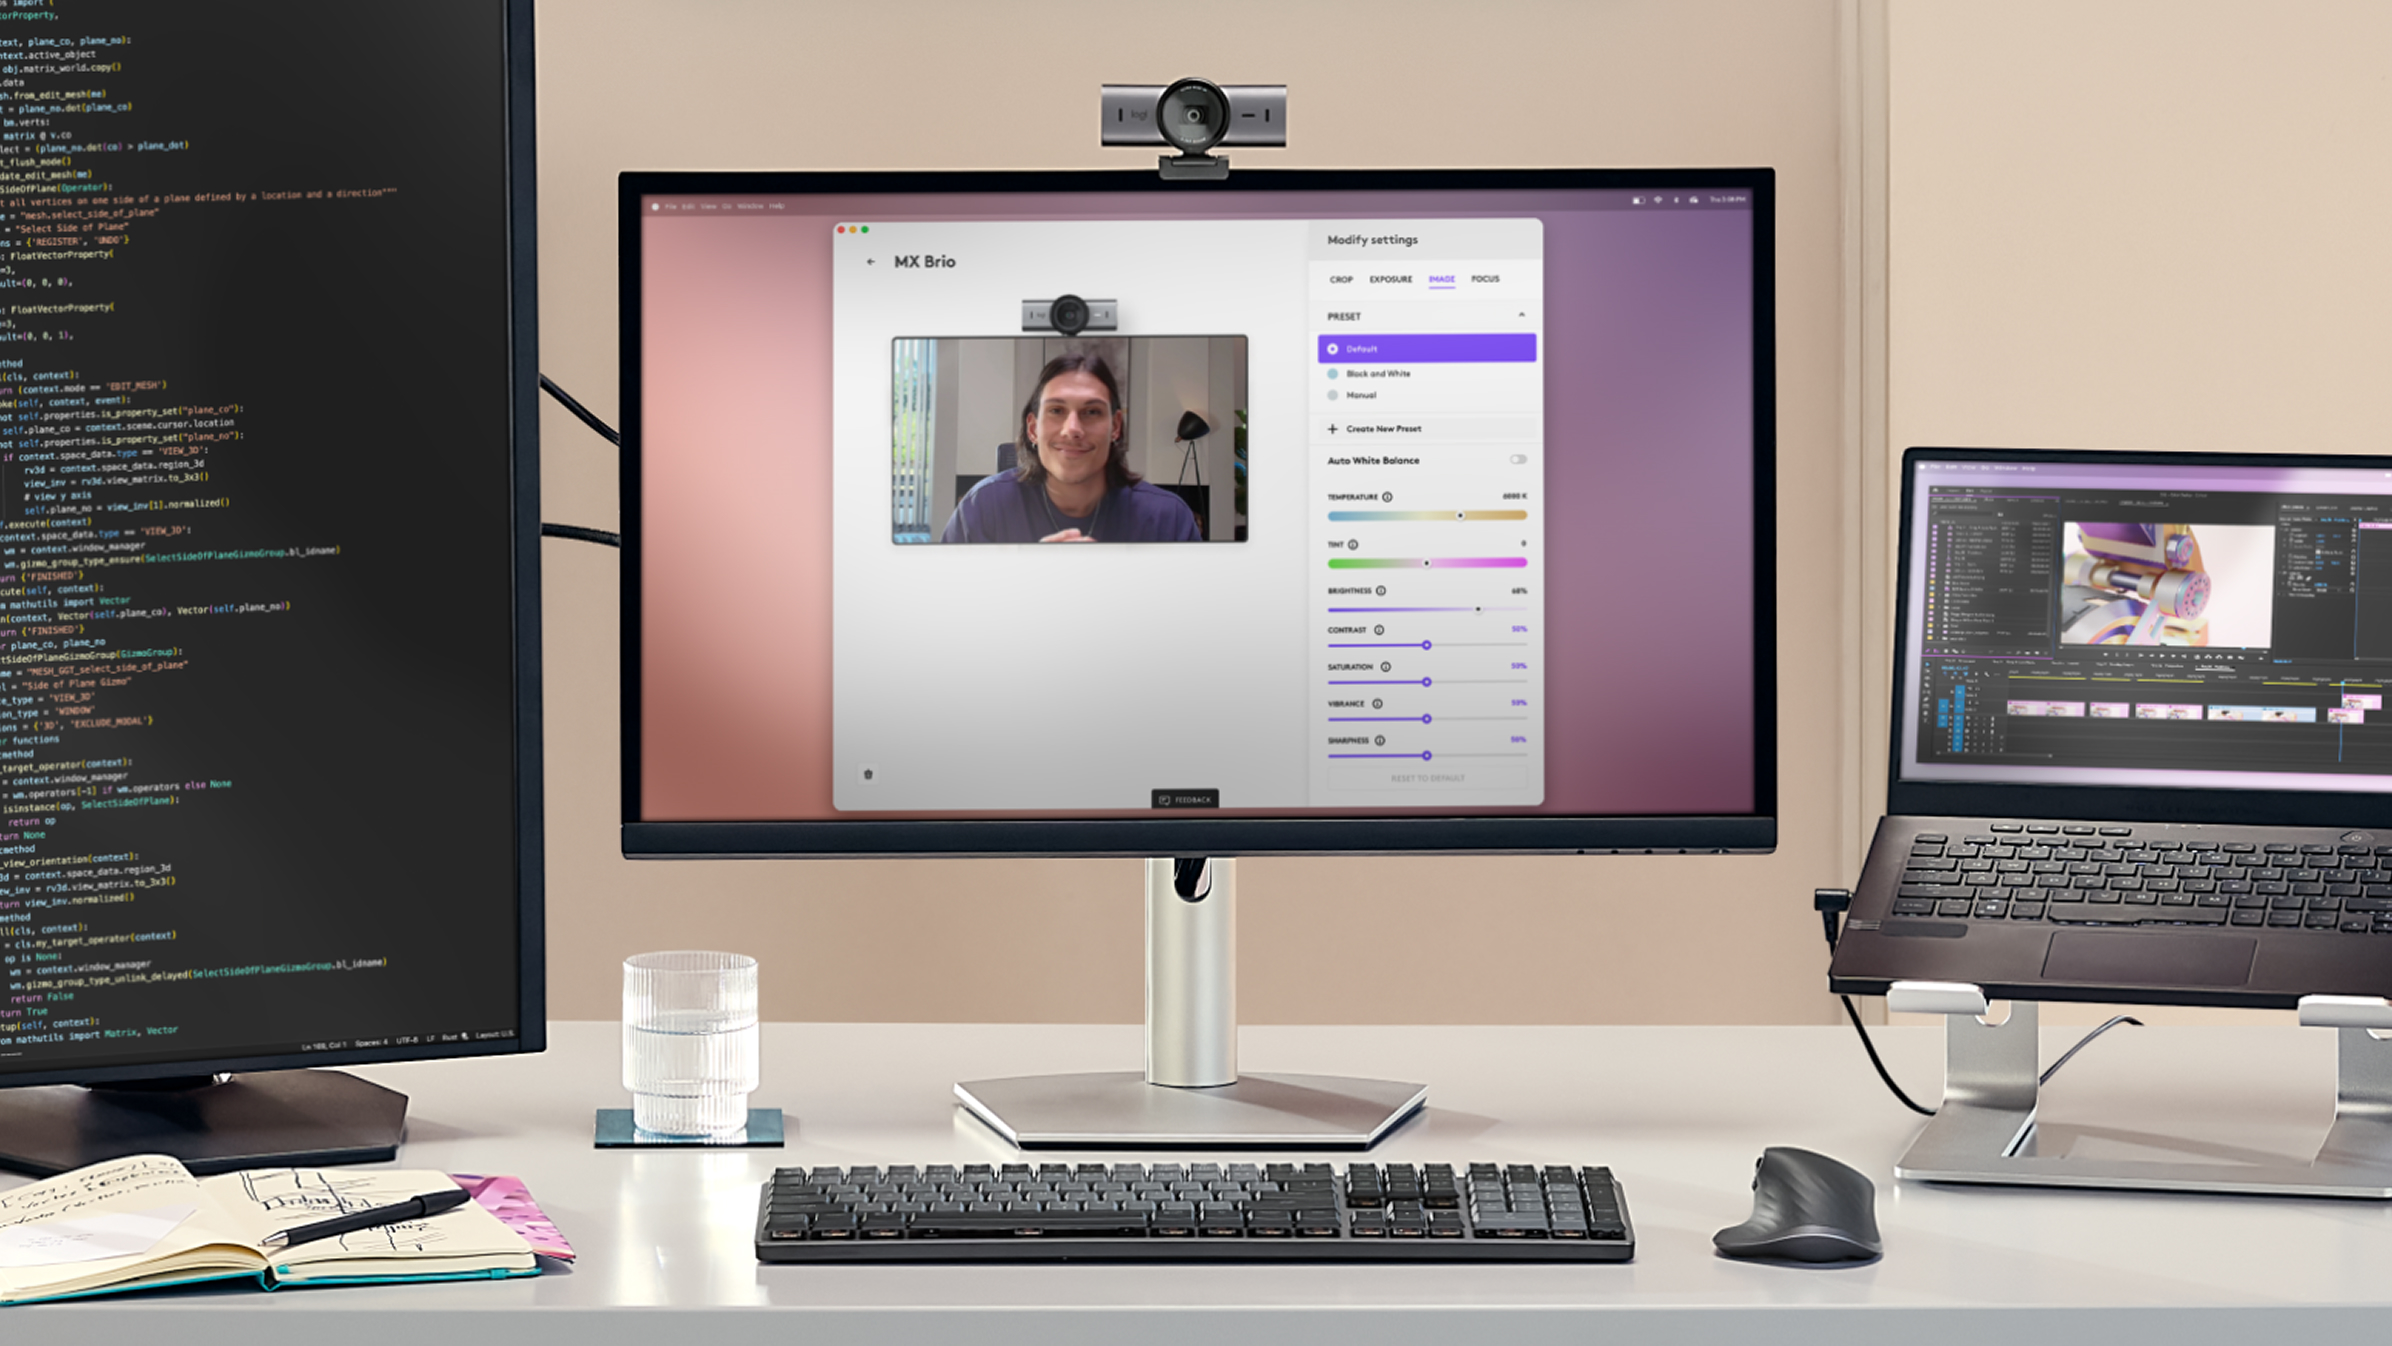
Master Essential Logi Tune Controls for Professional Results
Logi Tune provides four critical adjustments that dramatically improve video quality:
- Manual Focus: Disable autofocus that constantly hunts during calls; lock focus on your face
- Digital Zoom: Frame yourself perfectly without moving the camera (use sparingly to avoid pixelation)
- White Balance Presets: Choose “Indoor,” “Outdoor,” or “Fluorescent” based on your lighting
- Color Intensity: Boost saturation slightly for more vibrant, professional-looking video
Pro Tip: Adjust these settings before important calls—Logi Tune remembers your preferences per application, so settings for Zoom won’t affect Teams.
Alternative Control Options When Logi Tune Doesn’t Support Your Model

If Logi Tune doesn’t recognize your older Logitech webcam (like C920) or lacks needed features, third-party apps fill the gap with advanced controls. These solutions work with virtually any USB webcam and offer functionality Logitech’s official software lacks.
Webcam Settings App: Best Value for Manual Controls
Available on the Mac App Store for $4.99, this lightweight app provides granular control impossible through macOS:
- Exposure Compensation: Fix dark video in dimly lit rooms without washing out bright areas
- Manual Focus: Precisely control focus distance (critical for macro shots or dual-monitor setups)
- White Balance Slider: Fine-tune color temperature beyond Logi Tune’s presets
- Digital Zoom with Quality Preservation: Zoom up to 2x without severe pixelation
Installation Process: Search “Webcam Settings” in Mac App Store > Purchase > Grant camera permissions > Select your Logitech webcam from the menu bar icon.
OBS Studio: Professional-Grade Control (Free)
While primarily a streaming tool, OBS’s virtual camera feature offers exceptional webcam control:
- Download OBS Studio (free, open-source)
- Add your Logitech webcam as a “Video Capture Device”
- Apply filters for:
– Color Correction: Adjust brightness, contrast, saturation
– Sharpness: Enhance detail without artificial sharpening
– Chroma Key: Remove backgrounds for virtual sets
Time-Saver: Create “scenes” for different uses (e.g., “Professional Call” vs. “Casual Chat”) with one-click switching.
Fix Blurry Video: Adjust Focus and Lighting for Professional Quality
Blurry video is the #1 complaint from Mac users with Logitech webcams, but the solution rarely involves the camera itself. Poor lighting and autofocus issues cause 90% of blurriness—fix these first before blaming your hardware.
Disable Autofocus to Stop Constant Refocusing
Logitech webcams constantly hunt for focus during video calls, creating distracting blur transitions. Here’s how to lock focus:
- Open Logi Tune or Webcam Settings app
- Disable “Auto Focus” if available
- Manually adjust focus until your face appears sharp
- Place a small object at your typical sitting position to maintain consistent focus
Critical Check: Ensure nothing moves between you and the camera (pets, passing people) that triggers refocusing.
Optimize Lighting Before Adjusting Camera Settings
No camera setting fixes bad lighting. Implement these lighting solutions first:
- Position yourself facing a window for natural, flattering light
- Use a ring light placed slightly above eye level (not below)
- Add a secondary light behind your monitor to reduce shadows
- Avoid backlighting (windows behind you) which silhouettes your face
Pro Tip: Test lighting by looking at your face in a mirror—well-lit areas should reflect light evenly without harsh shadows.
Resolve “No Camera Detected” Errors in Zoom and Teams
When your Logitech webcam works in Photo Booth but not in conferencing apps, follow this targeted troubleshooting sequence before reinstalling anything.
Reset Camera Permissions Without Restarting Your Mac
This often fixes camera detection issues in 30 seconds:
- Open the problematic app (Zoom, Teams)
- Go to Settings > Video
- Select your Logitech webcam from the dropdown (it may appear as “USB Camera”)
- If not listed, quit the app completely (right-click dock icon > Quit)
- Reopen the app—macOS will re-request camera permissions
Warning: Don’t select “Deny” if prompted—this requires a system restart to reset.
Clear Application-Specific Camera Conflicts
Multiple apps fighting for camera access causes detection failures. Resolve conflicts by:
- Closing all background apps that might use the camera (Photo Booth, Skype)
- Restarting the conferencing app after closing others
- Testing with QuickTime Player (File > New Movie Recording) to verify camera functionality
Common Culprit: Background recording apps like Loom or Clipchamp often maintain hidden camera access.
Optimize Settings for Video Calls vs. Content Creation

Your Logitech webcam requires different configurations for professional meetings versus YouTube videos. Applying the wrong settings wastes your camera’s potential.
Ideal Settings for Professional Video Calls
For crisp, professional Zoom and Teams appearances:
- Resolution: 720p (saves bandwidth, looks sharper than 1080p on most calls)
- Frame Rate: 30fps (sufficient for talking head videos)
- Lighting: Front-facing with soft shadows
- Background: Clean, uncluttered space or subtle virtual background
- Audio: Use separate headset mic for clearest sound
Pro Tip: Position the camera at eye level—never look up into the lens—as this creates unflattering angles.
Advanced Settings for YouTube and Streaming
When recording high-quality content:
- Resolution: 1080p minimum (4K if your model supports it)
- Frame Rate: 60fps for smooth motion (gaming, demonstrations)
- Bitrate: 8-12 Mbps for local recording (higher quality than streaming)
- Software: Record locally with OBS while streaming
- Lighting: Three-point setup with key, fill, and backlight
Critical Note: Always record at higher quality than your final output—downscaling preserves detail better than upscaling.
Maintain Peak Performance With Regular Webcam Checks
Logitech webcams don’t degrade quickly, but neglected maintenance causes preventable issues. Implement these simple checks to avoid last-minute failures.
Monthly Webcam Maintenance Routine
Spend 5 minutes monthly to ensure reliable performance:
- Clean the lens with a microfiber cloth (no liquids)
- Test all apps you regularly use (Zoom, Teams, Photo Booth)
- Verify software updates for Logi Tune or third-party apps
- Check cable connections for fraying or loose ports
Warning: Never use window cleaner or paper towels on your webcam lens—they scratch the coating.
Troubleshoot Before Important Calls
Prevent disasters with this 2-minute pre-call checklist:
- Confirm camera selection in your conferencing app
- Test lighting conditions (natural light changes throughout the day)
- Check permissions if you’ve recently updated macOS
- Restart your Mac if the camera appeared unreliable recently
Pro Tip: Keep Photo Booth open during important calls as a backup test tool—you can quickly verify camera functionality if issues arise.
Final Note: Setting up your Logitech webcam on Mac requires understanding macOS’s unique permissions structure and using the right control software. By following these specific steps, you’ve transformed a basic plug-and-play experience into a professional video setup that works reliably across all applications. Remember to check permissions first when issues arise, optimize lighting before adjusting settings, and use Logi Tune or Webcam Settings for manual control. With regular maintenance and the correct configuration for your use case, your Logitech webcam will deliver crisp, professional video for every Mac video call and recording session.


