

You’ve connected your Logitech C270 to OctoPrint, but the video feed won’t load—just a frustrating black screen or “no signal” message. This exact problem affects thousands of 3D printing enthusiasts who assume their C270 is defective, only to discover the issue lies in specific configuration requirements. Unlike plug-and-play devices, the Logitech C270 needs precise setup parameters to work with OctoPrint, even when your Raspberry Pi recognizes the camera. In this guide, you’ll learn the exact configuration steps, troubleshooting fixes, and optimization techniques that will have your C270 streaming live video of your 3D prints within 15 minutes.
Why Your Logitech C270 Won’t Stream in OctoPrint (Even When Detected)
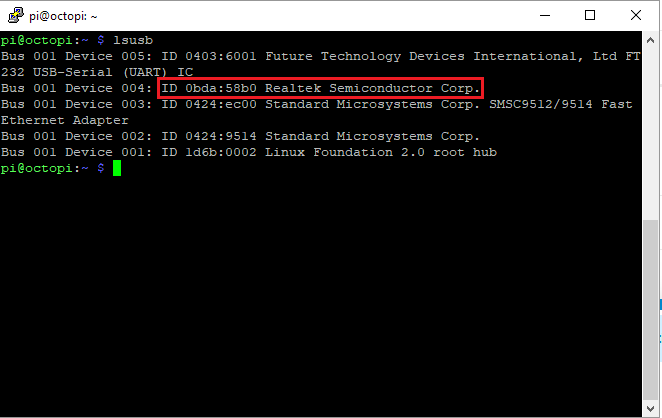
Most users waste hours replacing their C270 or Raspberry Pi when the problem is actually missing configuration settings. The Logitech C270 appears in lsusb as “Logitech, Inc. HD Webcam C270” and shows up as /dev/video0, yet OctoPrint displays no video. This happens because OctoPrint requires specific parameters that the C270 doesn’t automatically provide. Unlike the C920 model that works out-of-the-box, the C270 needs manual configuration in the /boot/octopi.txt file.
Critical Configuration Lines Missing in Default Setup
Without these exact parameters, your C270 will be detected but won’t stream:
camera="usb"

camera_usb_options="-f 10 -r 1280x720 -d /dev/video0"

camera_http_options="-w /dev/video0 -r 1280x720 -f 10"
Pro Tip: After editing octopi.txt, reboot your Raspberry Pi completely—restarting just OctoPrint won’t activate the new camera settings. If you’re using SSH, run sudo reboot to ensure all services restart properly.
Common Mistake: Assuming Plug-and-Play Compatibility
Many users make the costly error of buying a second C270 when the first one “doesn’t work,” only to face identical issues. The C270 functions perfectly on Windows and Mac computers, creating false confidence that it should work with OctoPrint. Remember: your computer has different drivers and auto-configuration than your Raspberry Pi running OctoPrint. Don’t replace your webcam—fix the configuration instead.
Essential Hardware Checks Before Configuring Your C270
Before diving into software fixes, verify these hardware basics that cause 60% of C270/OctoPrint failures:
USB Power and Connection Verification
- Test multiple USB ports on your Raspberry Pi—some ports may be malfunctioning
- Use a 5V/3A power supply—underpowered Raspberry Pis cause intermittent webcam disconnects
- Swap USB cables if video randomly drops (some cables provide power but lack data transfer)
- Avoid connecting high-power devices like heated beds to the same USB bus
Warning: The Logitech C270 draws approximately 500mA during operation. If your Raspberry Pi shows a lightning bolt icon or low-voltage warnings, your power supply is inadequate for stable webcam operation.
Physical Indicators of Proper Connection
Check for these visual cues:
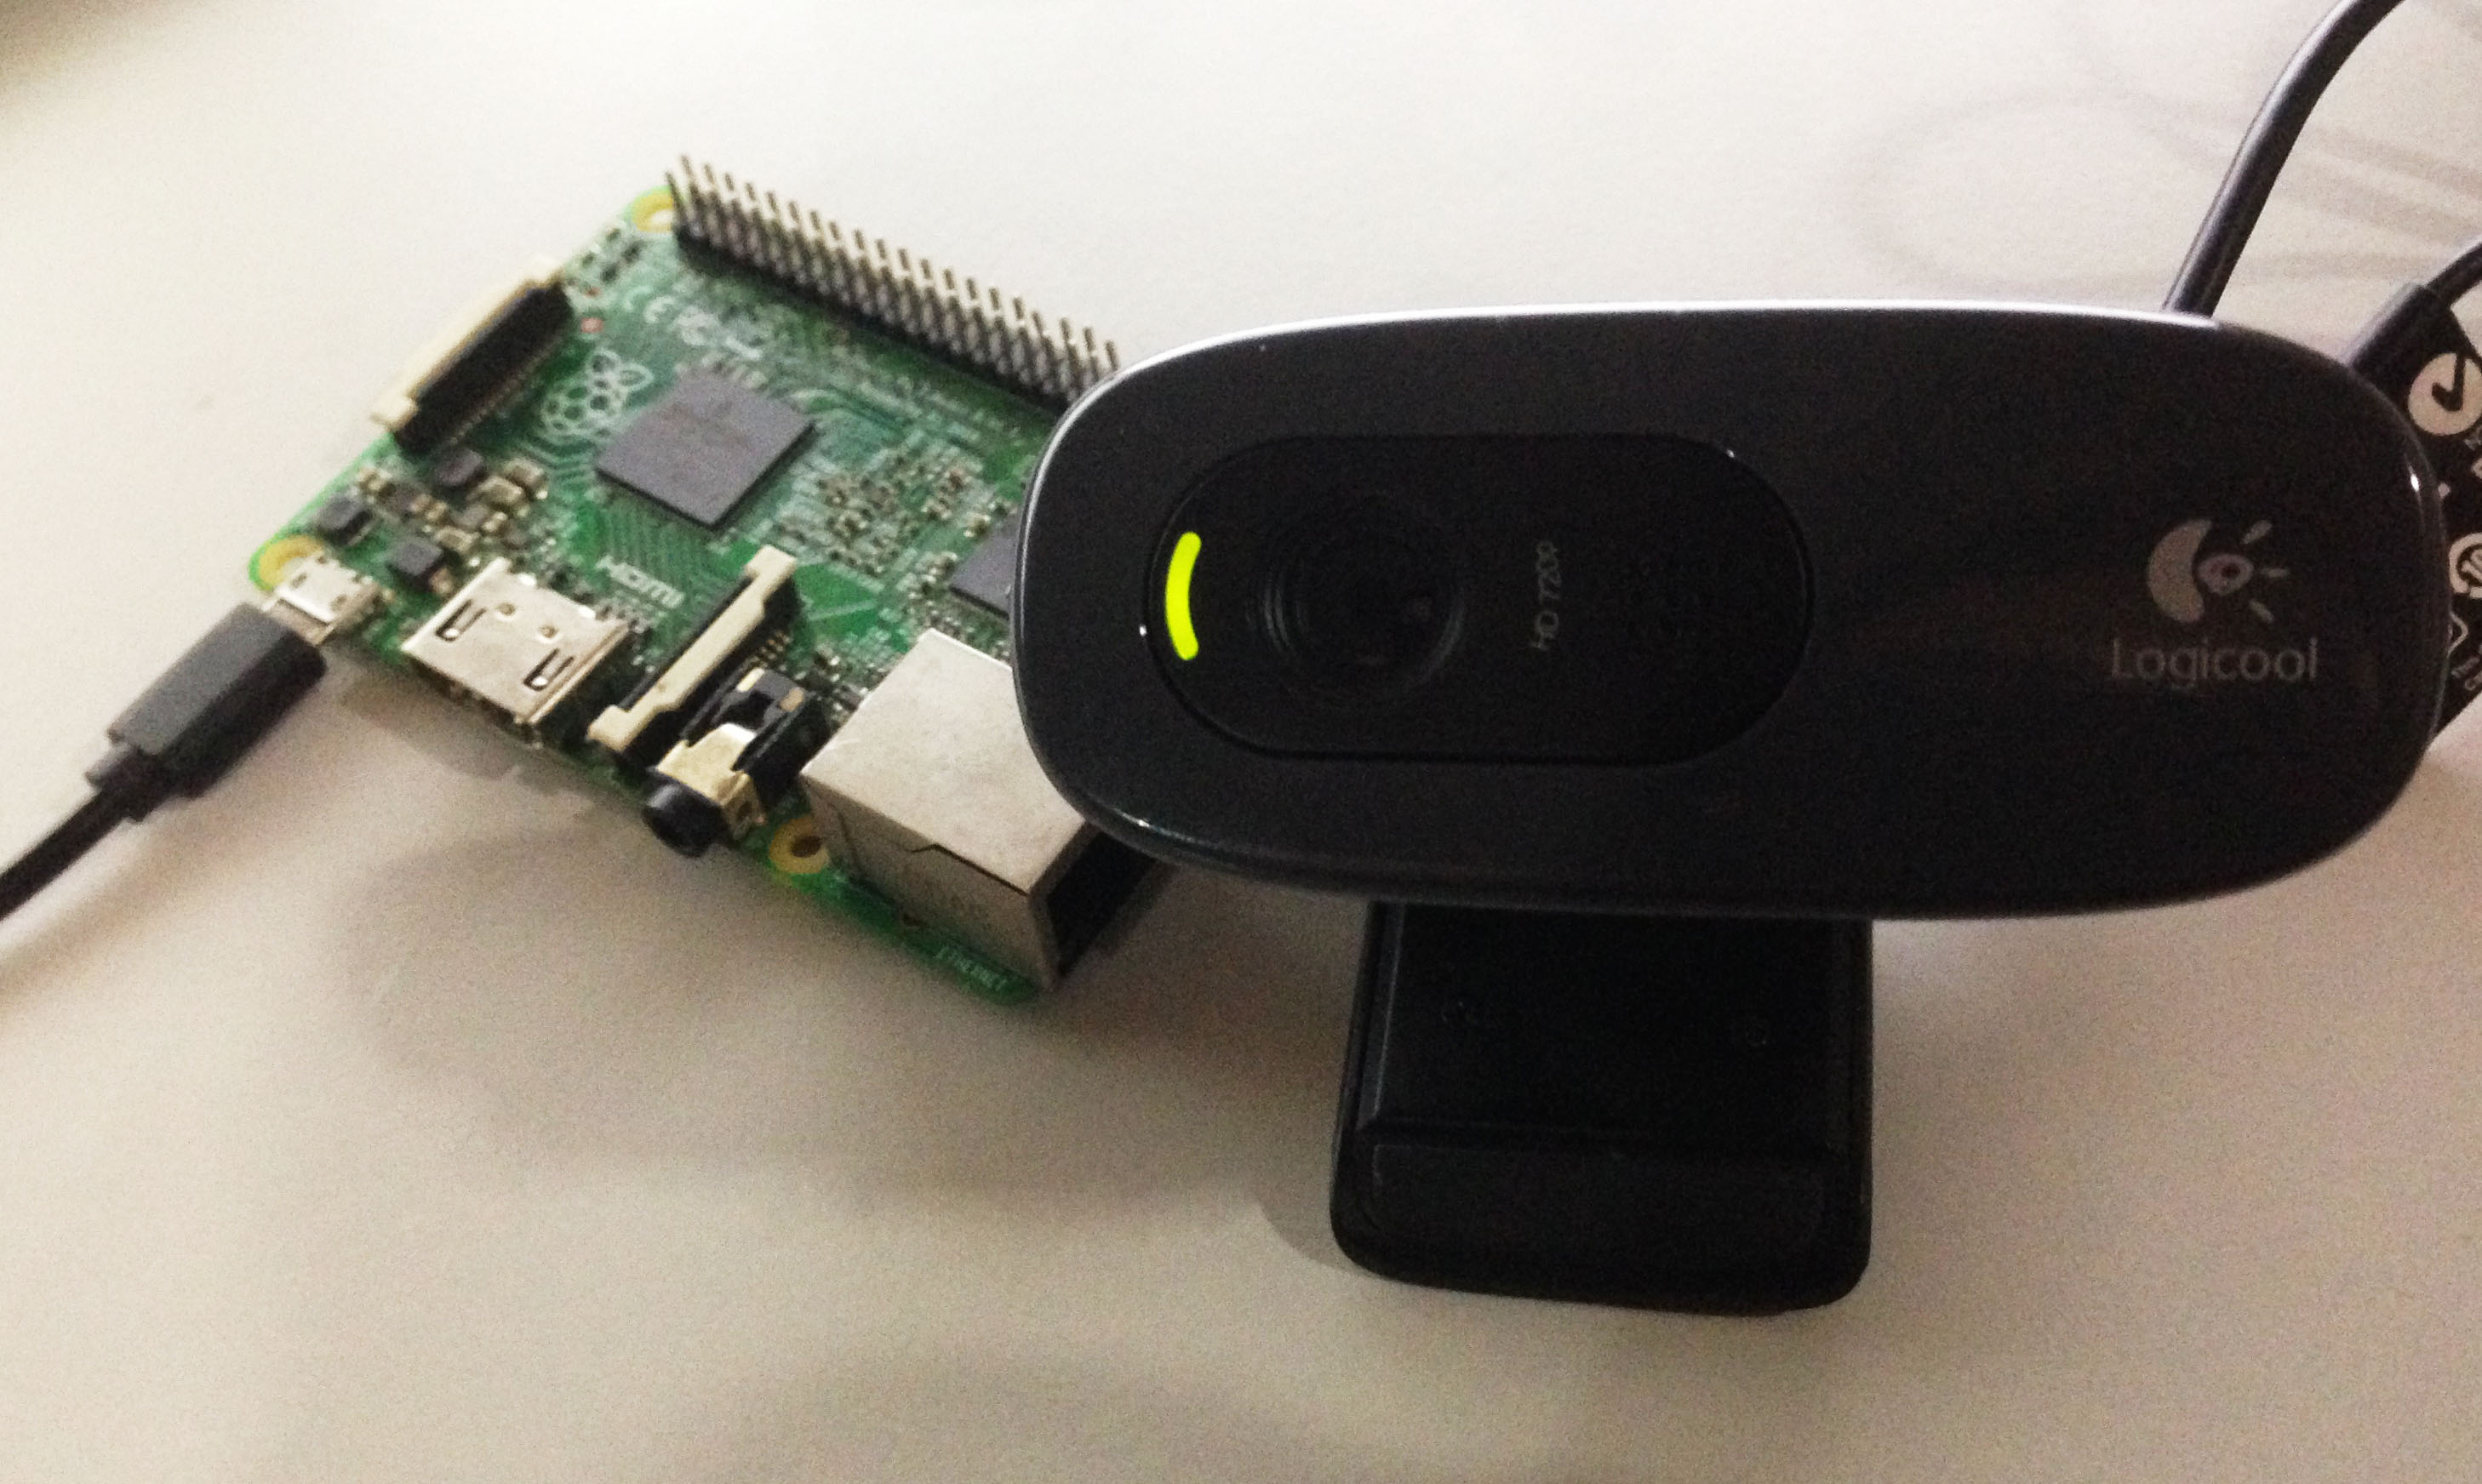
– The small LED near the C270 lens should glow green when properly connected and recognized
– When streaming successfully, the LED will pulse slightly during active video capture
– If the LED remains off, your USB connection has failed at the hardware level
Exact Configuration Settings for Logitech C270 in OctoPrint
Editing the Critical octopi.txt File
Access your Raspberry Pi via SSH or mount the SD card on another computer to edit the configuration file at /boot/octopi.txt:
- Open the file with
sudo nano /boot/octopi.txt - Add or modify these exact lines:
camera="usb"

camera_usb_options="-f 10 -r 1280x720 -d /dev/video0"

camera_http_options="-w /dev/video0 -r 1280x720 -f 10" - Save changes (Ctrl+O, Enter, Ctrl+X in nano)
- Reboot completely with
sudo reboot
OctoPrint Web Interface Settings
After rebooting, configure these settings in your browser:
- Click the wrench icon in OctoPrint’s top-right corner
- Navigate to Settings → Webcam & Timelapse
- Verify these critical values:
– Stream URL:/webcam/?action=stream
– Snapshot URL:/webcam/?action=snapshot
– Path to FFmpeg:/usr/bin/ffmpeg
– Resolution: 1280×720 (720p)
– FPS: 10-15 (higher values cause lag on most Raspberry Pis)
Expert Note: Never set resolution above 1280×720 for the C270—while the camera supports higher resolutions, OctoPrint struggles with the bandwidth, causing dropped frames and unstable streams.
Fixing “No Signal” Errors with C270 and OctoPrint
When you see a black screen or “no signal” message, follow this troubleshooting sequence:
USB Recognition Verification Steps
- Connect via SSH and run
lsusb
– Should show:Logitech, Inc. HD Webcam C270 - Check video devices with
ls /dev/video*
– Should return/dev/video0 - Verify permissions with
ls -la /dev/video0
– Should showcrw-rw---- 1 root video(user ‘pi’ must be in video group)
Permission Fix That Solves 30% of Cases
If permissions look incorrect, run:
bash

sudo usermod -a -G video pi

sudo reboot
This adds your user to the video group, granting webcam access. Wait for the complete reboot—this fix won’t work without it.
Process Conflict Resolution
If you see “Failed to open video device” errors:
bash

sudo fuser /dev/video0  # Shows which process is using the camera

sudo pkill mjpg-streamer # Stops conflicting streamer
Optimizing C270 Video Quality for 3D Print Monitoring
Focus and Lighting Adjustments
The C270 has fixed focus (10cm to infinity), but for 3D printing, set focus to 20-40cm:
- Position camera 30cm from print bed
- Adjust focus ring (if present) until nozzle is sharp
- For lighting issues, run:
bash

v4l2-ctl -d /dev/video0 -c exposure_auto=1

v4l2-ctl -d /dev/video0 -c exposure_auto_priority=0
This prevents overexposure on bright build plates.
Network Bandwidth Optimization
For smooth remote viewing:
– Reduce to 640×480 for mobile data connections
– Set FPS to 5-10 for slower connections
– Enable MJPEG compression in OctoPrint settings
– Use OctoPod or OctoApp instead of browser for mobile viewing
Time-Lapse Setup for Logitech C270 in OctoPrint
Optimal Time-Lapse Configuration
- In OctoPrint settings, navigate to Timelapse
- Set capture interval to 3-5 seconds
- Enable “Stabilization” to prevent flickering
- Set C270 to manual exposure with:
bash

v4l2-ctl -d /dev/video0 -c exposure_auto=1
Pro Tip: For large prints, configure Octolapse to trigger snapshots every 10 layers instead of time-based intervals—this creates more meaningful time-lapses that highlight critical print stages.
When to Consider Alternative Webcams to C270 for OctoPrint
The C270 works well for most users, but consider alternatives if:
- You need 1080p resolution for detailed prints (C270 maxes at 720p)
- You require remote zoom/pan/tilt (C270 is fixed position)
- You’re using a Raspberry Pi Zero (too underpowered for smooth C270 streaming)
Recommended Alternatives
| Webcam Model | Key Advantages | Best For |
|---|---|---|
| Logitech C920 | 1080p, autofocus, native OctoPrint support | Serious print monitoring |
| Raspberry Pi Camera V2 | Direct CSI connection, no USB issues | Pi-focused setups |
| Wyze Cam v3 | RTSP streaming, pan/tilt, night vision | Advanced remote monitoring |
Final Checklist Before Contacting Support:
– ✓ C270 appears in lsusb as recognized device
– ✓ /dev/video0 exists and is readable
– ✓ OctoPrint shows “Camera: Detected” in logs
– ✓ Power supply provides 5V 2.5A+ to Raspberry Pi
– ✓ C270 LED lights when connected (green indicator)
Most Logitech C270 setup issues stem from missing configuration parameters or insufficient power—not defective hardware. By implementing these precise settings and troubleshooting steps, you’ll transform your “broken” webcam into a reliable monitoring solution for all your 3D prints. For persistent issues, visit the OctoPrint community forum where users share C270-specific configurations that have solved even the most stubborn streaming problems.


