
Your video calls deserve better than grainy, poorly lit footage that makes you look like you’re calling from a basement. The Logitech C920S Pro HD webcam delivers crisp 1080p video right out of the box, but most users never unlock its full potential because they skip the proper setup steps. Whether you’re leading important business meetings, teaching online classes, or streaming content to your audience, this complete Logitech C920S Pro HD webcam setup guide ensures you’ll present yourself professionally on every call. Within 15 minutes, you’ll transform from “Can you see me now?” to commanding attention with broadcast-quality video that builds credibility and engagement.
The difference between an amateur and professional appearance often comes down to three critical factors: camera positioning, lighting, and software optimization. While the C920S works immediately when plugged in, taking just a few extra minutes to configure it properly will make you stand out in a crowded virtual space. This guide covers everything you need to know—from physical installation to advanced software tweaks—so you can maximize your webcam’s capabilities without technical headaches.
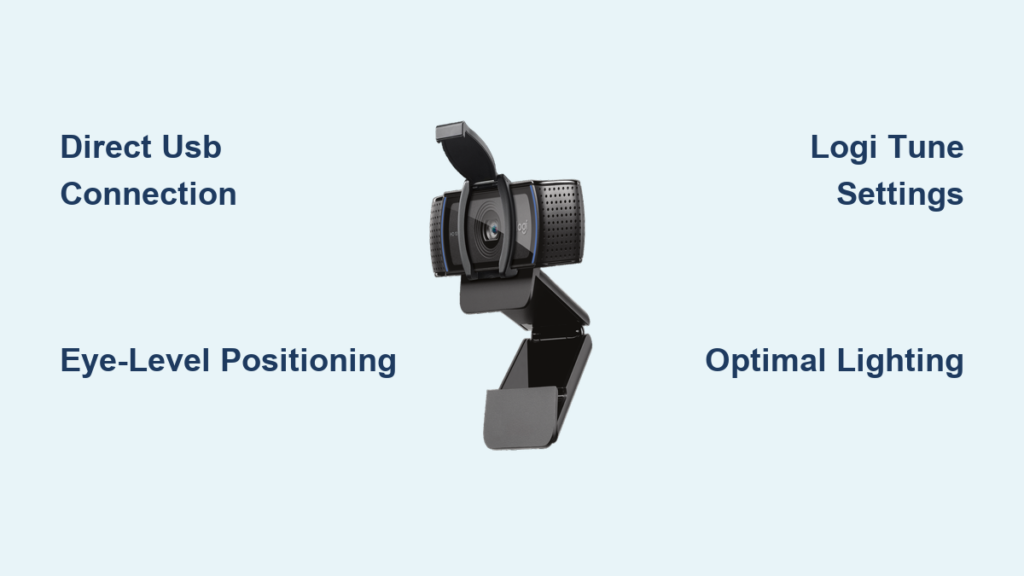
Direct Connection and Physical Placement for Optimal Performance

Skip the USB hub and connect your Logitech C920S directly to your computer’s USB port for reliable performance. The included 5-foot detachable USB cable provides enough length for most desk setups, but avoid using extension cables that could cause power issues. When positioning your webcam, aim for eye-level placement by clipping it to the top of your monitor or using a small stand. This creates a natural, flattering angle that avoids unflattering upshots or the “helicopter view” that makes you look disconnected.
Your webcam’s field of view captures everything within approximately 3 feet, so take a moment to tidy your background before important calls. The C920S features a physical privacy shutter that slides closed when not in use—a security feature that prevents unauthorized access to your camera. Make closing this shutter part of your daily routine when you finish video calls, ensuring complete visual privacy when the camera is inactive.
Instant Compatibility Across All Major Video Platforms
The Logitech C920S Pro HD works seamlessly with every major video platform without additional configuration. When launching Zoom for your next meeting, navigate to Settings > Video and select “C920(HD) Pro Webcam” from the camera dropdown menu. Microsoft Teams users will find the camera selection under Settings > Devices, while Google Meet automatically detects the webcam when you join a call. If your camera doesn’t appear immediately, restart the application with the webcam already connected.
For content creators using OBS Studio or Streamlabs, add the webcam as a “Video Capture Device” source within your scene. This gives you complete control over positioning and scaling the video feed within your streaming layout. The C920S appears as “C920” in the device selection menu—choose this option and adjust the source properties to frame yourself perfectly within your broadcast. Video recording applications like Camtasia or built-in operating system tools recognize the webcam automatically, requiring no special configuration for basic recording.
Why Your Camera Might Not Appear in Application Settings
If your C920S doesn’t show up in your preferred video application, first verify that no other program is using the camera simultaneously. Close background applications like Skype or photo booth tools that might be accessing the webcam. Next, check Device Manager (Windows) or System Information (Mac) to confirm the camera appears as an active USB device. If the camera appears in system settings but not your application, restart both the application and your computer with the webcam connected directly to a USB port on your machine.
Master Video Quality with Logi Tune App Configuration
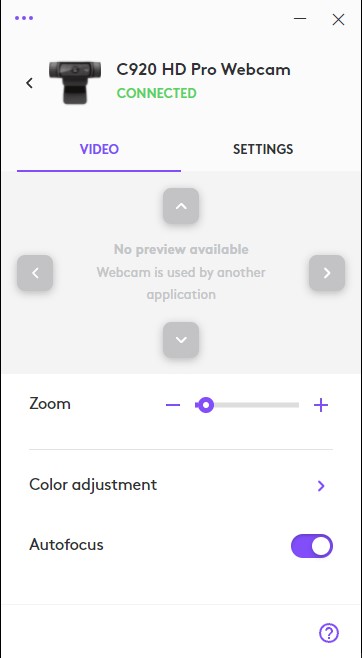
Download and install Logi Tune from Logitech’s official website to access professional-grade camera controls beyond what video conferencing apps offer. Once installed, open Logi Tune with your C920S connected to automatically detect your camera. The app’s clean interface gives you instant access to critical settings that dramatically improve your image quality.
Adjust the field of view to 65° for a tighter, more professional framing that focuses on your upper body and face. Enable RightLight technology to automatically balance exposure when you’re sitting with a window behind you—a common issue that turns you into a silhouette during video calls. For consistent lighting conditions, manually set white balance to match your environment: choose “Daylight” for natural light from windows or “Tungsten” for traditional indoor lighting. These precise controls ensure your skin tones appear natural rather than washed out or unnaturally yellow.
Fixing Common Video Quality Issues in Minutes
Dark or washed-out video usually stems from improper lighting rather than camera limitations. Position your main light source in front of you—never behind—using either natural window light or an affordable LED panel. In Logi Tune, increase backlight compensation to 2 or 3 when you can’t reposition lighting, which tells the camera to expose properly for your face rather than the bright background behind you.
If your C920S frequently refocuses during calls, disabling continuous autofocus solves this distracting “focus hunting” problem. Set a fixed focus distance in Logi Tune that matches your typical seating position from the camera—usually between 2-4 feet for desk setups. This creates a consistently sharp image without the annoying focus shifts that make viewers feel like they’re watching a wildlife documentary.
Audio Optimization Strategies for Crystal Clear Sound
While the Logitech C920S features built-in dual noise-cancelling microphones, its audio capabilities have limitations compared to dedicated microphones. For professional results, position the webcam within 2 feet of your speaking position to capture clear audio without background noise interference. The microphones excel at filtering out keyboard clicks and ambient office sounds, but struggle with room echo in larger spaces.
For critical presentations or content creation, connect a separate USB microphone while keeping the C920S for video. In your video application’s audio settings, select your preferred microphone while maintaining the C920S as your video source. This hybrid approach gives you professional video with broadcast-quality audio—essential when your message needs to be heard clearly without distractions.
Professional Setup Secrets Beyond the Basics
Lighting remains the most impactful factor in your video quality, far outweighing camera resolution. Position a soft light source at a 45-degree angle from your face to create natural shadows that add dimension. Avoid harsh overhead lighting that creates unflattering shadows under your eyes. An inexpensive ring light placed just above your monitor provides even illumination that makes you look alert and engaged.
Your background communicates professionalism before you speak a word. The C920S captures a wide field of view, so ensure the area behind you is tidy and free of distracting elements. A bookshelf with neatly arranged books creates an intelligent, professional impression, while a plain wall with subtle texture provides clean simplicity. Avoid virtual backgrounds whenever possible—they often create visual artifacts that distract viewers and consume additional processing power.
Troubleshooting Critical Connection Issues

When your C920S suddenly disappears from video applications, first try connecting directly to a different USB port on your computer—never through a hub. USB 3.0 ports (usually blue inside) provide more stable power than standard USB 2.0 ports. If the camera works on another computer but not yours, update your operating system’s camera drivers through Device Manager (Windows) or check for macOS updates.
Choppy video during calls typically indicates computer performance issues rather than webcam problems. Close resource-intensive applications like photo editors or video games before important calls. Within Zoom or Teams settings, ensure you’ve enabled 1080p video quality—some applications default to lower resolution to conserve bandwidth. If video remains choppy, reduce resolution to 720p in Logi Tune for smoother performance on less powerful machines.
Maintenance Practices for Long-Term Reliability
Extend your C920S’s lifespan by cleaning the lens weekly with a microfiber cloth designed for optical surfaces. Avoid paper towels or clothing that can scratch the high-definition glass. When not in use for extended periods, store the webcam in its original box or a protective case to prevent dust accumulation on the lens and privacy shutter mechanism.
Regularly check for firmware updates through Logi Tune, which occasionally delivers performance improvements and new features. The C920S receives occasional updates that enhance autofocus algorithms or improve low-light performance—keeping your firmware current ensures you benefit from Logitech’s ongoing optimizations.
Properly setting up your Logitech C920S Pro HD webcam transforms ordinary video calls into professional presentations that command attention and build credibility. By connecting directly to your computer, optimizing settings through Logi Tune, and implementing strategic lighting and positioning, you’ll consistently deliver high-quality video that makes a strong impression. Remember that consistent maintenance and troubleshooting knowledge ensures your webcam performs reliably when it matters most. With these setup techniques mastered, you’re now equipped to present your best self on every video call, turning what was once a technical chore into your secret professional advantage.


